Reindeer jacket (for a small boy...or girl)
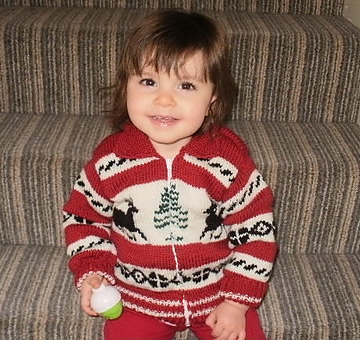
This looks so cute and would make a lovely Christmas cardigan for a toddler. The fair-isle design is not too challenging and hopefully you have plenty of time to knit for this year's festivities.
One size only I'm afraid, but you could increase it slightly by increasing the yarn weight and needle size.
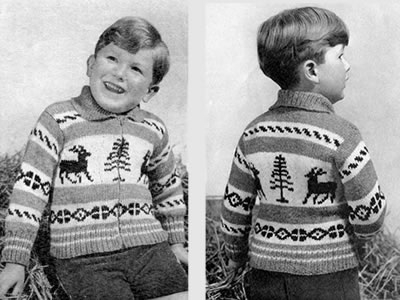
This was beautifully knitted by Sara for her daughter, who also models it. The original (boy) model seen after the pattern instructions.
InstructionsBack and fronts are worked together and then divided and worked separately at the armholes. Note that all the charted patterns are worked in shades "dark" and "light". The medium shade is used for bands of colour. Back and Fronts:Using No 8 (4mm) needles and Medium shade, cast on 127 sts. Change to No 7 (4½mm) needles and work remainder of Back and Fronts
in stocking stitch, (knit on right side, purl on wrong side). Commencing with a knit row, work 4 rows Medium, then 3 rows Light. Starting with a purl row, work rows 1-7 inclusive. from Chart A, reading chart from left to right on purl rows and right to left on knit rows.  Starting with a knit row, work: Work rows 1-20 inclusive from Chart B, working from right-hand side to
the centre stitch; work the centre stitch; then work back to the right-
hand side on every row.  Divide for Back and Fronts:Next row (2lst row of Chart B): K26
in Light, cast off 11 sts in Light; (1st left on needle after cast-off),
k25sts in Light, k1 st in Dark, k26 sts in Light, cast off 11 sts in Light.
(1st left on needle after cast-off), knit remaining 25 sts in Light. Next row (22nd row of Chart B): P2
in Dark, p24 in Light. Using Light, work 2 rows. Work 3 rows in Light, decreasing 1 stitch at the neck edge on every row. [20 sts] Starting with a purl row, work rows 1-3 inclusive from Chart C.  Starting with a purl row, work 2 rows Light, 1 row Medium. Back:Slip the group of 53 sts back on to the working needles, and with wrong side facing rejoin Light proceeding for Back as follows: Next row (22nd row of Chart B): P24
in Light, p5 in dark, p24 in Light. Work 3 rows in Medium. Next row: Using Medium, k2tog; knit to the last 2 sts, k2tog. [49sts] Armhole shaping is now complete. Starting with a purl row, work rows 1-3 inclusive from Chart D.  Using Medium for the remainder of the Back, continue until the armhole
measures 5 ins, (that is 5 ins from the 11 cast-off sts), finishing at
end of a purl row.. Right Front:Slip remaining 26 sts back on to the working needles, rejoin Light, and with wrong side of work facing proceed for Right Front as for Left Front, reversing all shapings, and noting that the first 4 rows will read: Next row (22nd row of Chart B): Purl
24 in Light, 2 in Dark. Sleeves[Editor's note: The sleeves are knitted top down, making for easy length adjustments (or repairs).] Using No 7 needles and Medium, and commencing at the top of the Sleeve,
cast on 49 sts. Work rows 1-3 inclusive from Chart D. Work rows 1-7 inclusive from Chart E.  Work 3 rows in Light, 9 rows in Medium, and 3 rows in Light.
Next row: Using Medium, (p1, p2tog, p2, p2tog) 7 times. [35 sts] Change to No 8 needles, and commence the cuff, working stripes in rib
as for back and fronts welt as follows: Back CollarUsing No. 8 needles and Medium slip 13 sts. from Back neck on to the
working needles, and with right side of work facing proceed in rib as
on welts, increasing 1 st. at both ends of the 3rd and every following
alternate row until there are 33sts. Right part of CollarUsing No. 8 needles and Medium, cast on 2 sts. 1st row: Increase in the 1st stitch,
k1. Cast off. Left part of CollarUsing No. 8 needles and Medium, cast on 2 sts. 1st row: Increase in the 1st stitch,
k1. Cast off. To Make UpOmitting the ribbing, with wrong side of work facing block each piece by pinning out round edges. Omitting ribbing, press each piece using a warm iron and damp cloth. Using a back-stitch seam join shoulder and sleeve seams and stitch sleeves into position. Using a flat seam, stitch cast-off edge of Right Portion of Collar to
shaped edge of Back Collar noting that turnings should be placed nearest
to neck edged. Stitch side of Collar into position. Stitch zip into position. Press seams. |
Materials
|