Little Lumber Jacket
A delightful little child's jacket from the 1950s. Beryl knitted it for her grandson and it looks lovely on him - see pictures at the end. [She also gives useful feedback on the sizing].
Instructions:Two sizes are given - see notes on sizing with the photos at the end. Larger size is shown in brackets, and where only one number is shown it applies to both sizes. Pocket Flaps (make 2)Using No 8 (4mm) needles cast on 13 stitches. 1st row: Purl. Break off wool and leave stitches on a spare needle or stitch holder. Right FrontUsing No 10 (3¼mm) needles cast on 33[35] stitches. 1st row: K2, *
p1, k1; repeat from * to the last
stitch, k1. . Work these two rows 8[9] times more, increasing one stitch the beginning of the last row on the larger size only. {33[36] sts}. †† Shape armhole by casting off 3[3]
stitches the the beginning of the next row. Decrease 1 stitch the the
armhole edge on every row until 26[28]
stitches remain. Work 3[4] rows in stocking stitch thus finishing at the side edge. Place pocket flap: Proceed in yoke pattern as follows: 1st row (right side of work facing):
P8[8]; slip 13 pocket flap stitches
on to left-hand needle, purl across these stitches; purl to end. ††† Keeping yoke pattern correct, shape neck by casting off 5[6] stitches at the beginning of the next row. Decrease 1 stitch at the neck edge on every row until 17[18] stitches remain. Continue on these stitches until work measures 5[5½]inches from the beginning of the armhole shaping, finishing at the armhole edge. Shape shoulder: Left FrontUsing No 10 (3¼mm) needles cast on 33[35] stitches. Work rows 1 and 2 of rib as on Right Front 9[10] times, increasing one stitch the end of the last row on the larger size only. {33[36] sts} Work as for Right Front from †† to
††. Place pocket flap: Proceed in yoke pattern as follows: 1st row (right side of work facing):
P5[7]; slip 13 pocket flap stitches
on to left-hand needle, purl across these stitches; purl to end. Complete as for right Front working from ††† to end. Back:Using No 10 (3¼mm) needles cast on 65[71] stitches. Work rows 1 and 2 of rib as on Right Front 9[10] times. Change to No 8 (4mm) needles and proceed in stocking stitch until work measures same as fronts up to the armhole shaping, finishing at the end of a purl row. Shape armholes by casting off 3[3]
stitches at the beginning of the next 2 rows. Decrease 1 stitch at both
ends of every row until 51[55] stitches
remain. Proceed in yoke pattern as follows: 1st row (right side of work facing):
Purl. Continue in yoke pattern as on these 6 rows until work measures same as fronts up to shoulder shaping. Shape shoulder by casting off 8[9]
stitches at the beginning of the next 2 rows, 9[9]
stitches at the beginning of the following 2 rows. Sleeves (both alike):With No 10 (3¼mm) needles, cast on 32[34] stitches and Work 2¼[2½] inches in k1, p1 rib. Next row: Rib 1[2], (increase in next stitch, rib 3) 7 times; increase in next stitch, rib to end. {40[42] sts}. Change to No 8 (4mm) needles and proceed in stocking stitch, increasing 1 stitch at each end of the 7th and every following 10th[10th] row until there are 50[54] stitches. Continue on these stitches until work measures 10½[12] inches from the beginning. Shape top by casting off 3[3] stitches at the beginning of the next 2 rows. Decrease 1 stitch at each end of the next and every alternate row until 14[16] stitches remain. Cast off. Collar:Using No 10 (3¼mm) needles, cast on 85[89] stitches. 1st row: K2, *
p1, k1; repeat from * to the last
stitch, k1.. Work rows 2-5 inclusive 3 times more, then the 2nd row once. Cast off 9 stitches at the beginning of the next 6 rows. Pockets (make 2):Using No 8 (4mm) needles, cast on 13 stitches. Making UpOmitting the ribbing, with wrong side facing, block each piece by pinning
out round edges. Omitting ribbing, press each piece carefully using a
warm iron and a damp cloth. |
Materials7 [9] oz Double Knitting Yarn. A pair each No 8 (4mm) and No 10 (3¼mm) needles. 12[14] inch open ended zip. Tension22 sts and 30 rows to 4 inches on No 8 (4mm) needles in stocking stitch. Size mattersTo fit 23½[25½] inch chest. Abbreviations:yf: yarn forward; makes an extra stitch which forms a small pattern
hole when knitted on the next row. A word on the woolOriginal called for Patons Moorland, Double Quick, or Totem DK. Disclaimer
|
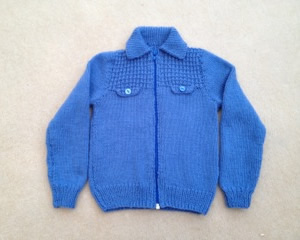
And here is a picture of the cardigan knitted by Beryl in a modern yarn: 2½ balls of Sirdar Snuggly Double Knitting:
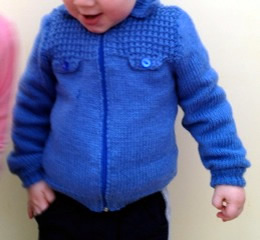
Beryl had some notes on the sizing. The original pattern was for 4-7 year olds; her grandson was only 20 months old and she left the length as it was written - she says: "he is a chunky littel chap" and previous feedback for the Little Raglan Reefer suggested the lengths of these old patterns works up a bit short for modern taste. The sleeves could have been shortened (for a 20 month old) as you can see the cuffs are turned back. Beryl found the zip a challenge and ended up using the sewing machine.
Her conclusion is that if the knitter does the length longer and leaves the sleeves as they are it would be more suitable for a 2-3 year old.
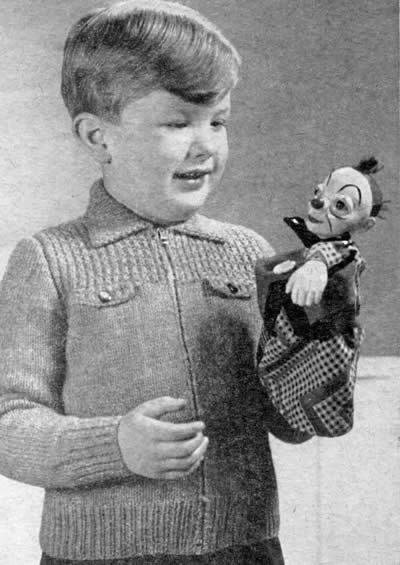
Beryl said: "I love the jacket on my grandson and I have recently found a picture of my brother wearing the same cardigan that my Mum made for him!"
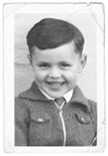
[And needless to say this one is my personal favourite - how is it that all our brothers from that era have such wonderful cheeky grins? All of them "Just William".]
