« Books in May | Main | Woolfest 2013 »
Saturday June 15, 2013
DIY Pin Loom
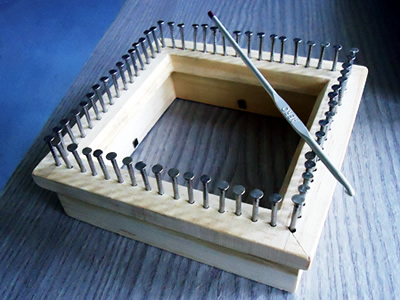
Carried away with the concept of Pin Looms, I decided that the major thing stopping me making one was a general inability to work successfully with wood. While buying a picture frame, I noticed there were square picture frames available that, (I thought), with the mere addition of a few nails, I could make into a pin loom myself.
The result was as above.
I was aware of a number of factors as I tried this out, and the main problem was, as I suspected, I did crack the wood - I plan to address this with a rework, but I wanted to show what happened here - and for the moment the loom does work fine as it is.
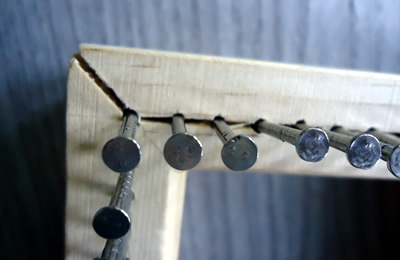
A number of the Guild members also tried it today, and they also cracked the frames, and gave up, However, everyone liked the weaving idea and went home with the intention of getting their husbands to make the wooden square out of a harder wood.
I should mention that I am completely aware that all the materials and method were not ideal, but I stuck with it with the following considerations:
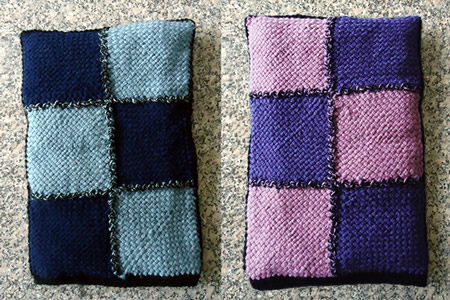
This is little sample of my weavings made into a cover for a microwavable hot pad. Don't be put off - my colour choices are not so good, plus the camera has picked up the inconsistencies - one of which is due to my sewing the square in with the "wrong" side exposed where I have threaded in the ends!
** The materials were: a 4 inch square Box Frame from Wilkinsons (currently available at half price), and 64 x 25mm round head nails, which were spaced evenly along the centre line at about a quarter of an inch apart, 17 nails from corner to corner on each side.
A couple of tips are - it is more essential to keep the nails in a straight line than it is to worry about the spacing being very precise, try blunting the nails before hammering in, which is a technique to avoid cracking the wood, and when finished, mark each alternate nail with a spot of coloured paint or nail varnish - it helps when using the loom.
Posted by Christina at 7:37 PM. Category: Spinning, Dying, Weaving