Archive Entries for 2016
« 2015 | Knitalong Home | 2019 »
Saturday December 31, 2016
Christina: FO at last
Finally sewed them all up - motivated by the desire to gift them to Wendy and Lloyd for their new baby. This cotton blanket is not very soft and cuddly, so I am not sure that this will be loved as much as my previous pin-woven gift - but it is a work of art...
Posted by Christina at 9:35 AM. Category: Lisa Richardson Rowan CAL
Tuesday October 11, 2016
Alison: Finally...
Posted by Alison at 12:02 PM. Category: Swallowtail Shawl
Sunday June 26, 2016
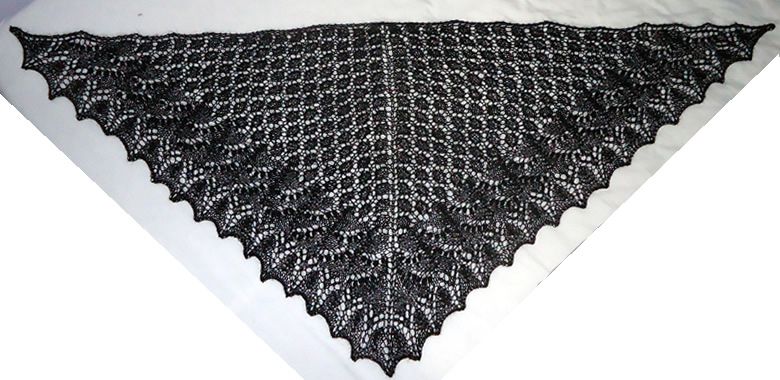
Christina: ...it is now
Posted by Christina at 1:42 PM. Category: Swallowtail Shawl
Friday June 24, 2016
Alison: On the way....
Posted by Alison at 7:52 AM. Category: Swallowtail Shawl
Sunday June 19, 2016
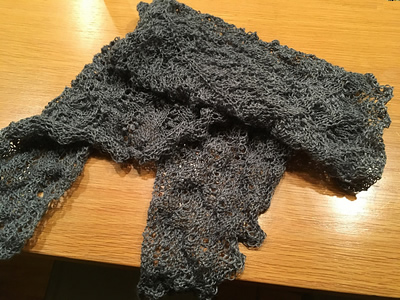
Christina: Lily of the Valley

I finished the central lace chart and moved on to the Lily of the Valley border.
I felt I got on a bit better with the border charts. In the first part you increase hugely so it seems more and more of a chore. However by the time you have 200 odd stitches on the needles you are working "one row at a time" and the charts are only about 10 rows long so it was easier for me to adjust to that mentally.
The nupps are quite easy to make on the increase row but I did find decreasing them (purl 5 together) a bit harder - its very easy to accidentally purl 6 together, as the 6th stitch is a yarn over and longs to stay in the nupp. It's also harder working with black yarn. Throughout I never stopped counting the stitches between the nupps.
Overall this is progressing faster than I imagined it would. [But it's not all over yet...]
Posted by Christina at 9:31 PM. Category: Swallowtail Shawl
Thursday June 9, 2016
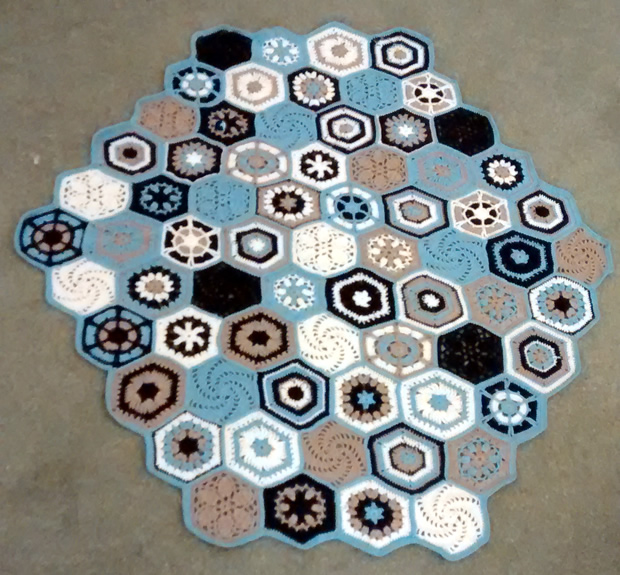
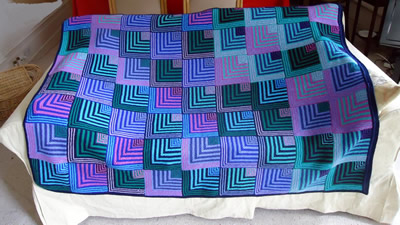
Christina: KAL variations with crochet
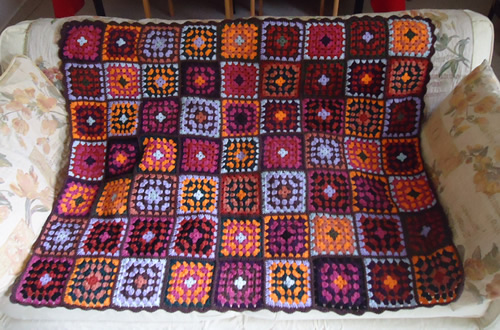
Here is the final colourway evolved from Kaffe KAL 2014. Its a simple granny square version using the sets of 4 colours originally specified for each square - but I have reversed the colour order within the squares on some pieces and also randomised the layout. I also made some mistakes in the colour combinations on some squares which I left "in" the design.
It's resulted in a very colourful blanket - smaller than the original knitted versions as each square is smaller; I could have increased the size of the squares with extra rounds but I preferred the balance as it is.
Read extended entry for a granny square pattern.
Granny Square
Squares are worked with a 4 mm crochet hook and double knitting yarn.
The squares are made up of 4 rounds with each round in a different colour.
If using Kaffe's colours from his blanket, the colour sequence is B, A,
C, D.
Using colour B, make 4 chain and join into a ring with a slip stitch.
Continue round 1 in colour B:
1st round: 5 chain (counts as 1 treble
and 2 chain), [3 treble into ring, 2 chain] 3 times, 2 treble into ring,
slip stitch to 3rd of the 5 chain you started with.
Break off yarn B.
2nd round: Using yarn A, slip stitch
into next space, 5 chain, 3 treble into same space, *1
chain, miss 3 treble, [3 treble, 2 chain, 3 treble] into next space; repeat
from * twice more, 1 chain, miss 3
treble, 2 treble into same space as 5 chain at beg of round, slip stitch
to 3rd of 5chain.
Break off yarn A.
3rd round: Using yarn C, slip stitch
into next space, 5 chain, 3 treble into same space, *1chain,
miss 3 treble, 3 treble into next space, 1 chain, miss 3 treble**,
[3 treble, 2 chain, 3 treble] into next space; repeat from *
twice more and from * to **
again, 2 treble into same space as 5 chain, slip stitch to 3rd of 5 chain.
Break off yarn C.
4th round: Using yarn D, slip stitch
into next space, 5 chain, 3 treble into same space, *[1 chain, miss 3 treble, 3 treble into next space] twice, 1 chain, miss 3 treble**,
[3 treble, 2 chain, 3 treble] into next space; repeat from *
twice more and from * to **
again, 2 treble into same space as 5 chain, slip stitch to 3rd of 5 chain.
Break off yarn D.
Now you should be able to see how the rounds are formed and carry on
if you want to add more rounds to make the square larger.
If I had wanted to make the squares larger I would have used 6 rounds
in the colour sequence:
B, A, C, A, C, D.
Posted by Christina at 10:08 AM. Category: Kaffe Fassett Rowan KAL
Wednesday May 25, 2016
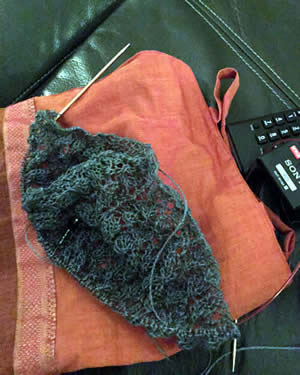
Christina: Cast on swallowtail......
.... which is harder than it sounded when we agreed to do it.
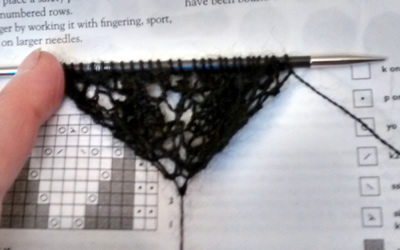
I focussed heavily on this (while watching news from the Chelsea Flower Show) but the stitches kept slipping off the needles and generally misbehaving - so the first 6 rows took hours, and then the next 6 in chart 2 were a bit quicker. Each repeat will get slower as the stitch count increases.
Note: have downloaded a stitch counting app for my phone - it seems designed for lace repeats, and now says "row 6 of repeat 1".
Posted by Christina at 10:24 AM. Category: Swallowtail Shawl
Tuesday May 24, 2016
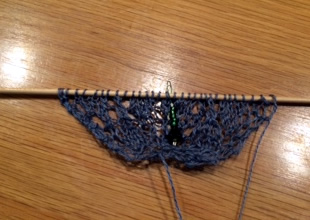
Alison: Cast on and set up
I have cast on!
I knitted the setup pattern about 5 times. Now I'm going to bed before I make any more mistakes.
Posted by Alison at 11:29 PM. Category: Swallowtail Shawl
Sunday April 24, 2016
Christina: KAL variations with modular knitting
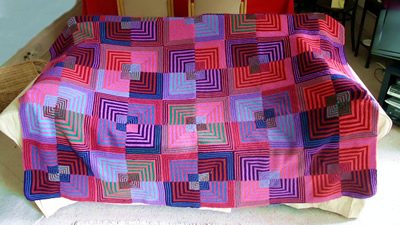
I decided at the beginning of last year that I wanted to make the Kaffe KAL 2014 striped blankets in each colourway. However I discovered while making the cushion, that although I loved the design of his finished blankets, I did not enjoy the construction technique at all. So I decided to make variations sticking with Kaffe's colour schemes, (he always knows best...!) but not his pattern. This project has been long in the planning and after a year I have completed two blankets .
The first blanket I made in the red colour scheme (above) and the second in the blue (below). For these I have used the so-called domino technique, which is not only fun to knit but economises on sewing up.
Because it's in garter stitch, there is still a definite right and wrong side but the joins between the squares are much neater (for me anyway...), and the "wrong" side is just a different pattern.
From a design perspective, the domino technique means that I have moved away from the overall design that Kaffe created by the interaction of the original stripes.
The blankets keep the order of the colours in each square, but the weighting of each colour is altered. The red blanket keeps the orientation and original layout of the squares, which means they are created in blocks of 4 and then sewn together - I decided I wanted an even number of blocks and so added an extra row of squares on two of the sides, making a bigger blanket (10 x 8), and I dispensed with an additional edging - intentional, not just expediency!
The blue blanket moves totally to the domino technique, with no sewing (except endless sewing in of "ends"!). I have still kept with the original layout, even though it was created to suit the interaction of the stripes in the original design. I chose to do this because with domino, you need a planned layout at the start, but it has resulted in a one-sided bias of colours which appears odd as I have moved so far from the real design. I could have probably done a better layout if I had pieced the squares afterwards, or tried it out virtually on a computer. The blue blanket has a short asymmetric garter stitch border.
A quick word on the yarn colour substitution: for the red blanket "papaya" was both a distinct and a key colour - I liked my substitution, but it is not red enough and the overall cast of the blanket is quite peachy; likewise for the blue blanket "magenta" sets the tone and I could not find a magenta that had as much blue in it as the original Rowan Worsted colour, thus the result has an overall pink effect.
The extended entry tells you about the construction.
Domino or modular knitting is described here in a DROPS tutorial on YouTube:
I used it in following way with Kaffe's colours:
While knitting the domino technique you should slip the last stitch in each row - knit to the last stitch, bring the yarn forward, slip the last stitch. This makes a neat edge for you to pick up as you build up the squares.
Cast on 70 sts using colour A
1st row (wrong side): Knit 34, knit
2 together, knit 34 [69 stitches]
2nd row: Change to colour B, knit.
3rd row: Knit 33 st, slip 1, knit
2 together, pass the slipped stitch over, knit 33 [67 sts]
4th row: Change to colour A, knit.
5th row: Knit 32 st, slip 1, knit
2 together, pass the slipped stitch over, knit 32 [65 sts]
6th row: Change to colour B, knit.
7th row: Knit 31 st, slip 1, knit
2 together, pass the slipped stitch over knit 31 [63 sts]
Continue decreasing 2 stitches at the centre of each row and the overall colour sequence is as follows:
Cast on and 1 row in A, 2 rows B, 2 rows A, 2 rows B, 2 rows A, 2 rows
B; [59 sts]
4 rows A; 4 rows C, 4 rows A; 4 rows C, 4 rows A; 4 rows C, 4 rows A;
4 rows C, 4 rows A; [23sts]
2 rows C, 2 rows D, 2 rows C, 2 rows D, 2 rows C, 2 rows D, 2 rows C,
2 rows D, 2 rows C, [5 sts]
Complete final rows colour D:
Next row: Change to colour D, knit
5.
Next row: Knit 1, slip 1, knit 2 together,
pass the slipped stitch over, knit 1 (do not slip the last stitch) [3
sts]
Next row: Slip 1, knit 2 together,
pass the slipped stitch over.
Fasten off.
Posted by Christina at 8:59 AM. Category: Kaffe Fassett Rowan KAL