Ganseys Knitalong
Saturday May 31, 2008
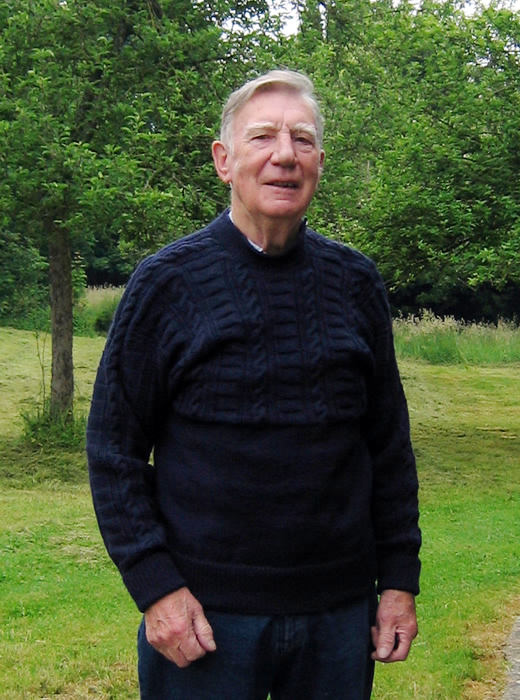
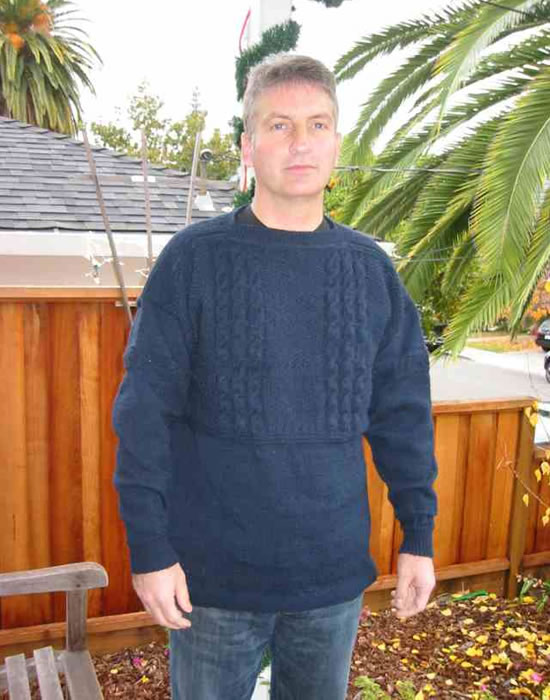
Christina: Whitby Gansey - complete
Now on the long weekend away in France with George's parents, I finished sewing in the extra ends generated by the new neckline, and handed over the finished garment to George Senior. He wore it for the first 10 minutes of gardening in the chilly early morning but basically it is too hot to work in a guernsey at the moment. Looks good in it though eh?
Posted by Christina at 7:22 AM. | Comments (1)
Tuesday May 27, 2008
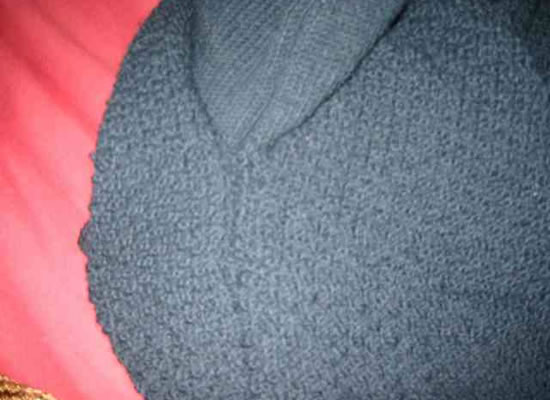
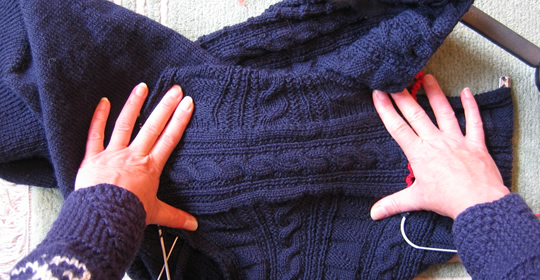
Christina: Whitby Gansey - revamped collar
George's Dad liked the gansey but he (and everyone else who tried it) had a problem with the neck being too high at the front. I think, comparing it with Alison's, my neck is much tighter and this does not work with a style having the back and front alike. So I undid the collar rows, leaving the live stitches, and picked up the two sides across the saddle and back neck the same as before. However at the front, I picked up stitches diagonally down about 12 rows, and then straight across about 12 stitches, for the front neck. I unravelled the rows between and will cut the threads and sew in the ends.
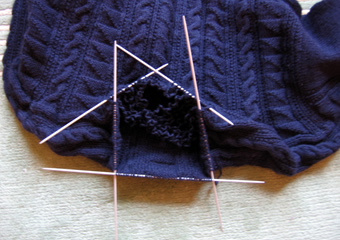
I then reknitted the collar.
We are spending next weekend with George's parents in France, so George Senior might be able to wear it then - especially if the weather doesn't improve!
Posted by Christina at 8:34 PM. | Comments (2)
Sunday March 30, 2008
Alison: Caister Gansey - The Final Unveiling
Though I finished the sweater late in 2007, I wanted to wait to give it to my father in person.
They just arrived to visit us and so I was able to hand over the guernsey.
Here he is modelling the finished garment:
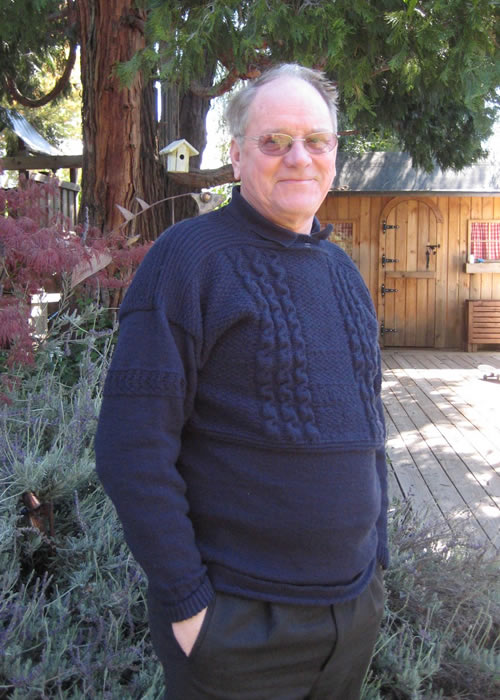
I did have a small concern that it might not fit well as the sizing was based on secret measurements taken by my mother. However, not only does it fit really well, but in the 5 days since he received it my father has not removed the guernsey which is very gratifying...almost gratifying enough for me to knit another...almost!
Posted by Alison at 4:05 PM. | Comments (0)
Thursday January 31, 2008
Christina: Whitby Gansey - finishing touches
Completed in the nick of time, ready for the weekend, when we see all of George's family for the birthday merriment... and I hope to find a person suited to my gansey... starting with George senior (whose birthday is the day after mine). Use the image pop-up to revel in the glory of the stitch detail.

I am still uncertain who exactly it will fit, but it's the thought that counts apparently!
Two final confessions:
On the ribbed collar I have one purl st where a knit should be - but luckily it is on the inside and completely unnoticeable. [I'd be surprised if that's the only error, but it's the only one I have seen so far].
I have left the threads at the cast off ends of the sleeves, so that I can adjust and finish them on the day, if necessary.
Posted by Christina at 12:07 AM. | Comments (1)
Wednesday January 23, 2008
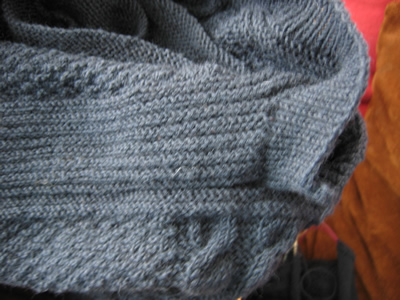
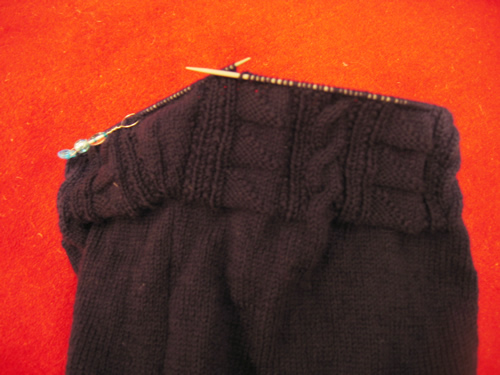
Christina: Whitby Gansey - collar
I paused in my work on the sleeves, in order to finish off the neckline. Its bascally a k1,p1, ribbed collar, but with an overlapping band of garter stitch on the left shoulder side, with 3 buttons; however I think the band is loose enough not to need buttoning really. I must say also, I am not sure I have interpreted the pattern correctly (and - again - it needed interpretation!) as it seems a little odd, but it has worked out.
The objective here was to allow George to try on the gansey at this point and see how the sleeve length was going to work out. This turned out to be pretty good - I have 7 or so more inches to knit on the sleeves, which is pretty accurately what the instructions for the decreasing dictate. The bad news is, George is complaining that the gansey is tight around the chest, and as his Father is larger that does not bode well. Looking at the old pictures of ganseys, they are tight to the chest, but George says he "would not want to wear it like that".
So - George's brother-in-law, Tony, who also has his birthday this month, is now a candidate for the gansey as he is "very skinny", (or lithe and fit, I would say!).
Posted by Christina at 9:29 AM. | Comments (0)
Sunday January 20, 2008
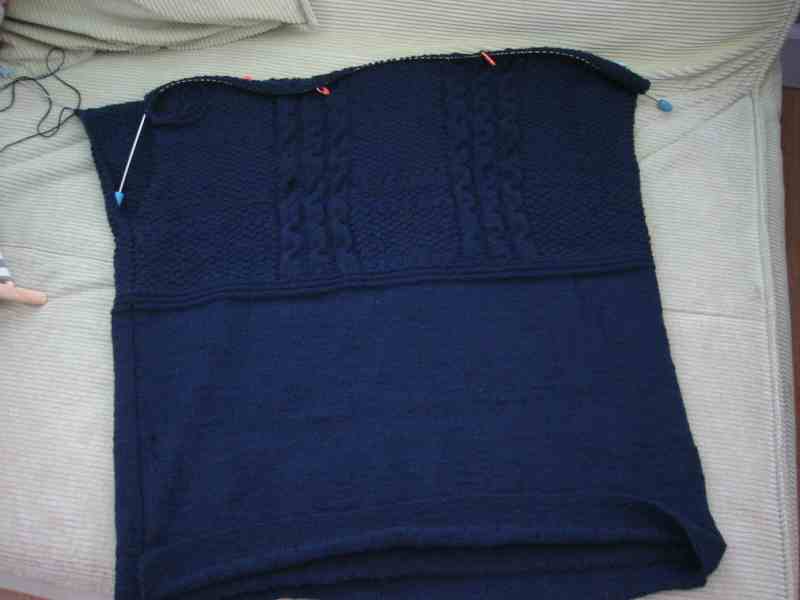
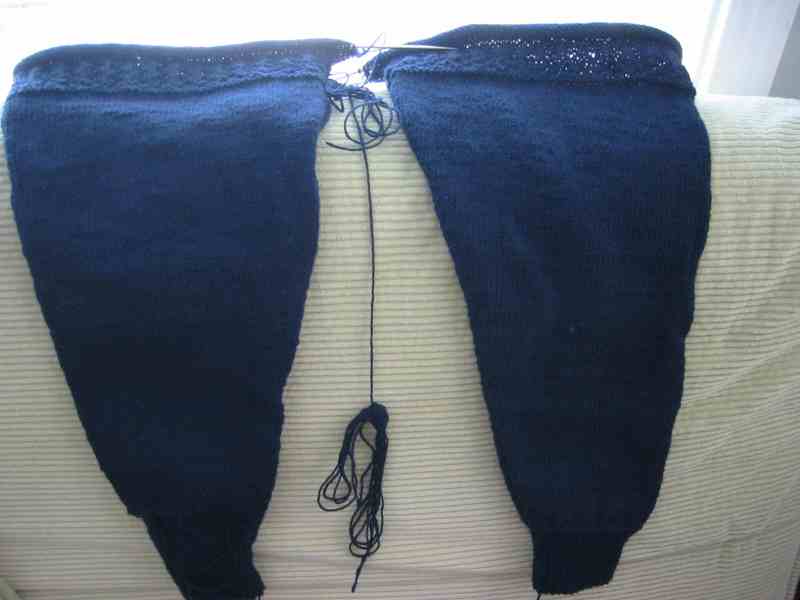
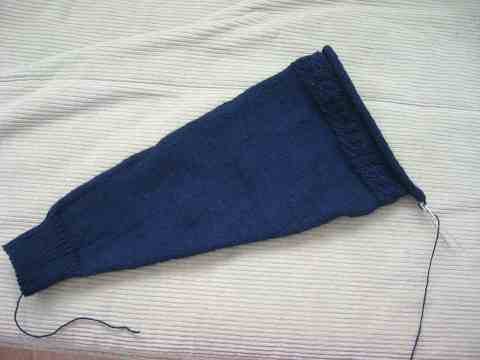
Christina: Whitby Gansey - first sleeve
This is "most" of the first sleeve. Although it does not look very long, it is down to the narrower part, so less knitting to do per round. This was as far as the ball of wool went, so I have started the other side, to avoid forgetting how I did it, and to try and make the sides symmetrical!.

Posted by Christina at 12:53 PM. | Comments (1)
Thursday December 6, 2007
Alison: Caister Guernsey Finished
After 14 months and 2 kilos of yarn, 2 sets of circular needles, and many band-aids, I have finished the Caister Gansey.
Here is the temporary modeled shot - Nigel standing in for my father for the time being.
I have not yet blocked the sweater - and I think it will benefit from a good pressing to even out the texture. Final photos await my Father.
Posted by Alison at 7:36 PM. | Comments (1)
Wednesday December 5, 2007
Alison: Caister Guernsey gets sleeves
I have finished the knitting of the guernsey body and arms. The next step is to attach the sleeves. The pattern is written to pick up stitches around the armhole and knit down. I decided that the weight of the sweater was too great to easily do this - so I kniitted the sleeves separately. This also gave me a chance to easily adjust the length of the sleeves above the pattern band - I needed to add 4" to the length.
Because I increased the length of the body after I split the front and back, I had a split at the seam. I closed this by picking up the live purls from the fake side seam. I knit these 2 stitches picking up edge stitches from the front and back to close the seam. Its not perfect - but not visible from galloping horse!
To pick up the stitches evenly around the armhole I divided the armhole into eigths.
I then did a 3-needle bind-off on the inside to seam the 2 sets of stitches together.
I'm really pleased with the effect - although it took an entire evening to join one sleeve.
However - one sleeve to go and a few ends to weave in and I'm done!
Posted by Alison at 6:03 PM. | Comments (2)
Thursday November 22, 2007
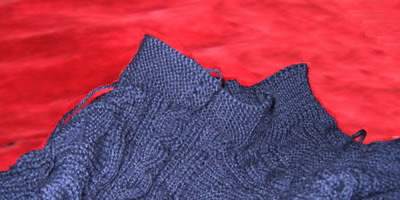
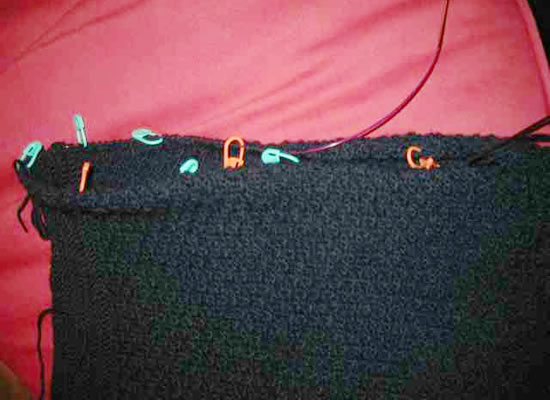
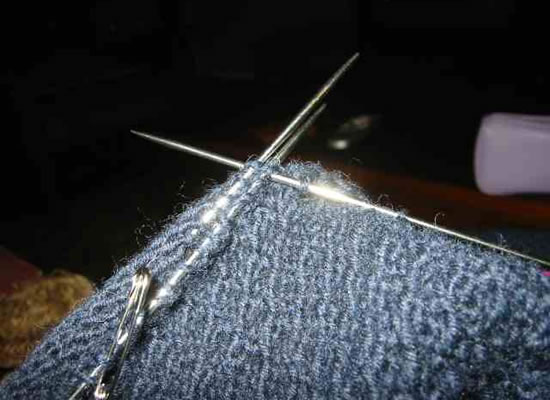
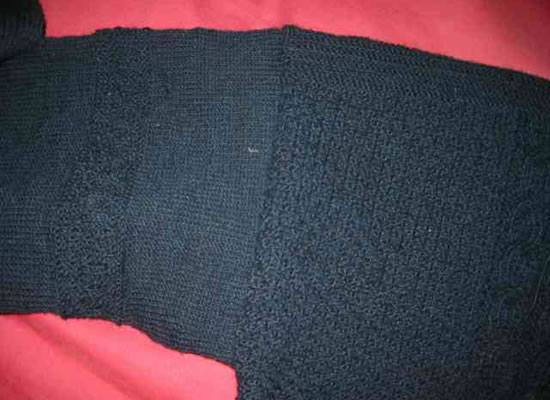
Christina: Whitby Gansey - saddle strap
Since coming back from the US, I have been frantically knitting the gansey, so that I can put my saddle shoulder next to the entry about Alison's for comparison. They are quite interesting to see together as the Caister gansey saddle shoulder is created by continuing to knit the shoulder in the same direction as the body to form the saddle. In the Whitby gansey pattern, a saddle strap is inserted, knitting at 90 degrees to the direction of the body knitting. You start to knit from the neck, joining the strap to the front and back shoulder stitches as you go, and finishing at the sleeve top. The stitches at the beginning are cast on with waste wool (mine in red in the photo) so that they can be picked up later when knitting the neck band.
I chose the Whitby pattern expressly because I liked the saddle strap and the way the pattern continues down the sleeve. However, I cannot believe the trouble I had trying to interpret the pattern. Alison and I have been laughing together at my pathetic efforts for some days now, and she has assisted not only in bearing with the numerous phone calls on the subject but also offering practical advice from her own knitting books.
There were two points causing confusion: one - that I did not realise the strap includes a neck gusset, so the stitches you first cast on are initially decreased for the first few rows, and, two - that although I suspected that there were numerous print errors (which there were) I just found it really hard to pick them out.
I'm still a long way from finishing the gansey, as, unlike Alison, I have the sleeves ahead of me, once I complete the shoulders. Now I have sorted this out, I plan to put the gansey aside for the moment and concentrate on Christmas knitting, so I expect to picking it up again in January. I would say that this is the longest project I have had but... Foolish Virgins are always there to haunt me....
Read the extended entry for Generic Saddle Strap instructions:
Generic Saddle Strap instructions:
I had such trouble trying to interpret my pattern - and there is more than one pattern book in similar vein to my own, where much is left to interpretation, and typos are abundant - that I thought I would make a note of some generic instructions to give you the general idea. Once you know, it's easy, but, (as with many things knitwise), explaining is not as simple as showing.
Here goes...
Note that any reference to the number of stitches will be dependent on the tension, as well as the individual pattern. My pattern starts with a base 34sts at the neck edge, which are made up of 20 "core" stitches for my pattern, and 6 edge stitches - 3 at each side of the saddle. The extra 8 stitches are decreased over the first few rows to make the neck gusset.
First take your shoulder stitches and arrange on two separate needles so that the points of the needles are at the neck edge. So, say, we are working on the left shoulder front and left shoulder back (I had 55sts on each needle). Hold them ready so that the left back sts are on the needle on your left and the left front sts are on the needle on your right; it is as if you have just knitted a knit row on the left front, and are about to start a knit row on your left back.
Using two other needles, (I suggest small double-point sock needles), cast on 33 sts in waste wool and knit one row in your gansey wool.
Slip these sts onto your right needle with the other left front sts, with the knit row facing you, and so that the working thread is ready to knit the left hand needle.
Knit one st from the left hand needle and TURN.
Purl across 33sts and then p2tog, (one st is the last of your cast-on strap and the other is one from the left back sts), TURN.
You are now going to continue with some decreasing to shape the neck gusset and some knitting 2 sts together to incorporate the strap into the shoulder stitches. I have colour-coded the gusset shaping in red..
Row 1: (right side) k1, k2tog tbl,
k4, {knit 20 "core" sts in your pattern} k4, k2tog, k2tog tbl
(one st from the saddle and one from the shoulder sts) TURN
Row 2: P6, {knit 20 "core"
sts in your pattern}, p5, p2tog, (one st from the saddle and one from
the shoulder sts) TURN
Row 3: k1, k2tog tbl, k3, {knit 20
"core" sts in your pattern} k3, k2tog, k2tog tbl (one st from
the saddle and one from the shoulder sts) TURN
Row 4: P5, {knit 20 "core"
sts in your pattern}, p4, p2tog, (one st from the saddle and one from
the shoulder sts) TURN
Row 5: k1, k2tog tbl, k2, {knit 20
"core" sts in your pattern} k2, k2tog, k2tog tbl (one st from
the saddle and one from the shoulder sts) TURN
Row 6:
P4, {knit 20 "core" sts in your pattern}, p3, p2tog, (one st
from the saddle and one from the shoulder sts) TURN
Row 7: k1, k2tog tbl, k1, {knit 20
"core" sts in your pattern} k1, k2tog, k2tog tbl (one st from
the saddle and one from the shoulder sts) TURN
Row 8: P3, {knit 20 "core"
sts in your pattern}, p2, p2tog, (one st from the saddle and one from
the shoulder sts) TURN
This ends the strap shaping and you have 26 sts left in the strap.
Next row: k3, {knit 20 "core"
sts in your pattern} k2, k2tog tbl (one st from the saddle and one from
the shoulder sts) TURN
Next row: P3, {knit 20 "core" sts in your pattern},
p2, p2tog, (one st from the saddle and one from the shoulder sts) TURN
Repeat the last two rows until you have incorporated all the shoulder sts into the saddle strap, and you have reached the head of the sleeve. Leave the saddle strap sts on a stitch holder to pick up later when you knit the sleeve.
Posted by Christina at 8:49 AM. | Comments (0)
Tuesday October 23, 2007
Christina: Caister Guernsey - saddle shoulder
As I am in California with Alison at the moment I am posting the picture of the saddle shoulder on her guernsey. [She is too busy looking after me to do any blogging..].
The saddle was knitted on to the front sides of the guernsey and then the front and back were cast off together in a three-needle bind off. You can see she has already completed the neck.
It would have been nice to have brought my gansey out here so we could have been united in our knitting for a short period, but I decided that it was too bulky to pack in my luggage.
Posted by Christina at 7:28 PM. | Comments (0)
Monday October 8, 2007
Alison: Caister Guernsey - Nearing the end
I'm really pressing on with the Caister guernsey. Ive finished the patterning on the body front and back. The next step is to knit the shoulder saddle.
I also need to revisit the sleeves; the pattern calls for 16" sleeves. I knit 18.5" sleeves, but discovered that my father's arms are actually 20.5" long.
I'm also having some concerns that the body will be too short - I need to get my mother to re-measure my father again. If it works out short I will add some more length onto the welt - maybe even re-knit in a different pattern.
To finish on a good note - the front has significantly fewer mistakes than the back....lookit! *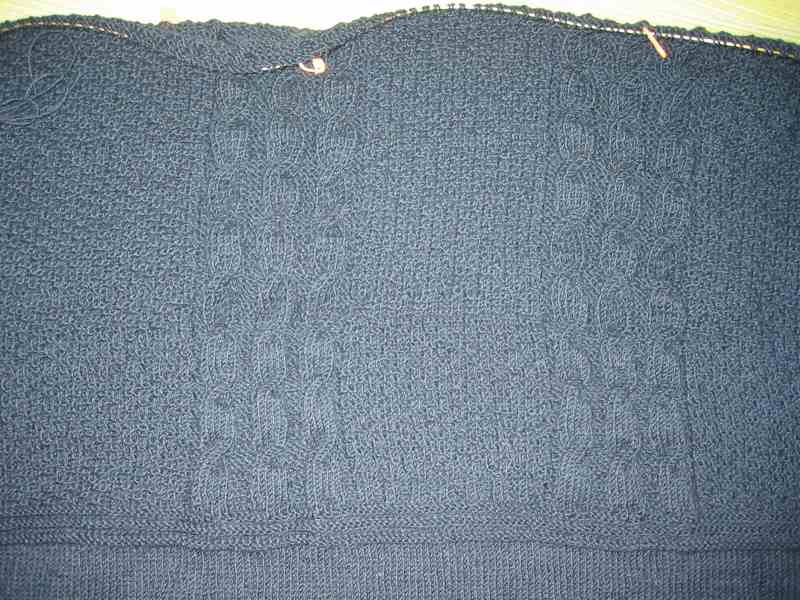
*"Lookit" = California boy-speak
Posted by Alison at 6:59 PM. | Comments (0)
Tuesday September 18, 2007
Alison: Caister Guernsey - making my mark
As previously mentioned - I planned to knit my father's initials into his sweater. I hope he does not hate it! I wanted to do something rather subtle so planned the size to be small. Here is my chart:
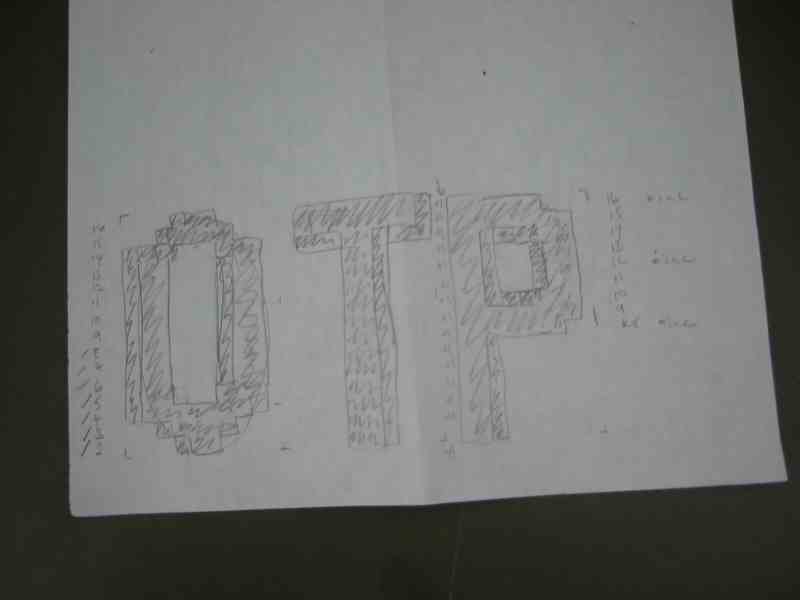
and here is the final result:
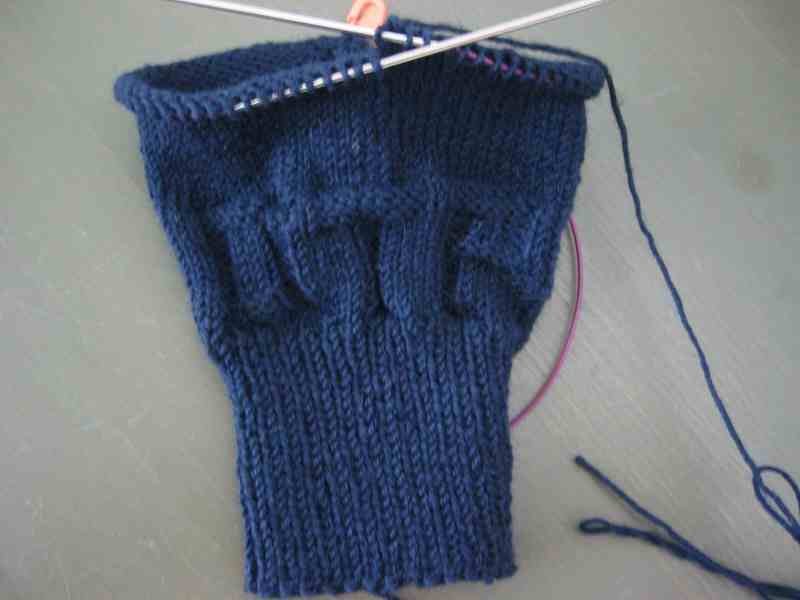
I think the intials will be clearer once the sweater is blocked.
Posted by Alison at 7:25 PM. | Comments (1)
Monday September 17, 2007
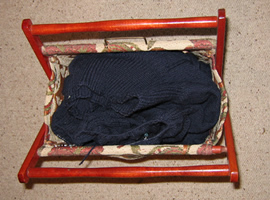
Christina: Whitby Gansey - Mothballed
Mothballed - but only temporarily.
Posted by Christina at 11:59 PM. | Comments (0)
Sunday September 16, 2007
Alison: Christina! Where are you?
I know you were 'waiting for me', and of course you have been seen with another guernsey...(http://www.work4idlehands.co.uk/archives/2007/09/maiden_over.html)... but enquiring minds want to know what you are doing with the Whitby Gansey.
Posted by Alison at 10:58 PM. | Comments (0)
Alison: Caister Gansey - making a lot of progress
I have been knitting pretty-well full-time on the guernsey. It's amazing how much difference it makes to concentrate on one piece. I also had the benefit of a 3-day teleconference which allowed me to knit the sleeve. I'm really motivated by the progress and keen to move on. I'm knitting on both the body and the sleeves. The sleeves are my 'mindless' knitting as the body does require some concentration and counting.
I've charted out my father's initials to knit into the cuff of the right sleeve. I'm going to make the initials in purls in the stockinette part just above the ribbing.
I re-wrote the pattern to knit the sleeves from the bottom up. The pattern calls for picking up stitches around the arm hole and knitting down, but a) I have not finished the body and wanted to knit the sleeves, and b) I feel that 2 lbs of wool would be somewhat unweildy to be moving around as I turn and knit the sleeves.
Posted by Alison at 10:38 PM. | Comments (0)
Sunday June 24, 2007
Alison: Houston we have patterning
I've been making good progress on the gurnsey and reached the chest patterns.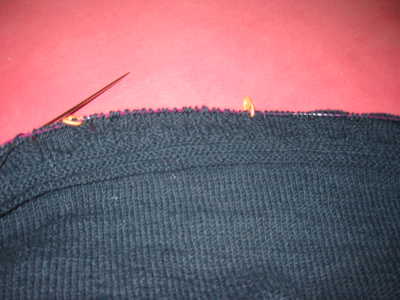
I've made a few mistakes so far, I hope not too noticable as I made the same mistake on both the front and the back. In fact, I think this photo is of the error section.
I think the reason that Ive made mistakes, and these are really stupid errors of counting, is that the pattern is terribly confusing. It's really quite unnecessarily confusing as its a pretty basic 16 row repeat, with only 4 actual pattern rows. It would be an ideal pattern for a chart, however the way the pattern is written does not point out the repeat, and each row is written out, with comments like Rows 16-24 repeat rows 12-16, but the instructions for row 15 say repeat row 13...you get the idea.
Finally, I got out my notebook and calculator, worked out where I had made the mistakes, and re-wrote the pattern in a row repeat format. I would have charted it but my squared paper was too small for the 175 stitch pattern (!) I know I could have charted the repeats, but the exercise of rewriting the pattern has reinforced the pattern in my mind and it's really much easier now. I also added the markers to aid knitting without counting (essential for knitting while watching television).
Ive got a while before the arm split, but I'm waiting for measurement details from my mother before committing to the length!
Posted by Alison at 7:12 PM. | Comments (1)
Wednesday June 20, 2007
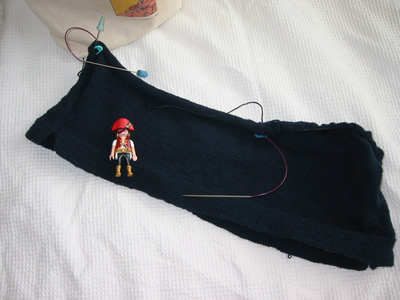
Alison: Caister Gansey gets interesting
After what seems like an eternity I am finally at the beginning of the patterned section of the guernsey. Playmobile pirate again for scale - but actually its now 34cm long.
The patterned section starts below the arm split, so I guess this is just over half of the body completed. Ive made a concerted effort to knit on this as every opportunity, and despite feeling like I'm making no progress, clearly there has been progress. I usually complete 1-2cm each evening so my slowness in reaching this point is entirely my own lack of effort on this project.
I'm hoping that the cable pattern is more interesting to knit - but actually expect that progress will be even slower from now on. I'm also hoping that I can do something to stop the welt rolling so much - maybe blocking will help.
Posted by Alison at 8:51 PM. | Comments (0)
Wednesday February 14, 2007
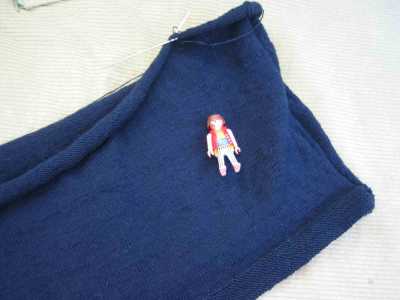
Alison: Caister Gansey - I'm still at it
I'm making progress on the Caister Guernsey but it is sloooooow. Playmobile pirate for scale (and interest - let's face it navy stockinette is not the most exciting knitting).
I knitted on this during all my conference last week so it represents about 12 hours solid knitting. Probably no knitting on this for the next month as my parents will be staying with us and I wont be able to knit in secret.
Posted by Alison at 6:32 PM. | Comments (0)
Thursday January 4, 2007
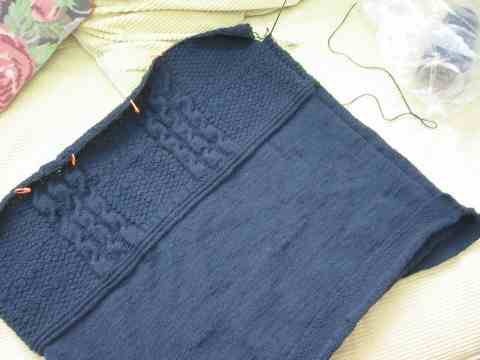
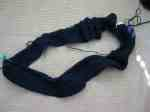
Christina: Whitby Gansey - Gusset
I have reached the part where you divide the work for front and back and continue knitting on two needles. Actually, to avoid minor tension changes I shall probably struggle on with the circular needle. In the picture you can see the pattern begin to emerge at the same time as the underarm gusset, which, in this gansey, is made by increasing on each side of the single side-seam purl stitch; you can see the purl stitch continuing through the middle of the gusset.
Posted by Christina at 10:31 AM. | Comments (0)
Thursday November 30, 2006
Christina: First ever gansey - complete
OK I admit it. It is very small. It may not fit George. It may not fit anyone over 12 inches in height.

Posted by Christina at 8:57 AM. | Comments (0)
Wednesday November 29, 2006
Christina: "How to knit a gansey"
After a discussion at Alison's knitting group about how ganseys were originally made, I am posting this information, again taken from the lovely books by Michael Pearson. I need to say two things: this text and pictures are copied verbatim from the book, and this is probably the only source of information I have read; as the statements are sourced from knitters in Scotland and the NE of England, they are clearly true, but overall, there is no one method or technique, and it is also an obvious truth that different areas have different traditions.
Seam Lines
A seam line occurs, made up from a combination of purl and knit stitches, which runs up each side of the gansey. This device is designed to help the correction of the pattern by making a division for front and back. It also provides the base for a gusset, which is knitted under the arm to give freedom of movement, and extend the life of the gansey.
Circular Knitting
The circular knitting technique is the essential feature of ganseys, creating a seamless construction. This traditional method of knitting in the round is more natural to knitting than the more modern method of knitting over two needles. Knitting pieces and sewing them together owes more to dressmaking and tailoring than knitwear. Two needle knitting has arisen to accommodate difficult shapings demanded by fashion trends. The majority of old patterns were in the round. Shetland Islanders mention over and over again: “Never sew when you can knit”, and most people hate sewing the knitted pieces together. Circular knitting is achieved by knitting over 3, or 4 long straight needles.
The “Whisk”
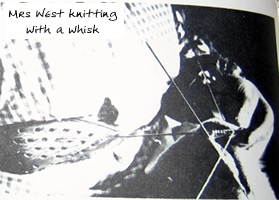 To speed up the knitting, apart from the obvious mechanism of the technique, the most significant method was to anchor the working needle so that the knitter can use the fingers of the right hand to move the stitches from the left hand needle. This enabled the average knitter to knit “two cuts a night” (4oz which is 115g), at around 200 stitches a minute. The most popular of these anchors was the sheath or a stick, strapped or pinned to the waist. The stick was about 10 inches long, with a hole at the top for placing the needle. The sheath was made of leather, stuffed with horse hair, and attached to a belt fitted around the waist (see photo).
There were other methods:
Mrs Leith from Orkney: “… leather belts are sometimes used… personally I prefer the safety pin stuck firmly in the bodice, a little above the belt on the right hand side. I have seen a bunch of feathers used, stuck in the belt….”
Mrs Keith from Lossiemouth in 1959: “a ‘wisker’ was a bunch of straw stuffed inside an old sock and tied to the waist…”
The Patterns
The tradition was an aural one – the information and expertise passed down generation after generation. Many of the knitters now too old to knit explained their patterns by repeating the rounds they used to chant, or the pattern was deciphered through close examination of archival photographs taken around 1900. The shape of the gansey relates to bridal shirts and smocks of earlier centuries. The arms and cuffs are knit down from the shoulder and cast off at the cuff (the opposite of modern knitwear), to enable one to repair any worn parts by simply pulling back the past the hole and knitting back down again to the cuff.
Posted by Christina at 11:48 PM. | Comments (0)
Tuesday October 31, 2006
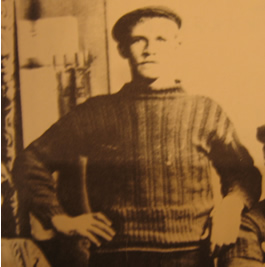
Christina: Old gansey
As this gansey project is obviously going to be ongoing for quite a while I thought I'd include this old gansey photo that illustrates our previous exchange of comments. I could not find an exact photo of a very wide ribbed welt, but many of the ganseys have some kind of wide "belt" around the middle, formed as part of the pattern.
Posted by Christina at 11:11 PM. | Comments (0)
Saturday October 28, 2006
Christina: Whitby Gansey - All plain sailing
I have used up my first 100 gram ball of wool; that is: all bar the last 6 inches as a moth seems to have chewed through the thread very near the end. Little to report except lots of plain knitting.
I am purling only one stitch at each side, and Alison's gift of lovely bead placement markers are really coming into their own. I hardly have to concentrate at all - though this has lead to a dropped stitch, which I had to pick up some half a dozen rows down. The knitting is so tight on the fine needles that the extra tension has not distorted the fabric at all noticeably.
I never understood the stuff about dropped stitches; when I was young, it seemed to be a major topic for knitters and a key indicator of knitting incompetence. Growing up, I thought you would have to be a real ninny to (a) drop a stitch in the first place, and (b) not be able to easily correct it. Lately, I have knitted a couple of vintage 3 and 4 ply patterns where the instructions "cast on 328 stitches" is not so uncommon, my eyesight is not so acute, and I am a little more humble. Going to the trouble of counting your stitches, finding one short, and having to examine the stitching to find out where it might have gone is .... well... needles and haystacks spring to mind.
Posted by Christina at 2:16 PM. | Comments (2)
Sunday October 22, 2006
Alison: Caister Gansey - It's a start
I have completed the 20 rows of the welt and started the body of my sweater.
It's slow going, especially as I keep poking myself with my needles. The knitpicks circular needles are really nice, especially the cord which is much more flexible than Addi Turbo needles, but they are very pointy. I don't think I could manage with a less pointy needle though because the gauge is so tight.
Other than all that winging, I really like the knitted fabric. It's nice and firm, just like a real guernsey!
Posted by Alison at 7:48 PM. | Comments (0)
Monday October 9, 2006
Alison: Caister Gansey - the start
I have chosen the Caister Gansey from The Traditional Sweater book by Madeline Weston. Here is the work so far - my wool and swatches. Result of the swatching means that I need to use 2mm needles - so part of the reason for selecting the Caister Gansey is that I can actually get the correct tension.
The wool came from Frangipani, who provide a sample pattern - but with a tension of 36 st to 10cm and, even on 2mm needles, I really couldn't get close. The Caister Gansey is 28sts which I can achieve on the 2mm. I also wanted a fairly plain guernsey pattern as I cant really see my Father (planned recipient) wearing anything more complex or patterned, lovely though they are; I might even leave off the cables on this pattern and stick to a knit/purl pattern, which think is more traditional.
Posted by Alison at 8:15 PM. | Comments (0)
Friday October 6, 2006
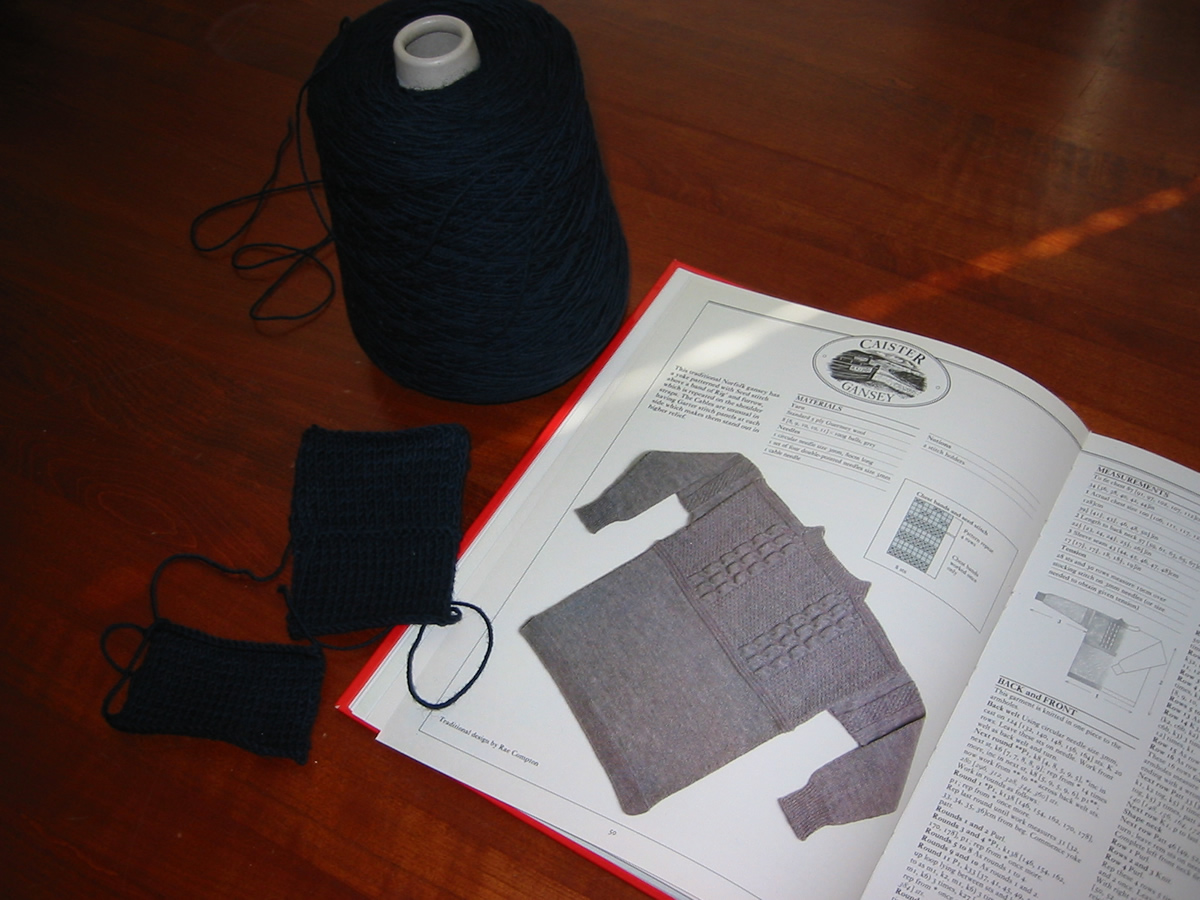
Christina: Whitby Gansey - the start
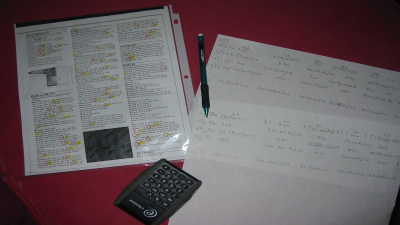
This is Mrs Laidler's pattern from the book "Fisher Gansey patterns of NE England" by Michael Pearson; this is a lovely booklet, now out of print but sometimes seen on eBay. The patterns in this book are described rather than written in detail, and there is basically only one size quoted (differs by pattern) - you can adapt the sizes but for some of the patterns this is difficult. I chose this pattern because it is knitted in the round, and has the traditional features of saddle shoulders, and under-arm gussets.
The wool (Creskeld - now called British Breeds 5 ply) knits up to 27 sts to 4 inches (10cm) on No 12 (2.75mm) needles. So far I have "cast on 300 loops", and started the welt.
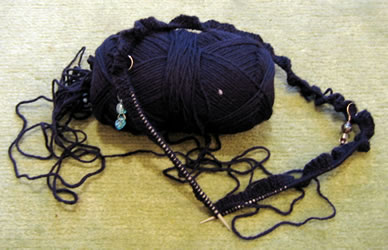
Posted by Christina at 2:07 PM. | Comments (0)