Hug-Me-Tight
Snug winter accessory from 1953.
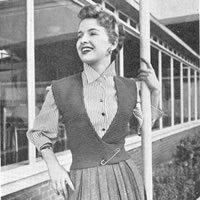
"Something new in waistcoats. A modern version of the old-fashioned knitted comforter".
Proves to be very flattering for most shapes, and not just for those twig-like 1950s post-war figures.
Instructions.The overall pattern is four basic rows: 1st Row: Right side facing, purl.
These 4 rows form the ridged pattern. Back:With larger needles cast on 117 sts. and work 52 rows in pattern as given above. With right side facing, shape sides by increasing one stitch at each end of next and every following 6th row until there are 153 sts. Work straight until back measures 11 inches at centre. Work straight until back measures l8¾ inches, then with right
side facing, shape shoulders by casting off 10 sts at beginning of next
8 rows. Right Front:With larger needles cast on 82 sts and work in pattern as for back, Work 12 rows straight in pattern. With wrong side facing, decrease one stitch at end of next and following
9 alternate rows [82 sts]. With right side facing, continue in pattern, sloping front edge and shaping
side edge as follows: Continue in pattern, sloping front edge by decreasing one stitch at beginning
of every following l0th row. With wrong side facing, continue sloping front edge on every l0th row as before, and at the same time, shape armhole by casting off 6 sts at beginning of next row, then k2 tog at this edge on next 7 rows. Now keep armhole edge straight and continue sloping front edge on every
l0th row as before until 40 sts remain. With wrong side facing, shape shoulder by casting off 10 sts at beginning
of next and following 3 alternate tows, armhole edge. Left Front:With larger needles cast on 60 sts. and work 52 rows in pattern. Armhole borders:Join shoulder seams. Front Borders:With right side facing and smaller circular needle, pick up and knit
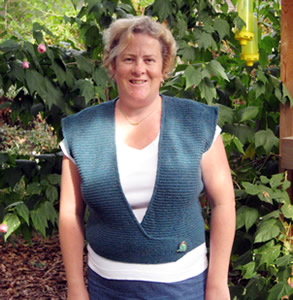
172 sts from top of flap to centre back of neck. Work 5 border rows as for armhole borders. To Make UpPress parts lightly on wrong side under a damp cloth. Join side seams. Press seams. Fasten with pin or brooch as shown in photograph. |
|
Materials10 x 25g balls 1 pair each of No 11 (3mm) needles, and one long No 12 (2¾mm) circular needle. Original knitted in a 3ply wool on numbers 14, and 13 (2mm and 2¼mm) needles. Kilt pin to fasten. TensionYarn knits 28sts x 40 rows to four inches on No 11 needles. The original tension on thinner wool is 9 sts to the inch. Note: Do not stretch pattern when Size mattersOriginal sized for bust 33-34 inches; length from top of shoulders 19
inches. See "adapting the size". **A word on the wool.I used a Rowan Tweed 4ply, which is thicker than the original wool and made the item larger overall. The actual yarn I used is no longer available but you could choose Scottish Tweed 4ply instead. Original: Paton's Beehive Fingering 3 ply in Lipstick Red. Disclaimer
|
|
Adapting the size:Knitting in 4-ply produces a bigger size than the original but I carefully checked my tension, experimented with needle sizes, and did the arithmetic. Changing from 9st per inch to 7st per inch makes a big change from a 34 inch bust to 42. However the wrap over style offers some flexibility, and it is easy to add or subtract a few sts throughout the pattern if you need to, or even alter the waist size that you start with, and do fewer increases up to the armhole, if you feel up to it. This style is meant to be wrapped as tightly as you like to wear it, and seems to look flattering on a range of figure types. I wanted to make the wrap for myself, I liked the style and tried on this one before sending it off to Alison. However, the 4ply tweed made up too big for me (even with my own ample bosom!). I purchased some 2 ply on-line - fine pure wool in a cone, intended for machine knitting - so one day when I feel like working with lots of tiny stitches, I might get round to it.... (It's a lovely red - "lipstick red" ...) |
|