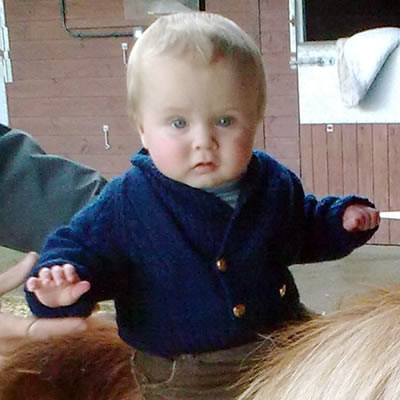
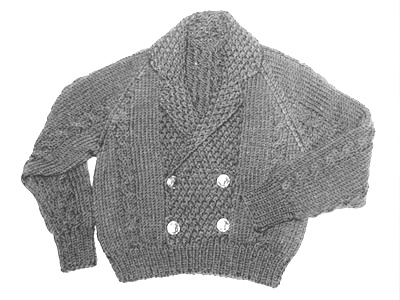
Little Raglan Reefer
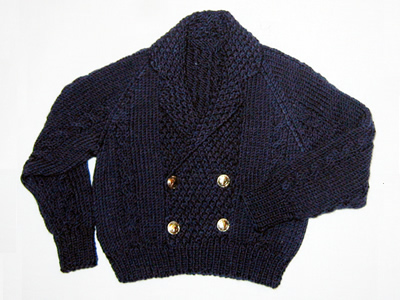
Here is a cute little knitted reefer for a small child (6-24months). It dates from pre 1960s where children's knitwear was not inspiring, but as soon as I saw this I wanted to make it - I am a sucker for any nautical theme, especially for kids (and dolls...)
Instructions.This pattern is given for 2 size options - the instructions for the larger
size are blue bold type in curly brackets. BackWith No 10 (3¼mm) needles cast on cast on cast on 55{61}
sts and work rib as follows: 12th rib row: Rib 3{6}, (increase in next st, rib 6) 7 times, increase in next st, rib to end. [63{69}sts] Change to No 8 (4mm) needles and proceed in cable pattern as follows: 1st row (right side facing): K9{10};
p1, k4, p1; k11{13}; (p1, k4, ) twice,
p1; k11{13}; p1, k4, p1; k9{10}. Continue in pattern until you have completed row 28{32}. Shape raglan: (keep continuity of pattern as you work these rows). [Editor's note: you should be about to begin Row 5 of the pattern sequence for the smaller size and Row 3 (a cable row) for the larger size.] Next row: Cast off 3sts, work to
end. Repeat last 2 rows 18{20} times,
[19{21}sts] FrontWith No 10 (3¼mm) needles cast on cast on cast on 55{61} sts and work rib for the first 11 rows as you did for the back. 12th rib row: Rib 3{6}, (increase in next st, rib 7) 6 times, increase in next st, rib to end. [62{68}sts] Change to No 8 (4mm) needles and proceed as follows: 1st row (right side facing): K9{10}; p1, k4, p1; k8{9}; (p1, k1, ) 8{9} times; k1. Turn and continue working on these 40{44}sts to make the left front (these instructions are intended for a boy - see editor's note below) and slip remaining 22{24} sts on to a stitch holder and leave to work later. [Editor's note: If you want to make this for a girl - maybe in white? - then you will perhaps want to reverse these instructions by working the first 22{24} sts, casting on 20sts and working on these 40{44} sts as written, omitting the button holes. Pick up the rest of the sts to work the right front - and don't forget to work the buttonholes on the right front!] 2nd row: (K1, p1) 9{10} times; purl to the last st, k1. [Editor's note: The centre panel on each of the front pieces is worked in double moss stitch, and I found it convenient to put a stitch marker after I had worked the first 18{20} sts of row 2, to show the limit of this section.] 3rd row: K9{10};
p1, C2B, p1; k7{8}; *
p1, k1; repeat from * to end. Keeping cable and moss stitch panel correct throughout, work 16{20} rows, working buttonholes as before on the 9th of these rows (row 21 for both sizes). Shape raglan: (keep continuity of pattern across the cables and
the centre moss stitch panel as you work these rows). Next row: Cast off 3sts, work to
end. Repeat last 2 rows 10{11} times,
[26{29}sts] ** Keeping continuity of the pattern,
continue to decrease at the armhole edge as before until 18{20}
sts remain of the moss stitch panel. Completing the other side to make the right front: Slip the sts from the stitch holder on to a No 10 needle, point facing
centre of work (right side facing you), and cast on 18{20}sts.
[40{44}sts]. 1st row (right side facing): K2;
(p1, k1) 8{9} times; k7{8};
p1, k4, p1; k9{10}. Shape raglan: (keep continuity of pattern across the cables and the centre moss stitch panel as you work these rows). Next row (wrong side facing): Cast
off 3sts, work to end. Repeat the last 2 rows 10{11} times, [26{29}sts] Next row: Cast off 5sts, work across
in pattern to the last 3 sts, k2tog, k1. Complete to match the left side of front, working from ** to end. Right sleeve:Using No 10 needles, cast on 32{34}sts. Work 13{15} rows in k1, p1 rib. Next row: Rib 3{4}; (increase in next st, rib 4) 5 times; increase in next st, rib to end. [38{40}sts] Change to No 8 needles and proceed in stocking stitch with cable panels set as follows: 1st row (right side facing): K3{3};
(p1, k4, p1, k7{8}) twice; p1, k4,
p1; k3{3}. Continue in pattern as on last 6 rows, increasing 1 st at both ends of
next and every following 6th row, until there are 50{54}sts;
work the extra sts in stocking stitch. Shape raglan by working rows as you did for the back: Next row: Cast off 3sts, work to
end. Repeat last 2 rows 18{20} times,
[6{6}sts] Right sleeve:Work as for the right sleeve, but working C2F instead of C2B. [Editor's note: The sleeves are identical apart from the way the cables twist, and obviously you can choose to sew them into the Reefer in whatever orientation you prefer.] To Make UpBlock each piece from the wrong side, pressing very lightly using a warm iron and a damp cloth, omitting the ribbing. Join side, raglan, and sleeve seams using a flat seam. Stitch down the 20 cast-on stitches at the waist on the inside. |
Materials
|
|
|
|
|
|
|
|
|

