Festival Bag
Festival season is well under way so I am posting this a little early - too late for Glastonbury but in time for WOMAD if you are a fast knitter (or knit while you are there..!).and Cropredy.
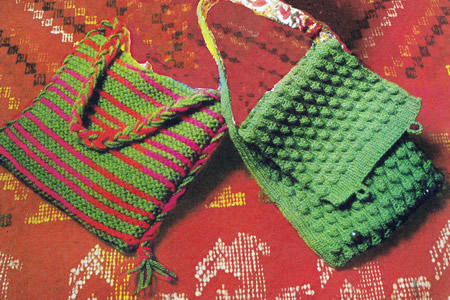
You can use any stitch for the bag that appeals, taking the pattern as a basic shape. You could try a multicoloured honeycomb pattern, or you could combine stripes of different pattern textures. The simplest shape (on the left) is the type I remember with the tasselled handle continuing all down the sides.
Instructions.Striped bag (left)Using No 3 needles and main colour A, cast on 36 stitches. To make up the striped bagIf you want to line the bag, cut the lining to the size of the bag, allowing
6mm (½ inch) turnings. Cut 6 strands each of A and B into 178cm (70 inch) lengths. Divide the strands into 3 groups and plait together to form a handle, making an overhand knot at each end and leaving the ends to form a tassel. Stitch the plait in position along the side seams of the bag, having a tassel at each lower edge and leaving the remainder to form the handle. Sew on one button or bead to the centre of each side of the top edge
of the bag. Shoulder bag (right)To make this bag you can experiment with any textured pattern. Cast on 62 stitches and start knitting in your chosen pattern.
Continue in pattern until the length is about 3 times the height you want the bag to be, allowing up to 2 inches additional for the bottom of the bag. The bag shown was knitted 76cm (30 inches) long. For the strap, cast on 11 stitches and work 106cm (42") in single rib. Finishing the shoulder bagSew together so that the strap makes a gusset at the sides of the bag. You can optionally line the bag and add a couple of buttons and loops as shown in the Picture. Textured Pattern stitches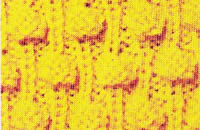 Bobble ribCast on a number of stitches divisible by 6 plus 2. 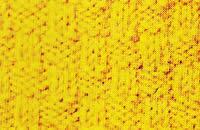 Cane basket stitchCast on a number of sts divisible by 6 plus 2. 1st row (right side): K2, *
P4, K2, repeat from * to end. 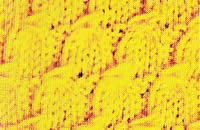 Tassel stitchCast on a number of sts divisible by 6 plus 2. You can find more textured stitches in these links: A different basket stitch and blackberry stitch. 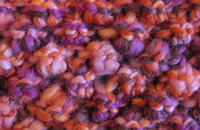 Honeycomb stitch in two colours 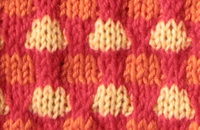 |
Materials
|
These types of bag were very popular in the 1970s - I used one instead of a school satchel. Probably the striped bag on the left above is the most stylistically similar to the ones I remember - I might choose different colours!
My own bag - now long lost - was woven in a mixture of dark red and blue. Below is a genuine "gap year" cloth bag from the 1970s which made its way backpacking to the far east and back. It is a mail bag style like the knitted version pictured on the right above.
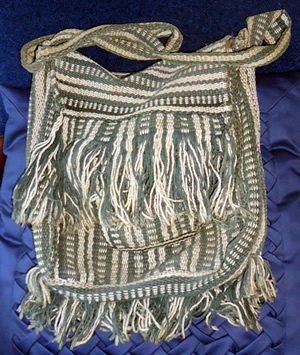
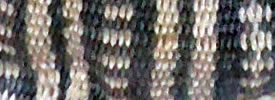
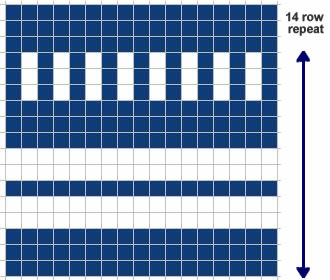
Below is a detail from the picture. The bag is woven of course but you could reproduce this pattern in knitting and easily add lots of tassels.
The main bag has the stripes running vertically, and the flap has them horizontal. If you want this effect, as it's not easy to knit vertical stripes while keeping the integrity of the fabric, you could use this chart as written for the flap, and then use it to knit the front and bag in one piece from side to side. If you were feeling really confident you could knit front and back (sideways rectangle) then pick up the stitches from the side of the knitting and knit the flap. So - to do this - before you start - work out your tension and then how large you want the bag to be. Lets say that it's 12 inches high and 10 inches wide. You need to cast on enough stitches to make 24 inches in the width of your knitting. Then knit stocking stitch in pattern for 10 inches and cast off. At the side of the knitting, pick up stitches for the flap. Usually this means picking up 2 stitches for every 3 rows to make a flat fabric without puckering. Then knit in the pattern for up to 12 inches to cover the front of the bag - if you are adding tassels you might want to knit as little as 4-6 inches.
Finally I'll leave you to extemporise on the handle and tassels. You might want to knit a plain handle about 2 inches wide and back it with some kind of webbing - then you would use it as the sides of the bag as you can see our original was made. Or you could just fold the bag without sides and apply a plaited cord handle as for the first bag on the left in these instructions.
You would probably need to use a 4 ply / DK / worsted on a smaller than usual needle to give a solid fabric, and it would be a good idea to line it with something firm.
I'm sure you could also make a simple bag from two woven panels (three for a mail bag) - perhaps made using a fairly crude home-made loom. I am planning to experiment with this in the near future. Watch this space (!).
