Lace Pattern
Row 1: (right side) k1, wfwd, sl1,
k1, psso, k1, * k1, k2tog, wind wool twice
round needle, sl1, k1, psso, k1; repeat from *
to last 4 sts: k1, k2tog, wfwd, k1.
Row 2: k1, p3, *
p2, [k1, p1] into "made" loops of previous row, p2; repeat from
* to last 4 sts: p3, k1.
Row 3: k2, wfwd, sl1, k1, psso, *
k2tog, wfwd, k2, wfwd, sl1, k1, psso; repeat from *
to last 4 sts: k2tog, wfwd, k2.
Row 4: k1, purl to the last st, k1.
Row 5: k2, k2tog, *
wind wool twice round needle, sl1, k1, psso, k2, k2tog; repeat from *
to last 4 sts: wind wool twice round needle, sl1, k1, psso, k2.
Row 6: k1, p2, [k1, p1] into made
loops, * p4, [k1, p1] into made loops; repeat
from * to last 3sts: p2, k1.
Row 7: k1, k2tog, wfwd, k1, *
k1, wfwd, sl1, k1, psso, k2tog, wfwd, k1; repeat from *
to last 4 sts: k1, wfwd, sl1, k1, psso, k1.
Row 8: k1, purl to the last st, k1.
Instructions
Back and front alike.
With No. 13 needles, cast on 114 (126) stitches, and work 4 inches in
k1, p1 rib.
With right side facing, change to No. 11 needles, and commence working
in stocking stitch (1 row knit, 1 row purl), starting with a knit row.
Increase at each end of the 11th and every following 6th
row, until there are 132 (144) sts. Then increase at each end of the following
4th row: 134 (146) sts. Next row: purl.
[Editor's note: I
worked both sides together in the round, (so every round knit) up to the
start of the armhole pattern, when I split the work, and continued each
side separately. Mark the sides with st markers to aid placement of the
increases.]
Introduce lace pattern at the centre:
Next row: k60 (66), pattern 14sts as 1st row of lace
pattern, k60 (66).
Next row: p60 (66), pattern 14sts as 2nd row of lace
pattern, p60 (66).
Continue in lace pattern and stocking stitch thus for a further 6 rows,
increasing 1 st at each end of the next and following 4th row,
[138 (150) sts].
Next row: Inc in 1st st, k55 (61), pattern 26sts as
1st row of lace pattern, k55 (61), Inc in last st.
Work a further 7 rows in lace pattern and stocking stitch thus, increasing
1 st at each end of every alternate row, [146 (158) sts].
Introduce lace pattern at sleeve edges:
[Editor's note: If
you are working in the round, then you need to split the work at this
point and continue each side separately.]
Next row: pattern 14sts as 1st row of lace pattern;
k40 (46); pattern 38sts as 1st row of lace pattern; k40 (46); pattern 14sts as 1st row of lace pattern.
Work a further 7 rows in lace pattern and stocking stitch.
Divide for neck as follows:
Row 1: pattern 14sts as 1st row of lace pattern; k34
(40); k1, wfwd, sl1, k1, psso, k1, * k1,
k2tog, wind wool twice round needle, sl1, k1, psso, k1; repeat from *
twice more, k1, k2tog, turn, and leave remaining sts on a spare needle.
Row 2: k1, p3, * p2, [k1, p1] into
"made" loops of previous row, p2; repeat from *
twice more, p3, k1, p34 (40), pattern 14st.
Row 3: pattern 14sts, k34 (40); k2, wfwd, sl1, k1, psso, *
k2tog, wfwd, k2, wfwd, sl1, k1, psso; repeat from *
to last 2 sts: k2tog.
Row 4: k1, p21, k1, p34 (40), pattern 14st.
Row 5: pattern 14sts, k34 (40); k2, k2tog, *
wind wool twice round needle, sl1, k1, psso, k2, k2tog; repeat from *
twice more: k1.
Row 6: k1, * p4, [k1, p1] into made
loops; repeat from * twice more: p2, k1,
p34 (40), pattern 14st.
Row 7: pattern 14sts, k34 (40); k1, k2tog, wfwd, k1, *
k1, wfwd, sl1, k1, psso, k2tog, wfwd, k1; repeat from *
once more: k1, wfwd, sl1, k1, psso, k2tog, k1.
Row 8: k1, p19, k1, p34 (40), pattern 14st.
Row 9: pattern 14sts as 1st row of lace pattern, k28
(34); k1, wfwd, sl1, k1, psso, k1, * k1,
k2tog, wind wool twice round needle, sl1, k1, psso, k1; repeat from *
twice more, k1, k2tog, wfwd, k2tog.
Continue in pattern, decreasing 1st at neck edge on every alternate row,
and at the same time, taking an extra 6 sts into lace pattern at neck
edge on every following 1st pattern row until 49 (51) sts remain,
ending with right side facing for next row. At this point 9 (10) complete
patterns have been done from the start of the lace pattern.
Now work over all stitches in pattern, still decreasing 1 st at neck
edge on next and following 3 alternate rows. [45 (47) sts]
Next row: in pattern.
[Editor's note: I
lengthened the armhole here, kntting one further 8-row pattern to make the armhole
measure 7 inches over my tension on the smaller size (actually I think
I should have knitted the larger size); I did not decrease at the neck
edge on these additional rows. Lengthening the armhole is fine but remember
you are also lowering the V neck when you add rows here, and if you do
it too much you may end up turning "pretty low-cut style for evenings"
into something far more racy!.]
Shape shoulder as follows (right side facing):
Next row: Cast off 12 (14) sts, pattern to last 2 sts, K2tog.
Next row: in pattern.
Next row: Cast off 6 sts, pattern to last 2 sts, K2tog.
Next row: in pattern.
Repeat the last 2 rows once more.
Now, keeping the neck edge straight, continue to shape the shoulder by
casting off 6 sts at the beginning of the next, and following 2 alternate
rows. Fasten off.
With right side facing, rejoin the wool to the remaining sts and work
the other side of the neck as follows:
Row 1: k2tog, k1, * k1, k2tog, wind
wool twice round needle, sl1, k1, psso, k1; repeat from *
twice more; k1, k2tog, wfwd, k1; k34 (40); pattern 14sts as 1st
row of lace pattern.
Row 2: pattern 14sts, p34 (40); k1, p3, *
p2, [k1, p1] into "made" loops of previous row, p2; repeat from
* to last 2 sts: p1, k1.
Row 3: k2tog, * k2tog, wfwd, k2, wfwd,
sl1, k1, psso; repeat from * twice more;
k2tog, wfwd, k2; k34 (40); pattern 14.
Row 4: pattern 14, p34 (40), k1, p21, k1.
Row 5: k2tog, k3, k2tog, * wind wool
twice round needle, sl1, k1, psso, k2, k2tog; repeat from *
once more; wind wool twice round needle, sl1, k1, psso, k2; k34 (40);
pattern 14.
Row 6: pattern 14, p34 (40), k1, p2, [k1, p1] into made loops;
* p4, [k1, p1] into made loops; repeat from
* once more: p4, k1.
Row 7: k2tog, k1, k2tog, wfwd, k1, *
k1, wfwd, sl1, k1, psso, k2tog,wfwd, k1; repeat from *
once more; k1, wfwd, sl1, k1, psso, k1; k34 (40); pattern 14.
Row 8: pattern 14, p34 (40), k1, p19, k1.
Row 9: k2tog, wfwd, sl1, k1, psso, k1, *
k1, k2tog, wind wool twice round needle, sl1, k1, psso, k1; repeat from
* twice more: k1, k2tog, wfwd, k1, k28 (34),
pattern 14sts as 1st row of lace pattern.
Finish to correspond with the other side of the neck.
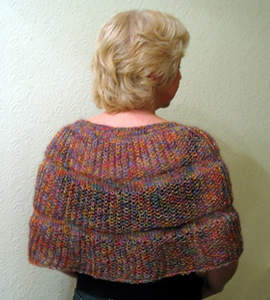
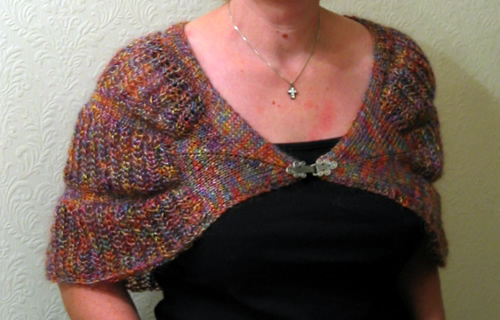
Making up - Press stocking stitch parts only on the wrong side
under a damp cloth. Join shoulder and side seams. Press seams.
 Crochet edging - Using the main colour, work a row of double
crochet (US single crochet) all round neck and sleeve edges.
Crochet edging - Using the main colour, work a row of double
crochet (US single crochet) all round neck and sleeve edges.
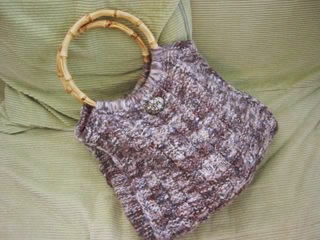
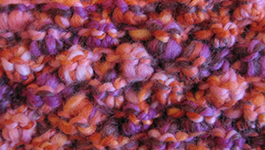
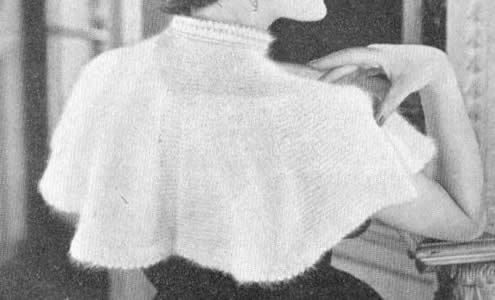
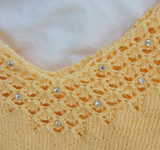
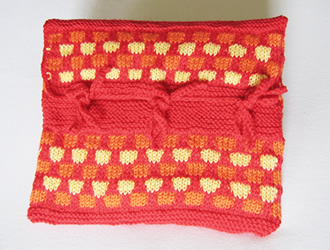
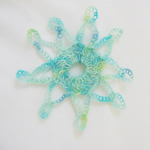
Embroidery - Using 2 strands of stranded cotton, embroider 4 petal
loop stitch flowers in centre of diamonds round neck edge and sleeves,
as shown in the photograph, then add a jewel or sequin to the centre of
each flower.
[Editor's note: I
omitted the embroidery and used 28 (a whole packet) of Gutermann beads
distributed around the neck at the front.]
|
 Making up - Press the piece lightly on the wrong side under a
damp cloth with a hot iron.
Making up - Press the piece lightly on the wrong side under a
damp cloth with a hot iron.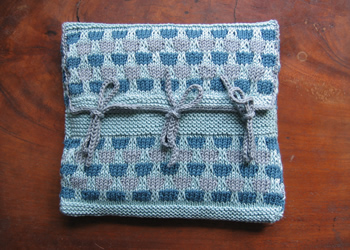
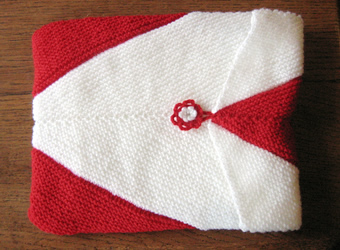
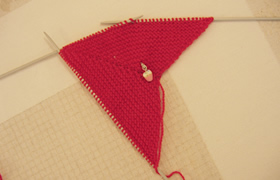

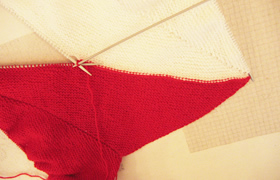
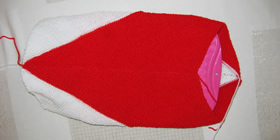
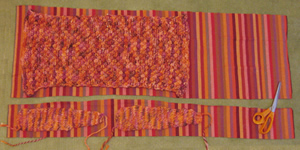
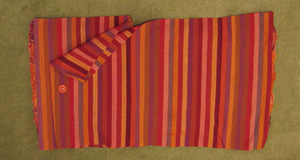
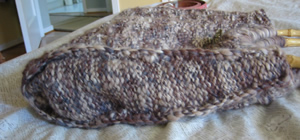
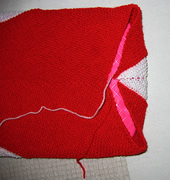 Fold up one of the ends and sew the diagonal seams in place from the wrong
side. (I sewed the tip of my white arrow for the closed end). At the other
end, make a chain using the crochet hook and sew in place as a loop for
the button at the (red) arrow tip.
Fold up one of the ends and sew the diagonal seams in place from the wrong
side. (I sewed the tip of my white arrow for the closed end). At the other
end, make a chain using the crochet hook and sew in place as a loop for
the button at the (red) arrow tip. 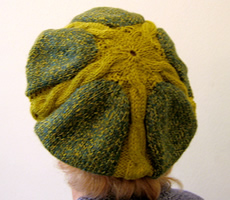

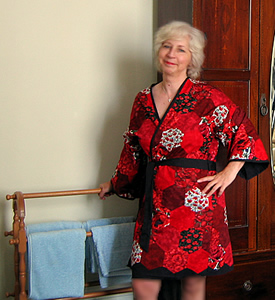
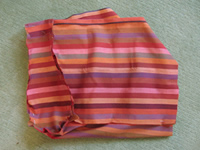
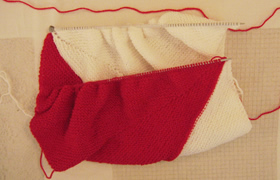
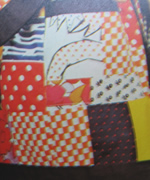 The original robe was a rather pleasing design made of uneven rectangles in geometric and spotted fabrics in 1970s oranges, yellows, and browns. However, I was seduced by the lovely red poppy fabrics in my local quilt shop in Dorking (
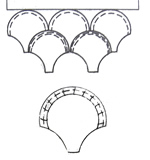 I would like to experiment with the fish-scale (or clam-shell) patch in beautiful pale blues and sea-greens to make a bath robe. There are some lovely "watery"
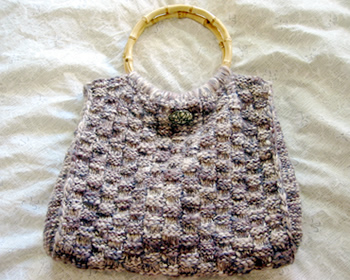
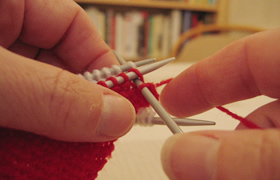
 Flower border - With No. 12 (the smaller) hook make 12 chain,
and join in a ring with a slip st.
Flower border - With No. 12 (the smaller) hook make 12 chain,
and join in a ring with a slip st.