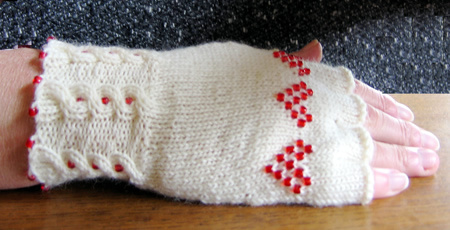
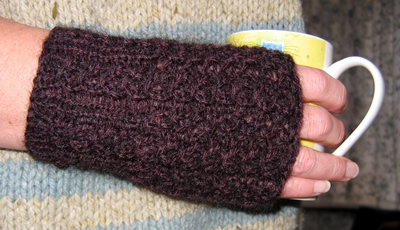
Matching Mittens
In need of an additional gift that you can speedily knit? - then this is for you. (Unless you live in the tropics, when it would probably never be for you).
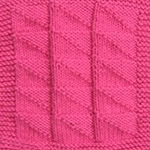
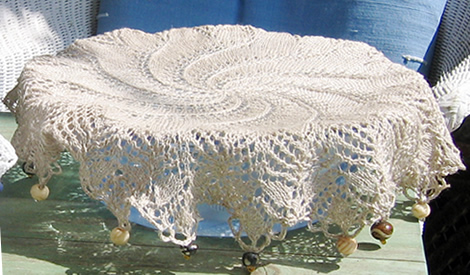
I made these mittens to go with the beret Featherbed by Louisa Harding from her book Little Cake. I like Louisa's work, and yarns; however, I made her beret in Rowan Kid Classic as I needed a particular colour, and in consequence had sufficient left to make mittens, using a similar stitch pattern.
Using Kid Classic was fine but made for an even more lightweight beret - I think I would like to try the recommended yarn for a slightly bulkier feel as intended.
The mittens are lovely and warm and .... feathery.
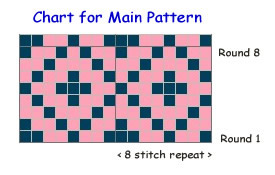
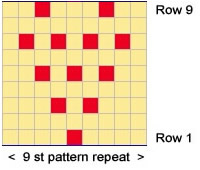
Instructions:(Make two gloves alike) Cast on 36 stitches, arrange evenly over 3 needles. 1st round: *
K3, p1, k1, p1; repeat from * 6 times to
end of round. 5th round: *
Slip1, k2, then pass the slipped stitch over the 2 knitted sts; p1, k1,
p1; repeat from * 6 times to end of round.
[30sts] Repeat rounds 5 through 8 four times more times. 21st round: as 5th. 23rd round: *
K3, p1, k2, p1; repeat from * 6 times to
end of round. 39th round: *
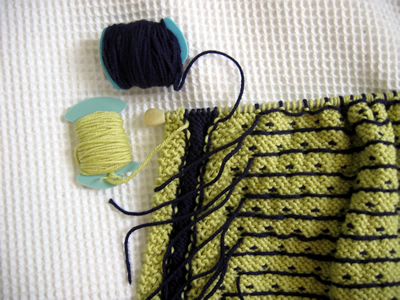
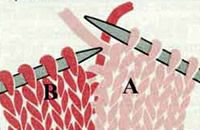
K3, p1, k2, p1; repeat from * 5 times. 40th round: Begin the next round continuing with the waste yarn, and k5. Slip these 5 sts back onto the left needle and knit them again using working yarn. Then finish the round as follows: k1, yon, p1; * k3, p1, k2tog, yon, p1; repeat from * 5 times to end of round. [43sts] 41st round: Slip1, k2, then pass the slipped stitch over the 2 knitted sts; p1, k2tog, k1, p1; * slip1, k2, then pass the slipped stitch over the 2 knitted sts; p1, k2, p1; repeat from * 5 times to end of round. [36sts] 42nd round: * K1, yon, k1; p1, yon; slip1, k1, psso; p1; repeat from * 6 times to end of round. [42 sts] Repeat rounds 23 through 26 twice more. Cast off 42 sts (not too tightly). Work the thumb. Go back to the waste yarn and carefully remove it, placing the resulting
live sts on two double-point needles; there will be 7 Now set off working in a round; starting with the 7 sts below the opening, arrange the sts as follows: Place the first 2 sts on a needle and leave for the end of the round. Join in the yarn and using another needle, k3, p1, then k2tog (the last
of the 7 lower sts and the first of the 8 upper sts), yon, then purl the
second stitch from the upper needle. This is "needle one" and
has 7 sts. 1st round: *
Slip1, k2, then pass the slipped stitch over the 2 knitted sts;
p1, k2, p1; repeat from * once to end of
round. [12sts] Cast off 14 thumb sts loosely. Making up: |
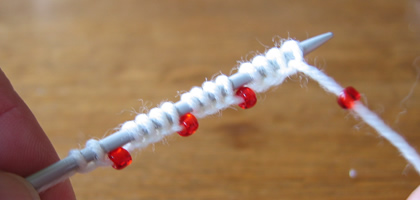
Materials1 x 50g ball Rowan Kid Classic. Small length of waste yarn in contrasting colour, (something slippery like cotton preferably). One set of 4 No. 8 (4 mm) needles. TensionKid Classic knits to a tension of 18sts and 24 rows to 4 inches on 6mm
needles. Size mattersWidth all round above thumb, 7 ins. To alter the size use larger or smaller needles as required. Abbreviationsyon: yarn over needle - makes an extra stitch which forms a small pattern hole when knitted on the next row. psso: pass the slipped stitch over. Effectively you are "knitting
2 together through back loops" Disclaimer
|