Instructions
First piece - with No. 11 needles and first colour, cast on 4
stitches.
Row 1: Inc in every st (8 sts)
Row 2: K3, inc by knitting into the front and back of the next
st - place a st marker - inc, K3 (10 sts)
Row 3: Inc, K3, inc in next 2 sts, K3, inc. (14 sts)
Row 4: K6, inc by knitting into the front and back of the next
st - place a st marker - inc, K6 (16 sts)
Row 5: Inc, K6, inc in next 2 sts, K6, inc. (20 sts)
Row 6: K9, inc by knitting into the front and back of the next
st - place a st marker - inc, K9 (22 sts)
With the right side facing for row 7 place a row marker on this side
of the work, to mark it as the right side of the work.
Then continue working as before, increasing at both ends of the row,
and in the middle, on odd (right side) rows; increase only in the middle
on even (wrong side) rows.
After a while, the stitches will become crowded and the shape hard to
manage on just 2 needles. At this point, spread the sts evenly across
two needles, discarding the centre st marker; continue to work back and
forth across the needles using a third needle.
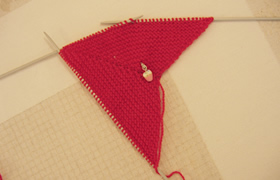
The work will take on a triangular, or arrow shape.
[Editor's note: The
original pattern is intended to form a triangle, I could not make this
happen - the wool I used may have a different rows:sts ratio than the
one recommended. This shape and resulting cover is flexible and should
suit whatever wool you use.]
Continue working until you have 105 sts on each side of the centre.
Leave the completed piece to one side without casting off. Do not break
off the wool.
[Editor's note: The
original pattern was intended for a hot water bottle. They advised to
knit until there are 139sts with the 3 ply wool. The base of the triangle
has to be long enough to wrap around your hot water bottle or heated pad;
you can choose to stop knitting when you feel it is wide enough.]
Second piece - work a second triangle (or arrow) in the contrast
colour.
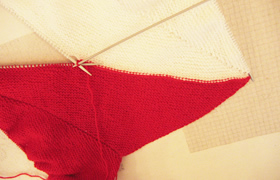
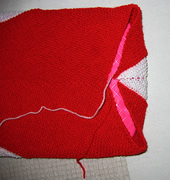
Lay the pieces out with the point of one arrow to the base corner of
the other arrow, (see picture below).

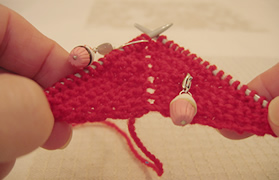
Continue working with one of the available colours (I used
the red). Cast off the two rows of knitting together, using a "three-needle cast off"(see picture below),
fairly tightly.
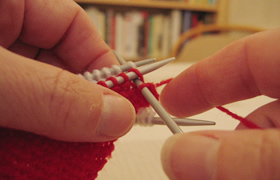
[Editor's
note: You put your working needle into the first st on the front needle
and the first st on the second needle behind; you pull your loop through
and knit both sts off the needles together. You have one st on your working
(usually right hand) needle. You repeat so there are two sts on your working
needle. You pass the first st you knitted over the second; continue casting
off in this way.]
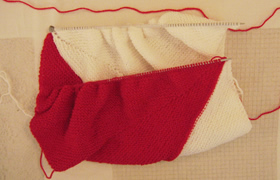
This is how it looks half way through; ideally the work should lie flat
at the cast off edge:
Next you put the other two edges together - again the point
of one arrow is next to the base corner of the other arrow, (see picture
below):
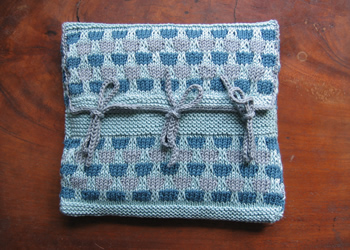
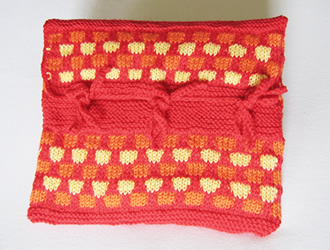
Cast off the two rows together. You are left with a sort
of tube; turn it so that the cast off edges are inside. The next picture
shows a hot water bottle placed in the tube.
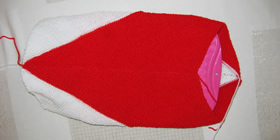
The arrow points are arranged centre front and back.
 Fold up one of the ends and sew the diagonal seams in place from the wrong
side. (I sewed the tip of my white arrow for the closed end). At the other
end, make a chain using the crochet hook and sew in place as a loop for
the button at the (red) arrow tip.
Fold up one of the ends and sew the diagonal seams in place from the wrong
side. (I sewed the tip of my white arrow for the closed end). At the other
end, make a chain using the crochet hook and sew in place as a loop for
the button at the (red) arrow tip.
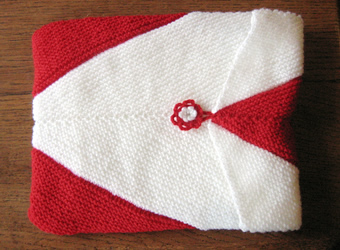
Place your "replacement core" in the cover and fold over the
top of the cover to an appropriate position and mark the place for the
closing button.
Make a crochet flower to act as a button, and sew in place.
[Editor's note: You
know how to make a crochet flower without instructions don't you?
O, all right then; this is what I did...]
Crochet flower - begin by making a slip loop with
your first colour as if you were starting a crochet chain, and crochet
into this loop for your first round. Ensure that the loop "slips"
(can be tightened) from the tail end of your work, not the working end.
Round 1: using the first colour, crochet 8 dc into
your loop; adjust the slip loop until the stitches fit nicely.
Round 2: chain 3, (1 htr 1ch) into each of the 8 dc then ss join
to the first 3ch.
Round 3: 1dc into first chain space, (3ch, 1dc into next ch sp) to end
of round, 3ch, ss into first dc. Fasten off.
Make a second flower in the second colour.
Round 1: using the second colour, crochet 8 dc into
your loop; adjust the slip loop until the sts fit nicely.
Round 2: ss into first dc, (3ch, ss into next 1dc) to end of round,
3ch, ss into first dc. Fasten off.
Place second flower on top of first, and sew through both
layers, onto the cover at the marked position for the button.
|
 Making up - Press the piece lightly on the wrong side under a
damp cloth with a hot iron.
Making up - Press the piece lightly on the wrong side under a
damp cloth with a hot iron.