Instructions
Instructions are for 2 sizes with the larger size given in brackets,
(bold blue); where one set of figures is given this applies to both sizes.
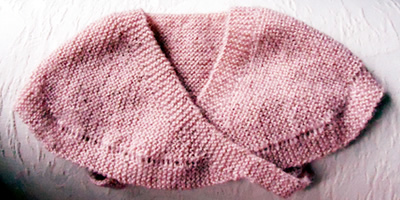
Front
**
With No 12 (2¾mm) needles cast on cast on 118 (124)
sts and work 1½ (2½) inches
in k1/p1 rib, increasing 10 (12) sts
evenly across the last row. [128 (136)
sts]
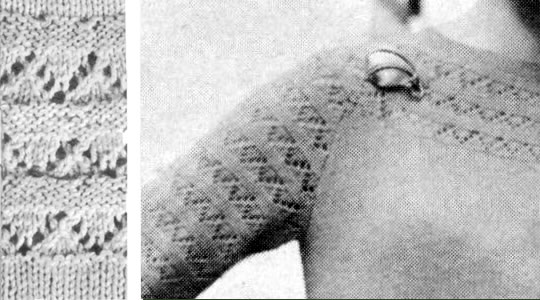
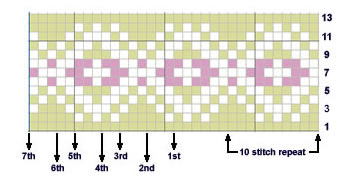
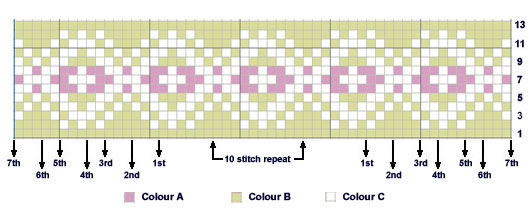
Change to No 10 (3¼mm) needles and pattern as follows:
1st row (right side facing): P21
(25) *
k2, p7, p2tog, m1k, k1, m1k, p2tog, p7; repeat from *
to last 23 (27) sts; k2, p21 (25).
2nd row: K21 (25),
*p2, k8, p3, k8; repeat from *
to last 23 (27) sts, p2, k21
(25).
3rd row: p21
(25), * k2, p6, p2tog,
m1k, k3, m1k, p2tog, p6; repeat from *
to last 23 (27) sts; k2, p21(25).
4th row: k21
(25), *p2, k7, p5, k7;
repeat from * to last 23
(27) sts; p2, k21 (25).
5th row: p21 (25),
* k2, p1, p2tog, m1k, k1, m1k, p2tog,
p1, m1k, k1, slip 1, k2tog., psso, k1, m1k, p1, p2tog, m1k, k1, m1k, p2tog,
p1; repeat from * to last 23 (27)
sts., k2, p21 (25).
6th row: k21 (25),
* p2, k2, p3, k2, p5, k2, p3, k2;
repeat from * to last 23 (27)
sts, p2, k21 (25).
7th row: p21 (25),
* k2, p2tog, m1k, k3, m1k, p2 tog.,
m1k, k1, slip 1, k2tog, psso, k1, m1k, p2tog, m1k, k3, m1k, p2tog; repeat
from * to last 23 (27)
sts, k2, p21 (25).
8th row: k21 (25),
*p2, k1, p5, k1, p5, k1, p5, k1; repeat
from * to last 23 (27)
sts, p2, k21 (25).
9th row: p21(25),
* k2, p1, m1p, k7, slip 1, k2tog,
psso k7, m1p, p1; repeat from * to
last 23(27) sts, k2, p21(25).
10th row:
k.21 (25), *
p2, k2, p15, k2; repeat from * to
last 23 (27) sts, p2, k21 (25).
11th row: p21(25),
* k2, p2, m1p, k6, slip1, k2tog, psso,
k6, m1p, p2; repeat from * to last
23 (27) sts, k2, p2l (25).
12th row: k21 (25),
* p2, k3, p13, k.3; repeat from *
to last 23(27) sts, p2, k21 (25).
13th row: p21 (15),
* k2, p3, m1p, k5, slip 1, k2tog,
psso, k5, m1p, p3; repeat from * to
last 23 (27) sts, k2, p21(25).
14th row: k21(25),
* p2, k4, p11, k4; repeat from *
to last 23 (27) sts, p2, k21(25).
15th row: p21(25)
* k2, p4, m1p, k4, slip1,
k2tog, psso, k4, m1p, p4; repeat from *
to last 23 (27) sts, k2, p21(25).
16th row: k21(25,
* p2, k5,p9, K 5; repfrom *
to last 23 (27) sts, p2, k21(25).
17th row: p21(25),
* k2, p5, m1p, k3, slip 1, k2tog,
psso, k3, m1p, p5; repeat from * to
last 23 (27) sts, k2, p21 (25).
18th row: k21 (25),
* p2, k6, p7, k6; repeat from *
to last 23 (27) sts, p2, k21 (25).
19th row: p21 (25),
* k2, p6, m1p, k2, slip 1, k2tog,
psso, k2, m1p, p6; repeat from * to
last 23 (27) sts, k2, p21 (25).
20th row: k21(25),
* p2, k7, p5, k7; repeat from *
to last 23 (27) sts, p2, k21 (25).
21st row: p21 (25),
* k2, p7, m1p, k1, slip 1, k2tog,
psso, k1, m1p, p7; repeat from * to
last 23 (27) sts, k2, p21 (25).
22nd row: k21 (25),
* p2, k8; p3, k8; repeat from *
to last 23 (27) sts, p2, k21 (25).
23rd row: p2l (25),
* k2, p8, m1p, slip 1, k2tog, psso,
m1p, p8; repfrom * to last 23 (27)
sts, k2, p21 (25).
24th row: k21(25),
* p2, k19; rep, from *
to last 23 (27) sts, p2, k21 (25).
25th row: p21(25),
* k2, p19; repeat from *
to last 23 (27) sts, k2, p21(25).
26th row: as 24th.
27th -30th rows: as 25th and 26th
rows worked twice.
These 30 rows form the pattern.
Continue straight in pattern until 3 patterns and 20 rows have been completed.
With right side facing, continue in pattern and
shape armholes by casting off 5 sts at beg, of next 2 rows,
then decrease 1 stitch. at each end of the next and every following alternate
row until 100 (104) sts remain. Work
one more row in pattern.
**
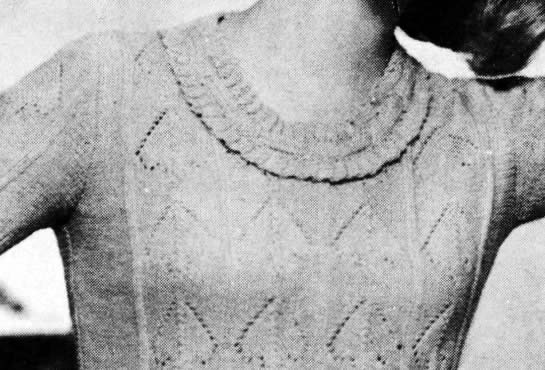
With right side facing, shape neck as follows:-
Next row: pattern 43 (45),
turn and leave remaining stitches on a spare needle.
Next row: work in pattern.
Now decrease 1 stitch at the neck edge on the next and every alternate
row until 28 (30) sts remain.
Keeping continuity of pattern work straight until 5 patterns and 28 rows
have been completed.
With right side facing, shape shoulder by casting off 9 (10)
sts at the beginning of the next and following alternate row, then 10
(10) sts at the beginning of the following
alternate row.
With right side facing, rejoin wool to remaining stitches, cast off centre
14 sts, pattern to end. Finish to correspond with first shoulder.
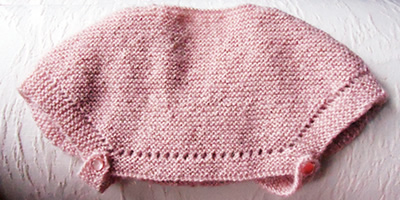
BACK SLEEVES
Back
Work as for front from ** to**
; [100 (104)] sts
Continue straight in pattern until back matches front at armhole edge.
With right side facing, shape shoulders by casting off 9(10)
sts at the beginning of the of next 4 rows, then 10 (10)
sts at beg, of the next 2 rows. Cast off remaining 44 sts.
Sleeves
With No 12 needles, cast on 80 (80)
sts and work 1¼ inches in k1/p1 rib, increasing 4 sts evenly across
on last row. [84(84) sts] Change to
No 10 needles and pattern arranging stitches as follows:
1st row (right side facing): p20,
[k2, p7, p2tog, m1k, k1, m1k, p2tog, P7] twice, k2, P20.
2nd row: k20, [p2, k8, p3, k8] twice,
p2, k20. .
Continue thus keeping continuity of lace pattern until 20 rows have been
completed.
With right side facing, continue in pattern and shape top by casting
off 3 sts at the beginning of the next 2 rows, then decrease 1 stitch
at each end of the next and every following alternate row until 38 sts
remain. Work one row.
Now decrease 1 stitch at each end of every row until 20 sts remain. Work
one row and cast off.
Neck Frill
With No 12 needles, cast on 16 sts.
1st row (right side facing): k5,
p6, k5.
2nd row: p5, turn, k5.
3rd row: p16.
4th row: k5, turn, p5.
5th and 6th rows: as 3rd and 4th rows.
7th row: k5, p6, k5.
8th row: p5, turn, k5.
9th row: k5, p1, cast off 4, p1, k5.
10th row:
p5, turn, k5.
11th row: P6, cast on 4, p6.
12th row: k5, turn, p5.
13th row: p16.
14th row: k5, p6, k5.
15th - 18th rows: as 1st and 2nd rows
twice.
19th row: p16.
20th row: k5, turn, p5.
21st - 28th rows: as l3th-20th rows.
Repeat rows 5-28 inclusive 16 times more, then rows 5-20 once. Cast off.
With No. 12 needles, cast on 5 sts and work 23 ins. k1, p1 rib, rows
on right side having a k1 at each end. Cast off.
To Make Up
Press work very lightly under a damp cloth..
Join shoulder, side, and sleeve seams; insert sleeves.
Join neck frill neatly; pin into position all round neck so that garter-
stitch in the centre of the border and the frill overlap on to main work.
Catch down neck edge just below top frill on wrong side, then catch down
other edge to main work at garter-stitch border at back of lower frill,
(so stitching is hidden by the frill). Thread ribbed strip through slots
in neck border and join neatly.
Press all seams.
|
Materials
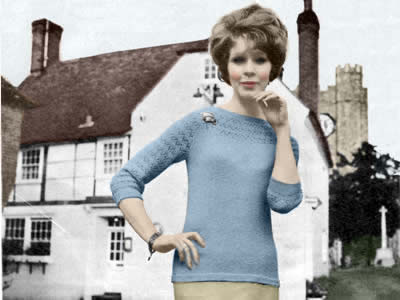
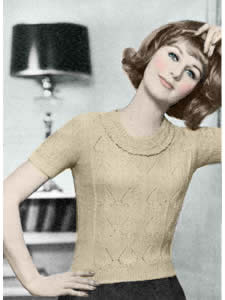
Original materials called for: 8 (9) ozs
Patons Nylox Knitting 4-ply in "Palamino"
[Editor's note: I'm guessing a golden beige.]
A pair each Nos 12 and 10 (2¾mm and 3¼) needles.
Tension
28 sts and 36 rows to 4 inches over stocking-stitch on No 10 needles.
Size matters
Original sized for bust 34-35 (36-37)
inches; length from top of shoulders: 20½ (21½)
inches; sleeve seam: 3½ (3½)
inches.
Abbreviations
m1p: pick up loop lying before next stitch and purl into back
of it.
m1k: pick up loop lying before next stitch and knit into back
of it.
psso: pass the slipped stitch over.
k2tog or p2tog: knit or purl 2 sts together (decrease one stitch).
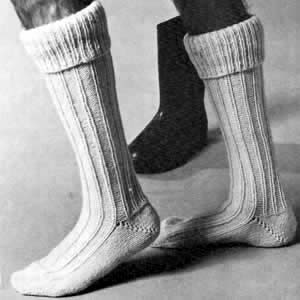
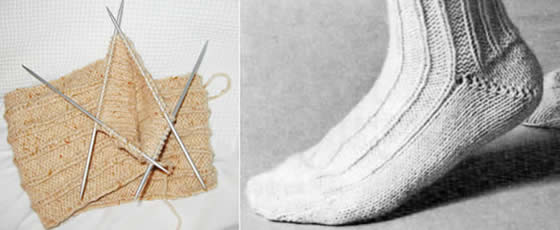
A word on the wool.
Patons Nylox was designed as a sock wool with 25% nylon as the name implies.
It was quickly appropriated for children's items as it was hard wearing
and fine weight. By the 1960s, nylon was the material of choice, producing
almost indestructable knitwear in brilliant non-fade colours - so this
versatile nylon-rich wool was an ideal choice for lighter-weight summer
clothes.
[Editor's note: Nylon lost its glamour in the1970s when we all went back
to nature - everything in moderation, I say.....]
Any standard 4ply yarn is suitable, and currently there are a lot of
them about in a good range of colours for grown-ups, such as Debbie
Bliss Rialto 4ply, Rowan
Pure Wool 4ply, and Susan
Crawford's Excelana 4ply aimed at vintage knitters.
Disclaimer
(well...almost)
In transposing any pattern it is always a risk that errors will be introduced,
in spite of dedicated proof reading.
If you have any problems with this pattern, please
and I will try and assist.
|