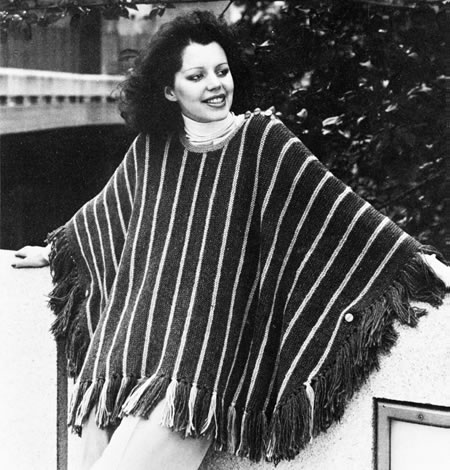
Poncho Capes - striped or plain...
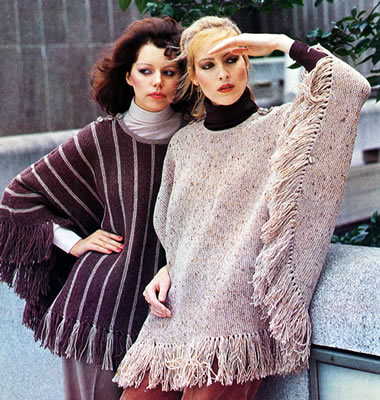
Ponchos are being cited as a trend at the moment - and also apparently: fringes. So here you have the perfect combination. From the 1970s (of course) this is a rather good plain shape and very simple to knit all in garter stitch - if you like that kind of thing, or yearn to recreate a piece of history.
"See how cool I am with my striped poncho in natural earth tones..."
"Look! What's that over there?"
"Whatever you say, I'm not looking - you are merely trying to compensate for your lack of cool stripeyness."
Instructions.Instructions given for striped version with pattern rows as follows: 1st - 16th rows: knit in main shade. These 20 rows form the stripe pattern. The plain version is worked in exactly the same way but using only one
colour. Back and Front (alike)(Worked sideways, starting at left side for Back and right side for Front). With No 8 (4mm) needles and main shade (MS), cast on 58 stitches and joining in contrast (C) as required, work in garter stitch (every row knit) and stripe pattern throughout, starting with 2nd pattern row, shaping as follows: 1st and following alternate rows (wrong side):
Knit. Now increase 1 stitch at the beginning of the next row, and at the same edge on every row until there are 106 stitches. Work 1 row. Increase 1 stitch at the beginning of the next and every alternate row, until there are 112 stitches. Work 3 rows. Now increase 1 stitch at the beginning of the next and every 4th row, until there are 117 stitches, then at the beginning of every following 6th row until there are 123 stitches. Work 80 rows, thus ending with wrong side facing for next row. Shape neck by decreasing 1 stitch at the beginning of the next row and at the same edge on every row until 113 stitches remain. Now decrease 1 stitch at the end of the next and every alternate row until 108 stitches remain. Work 34 rows. Increase 1 stitch at the beginning of the next and every alternate row until there are 113 stitches. Work 1 row. Now increase 1 stitch at the beginning of the next row and at the same edge on every row until there are 123 stitches. Work 80 rows. Decrease 1 stitch at the end of the next and every 6th row until 116 stitches remain, then at the end of every following 4th row until 111 stitches remain. Work 1 row. Now decrease 1 stitch at the end of the next and every alternate row until 106 stitches remain. Work 1 row. Decrease 1 stitch at the end of the next row and at the same edge on every row until 90 stitches remain. Work 1 row. Cast off 2 stitches at the beginning of the next row, then 3 stitches at the beginning of the following alternate row. Work 1 row. Now cast off 4 stitches at the beginning of the next and following 2 alternate rows, then 5 stitches at the beginning of the following 3 alternate rows. Cast off the remaining 58 stitches.
Borders and Making UpDo not press. Back Neck Border: Front Neck Border: Using a flat seam, join shoulder seams leaving 3 inches open at each side of the neck. Back shoulder opening borders: Front shoulder opening borders: To make a button loop: 3 chain, miss 2 dc, dc into next dc. Neatly catch down the base of the borders, front over back. Cut remaining yarn into 10 inch lengths and taking 4 strands together
each time, knot all round outer edge, matching main shade to main shade
and contrast to contrast, (as in the photo), to form a fringe. Sew two sets of buttons in position as in photograph (1 button on back,
the other to correspond on front).
Sew remaining 6 buttons on shoulders to correspond with button loops. Press seams. |
Materials
|
 |
