Yacht Club Chic

Casual sailing sweater, (designed in Italy, apparently), for that 1950s holiday mood. I think this is an outfit for the boathouse, or for the yacht where the chap does all the sailing stuff! I can't say how it would look covered in a life jacket, but it really is a delightful little sweater. The fit (smaller size) is excellent on me (a chubby UK size 12, US size 6), and it looks great despite the rules about short people and horizontal striping.
InstructionsBack and front are mainly knitted alike, but there is some additional
detail on the welt at the front. BackWith No. 12 needles, cast on 112 (120) stitches in navy, and work 2 inches (20 rows) in k1, p1 rib. ** Join in white and continue in st st stripes as follows: Row 1: right side facing, knit in white. Do not turn the work,
but slip the sts back to other end of the needle. Continue in the striped pattern, and shape the sides by increasing 1
st at each end of the next and every following 6th row, until there are
134 (142) sts. Shape armholes as follows: Shape shoulder as follows (right side facing): Next row: Rib to end, picking up loop where row was turned each
time and knitting it together with the the next st to avoid a hole Cast off right across very loosely in rib. FrontWith No. 12 needles, cast on 140 (148) stitches in navy, and work 2 inches
(20 rows) in k1, p1 rib. Work as for back from ** to **. [Editor's note: I adapted the front neck to give it some additional shaping. See "Adapting the Front Neck" section] To make upPress parts carefully on wrong side under a damp cloth. With navy wool
and number 12 needles, continue in rib on each of the sets of 14 sts on
safety pins until piece measures 5 inches from start. Cast off in rib.
Join these ribbed pieces to sides of front. [Editor's note: This is to stop the edges of the armholes from curling over, as there is no additional knitted edging.] Now fold neck edge of front over to back along shoulder edges by ½ inch. Sew two buttons on each shoulder through double thickness to secure shoulders. Press seams. |
MaterialsOriginal pattern calls for 4oz of 3ply in light navy and 1 oz each in
lipstick red and white. One pair of No 12 double pointed needles (or a circular needle) and one pair No 11 needles. 8 large pearl buttons and bias binding. Tension32st and 40 rows to 4 inches (10cm) on No 12 (2½ mm) needles,
using the 4 ply wool. (original pattern calls for No 11 needles and 3ply). Size mattersInstructions for two slim fitting sizes: 34-35 (36-37) inch bust; length from top of shoulders 20½ (20½) inches. A word on the wool.For the navy and white I used a vintage Hayfield soft cotton 4ply, and
for the red I used Jaeger Sienna (also a pure cotton 4ply). I used 11
and 12 needles which are a size smaller needles than stated in the original
pattern, and with these I managed to achieve the required tension. Disclaimer
|
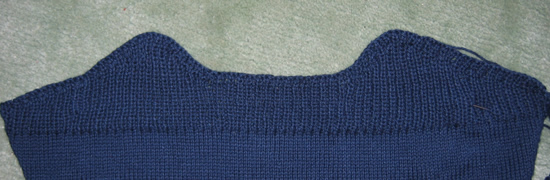
Adapting the front neck
The original pattern is a slash neck, the same at the back as the front. I adapted the front neck to lower it slightly and add shaping. [Editor's note: This adaptation used slightly less wool that the slash neck version where I had only inches left, knitting the smaller size. Adapting the neckline left me with just enough to sew up!]
Replace the shoulder shaping section for the front as follows:
Shape shoulder (front adaptation) as follows (right side facing):
Next 2 rows: Rib to the last 4 sts, turn; rib to the last 4 sts,
turn.
Next 2 rows: Rib to the last 8 sts, turn; rib to the last 8 sts,
turn.
Next 2 rows: Rib to the last 12 sts, turn; rib to the last 12 sts,
turn.
Divide for neck as follows:
Next row: Rib 40(42) sts; turn and leaving the rest of the sts
on a spare needle. Complete each side of the neck separately.
Next row: K2tog; rib to the last 16 sts, turn.
Next row: Rib to the last 2sts; k2tog; turn.
Next row: K2tog; rib to the last 20sts, turn.
Next row: Rib to the last 2sts; k2tog; turn.
Next row: K2tog; rib to the last 24sts, turn.
Continue thus, turning 4 stitches short of the shoulder edge each time
as for the back, and decreasing at neck edge on every row, until you complete
the row:
Next row: Rib to the last 36 sts, turn. Then:
Next row: Rib to the last 2sts; k2tog; break wool.
Rejoin the wool to the sts on the spare needle at centre neck. Rib across
all sts on spare needle to the last 16 sts, turn.
Next row: Rib 38(40) sts, k2tog; turn, and complete this side of
the neck separately, leaving the centre 28 (30) sts on a spare needle.
Next row: K2tog; rib to the last 20sts, turn.
Next row: Rib to the last 2sts; k2tog; turn.
Next row: K2tog; rib to the last 24sts, turn.
Continue thus, turning 4 stitches short of the shoulder edge each time
as for the back, and decreasing at neck edge on every row, until you complete
the row:
Next row: Rib to the last 36 sts, turn. Then:
Next row: (wrong side facing) rib across right shoulder to the last 2sts; k2tog; do not break wool.
Pick up and rib all sts across the neck: pick up the approximately 12
sts** down
right side of neck, rib across centre 28 (30) sts, pick up approximately
12 sts** up
left hand side of neck; then rib across all sts of right shoulder, picking
up loop where row was turned each time and knitting it together with the
the next st to avoid a hole.
[**Editor's note:
make sure you pick up the right number of sts down sides of neck to ensure
continuity if the k1 p1 rib - that is and even or an odd number.]
Next row: Rib back across all sts, picking up loop where row was
turned each time and knitting it together with the the next st as before,
across the right shoulder..
Cast off right across very loosely in rib.
Adapting the size
I have not tried this myself, but it seems to me that it would be moderately easy to adapt the size by simply adding stitches. To adjust the length, make additional stripes in the navy and the red striped sections evenly, both above and below the armhole decreasing, as required. To gauge how much to increase, you can use a sleeveless top that fits you well and measure the overall length, as well as the length of the armhole.
