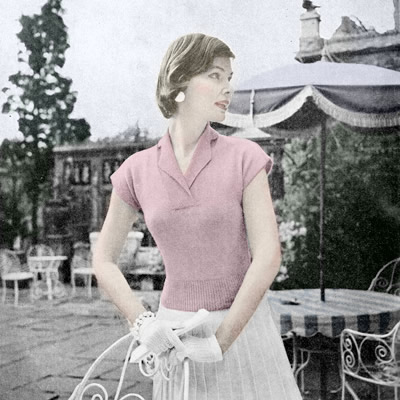
Cap-sleeve summer top
More....
Please note:
Patterns are for
Personal Use Only
You may freely circulate patterns with the Copyright Statement Preserved.
See terms of use.

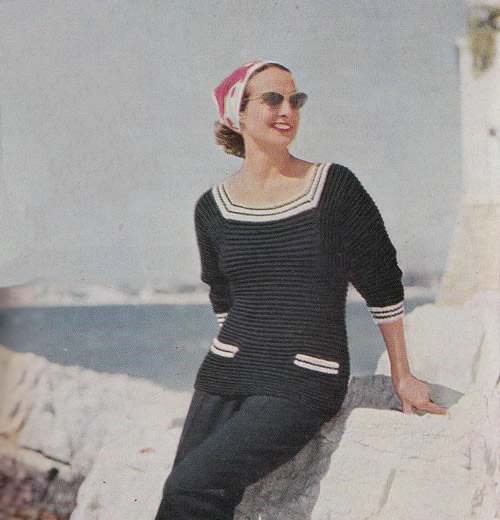
An understated casual top for summer from the 1950s. "Suits all sizes" - but only up to a 38 inch chest!
Instructions. Instructions for larger sizes are given in brackets. Where one set of
figures is given this applies to all sizes. Back** With right side facing, change to No 11 (3mm) needles and stocking stitch,
starting with a knit row, and shape sides by increasing 1 stitch at each
end of the 15th and every following 6th row until there are 132 (140
: 148) stitches. Here shape the underarm by increasing 1 stitch at each end of the next
8 knit rows: [148 (156 : 164)
sts] With right side facing, shape shoulders by casting off 4 (8
: 10) stitches at the beginning of the next
2 rows, then 10 (10 : 10)
stitches at the beginning of the next 10 rows. FrontWork as for back from ** to **
: [132 (140 : 148)
sts] Next row: Increase in 1st stitch, k55 (59 : 63), turn, and leave the remaining stitches on a spare needle. Continue on these stitches for the first shoulder, increasing at the
underarm at the beginning of the next 7 knit rows: [64 (68
: 72) sts]. Continue in stocking stitch, shaping neck edge by knitting 2 stitches together at the end of the next and every following 6th row 10 (10 : 12) times in all. Work a few rows straight until sleeve edge measures 6½ (6½ : 7) inches. With right side facing, shape shoulder by casting off 4 (8 : 10) stitches at the beginning of the next row, then 10 (10 : 10) stitches at the beginning of the following 5 alternate rows at the armhole edge With right side facing, return to the remaining stitches, slip the centre
20 (20 : 20)
stitches on a spare needle, knit to the last stitch, increase in the last
stitch. CollarFor all sizes: Join shoulder seams. Right half: With No 11 needles k20 from spare needle at the front, increasing 1 stitch in the centre to 21 stitches, and work in moss stitch as follows: 1st row: k1, (p1, k1) 9 times, k2. Repeat the last 2 rows 3 times more, then the 1st row again. Left half: With No 11 needles, cast on 21 stitches. 1st row: k1, (p1, k1) 9 times, k2. Repeat the last 2 rows 4 times more, then finish to correspond with right half. To Make UpPress parts lightly on wrong side under a damp cloth, avoiding ribbing.
With right side facing and No 13 needles, pick up and knit 124 (124
: 128) stitches along each sleeve edge. Work
4 rows stocking stitch. A Word on the Wool3 ply weight might be a bit hard to find (outside baby wools) - but I
believe you could get the right tension by varying needle sizes and using
the laceweight yarns such as Rowan
Fine Lace (80% baby alpaca, 20% merino; 400m per 50g) or Debbie
Bliss Rialto Lace (100% merino; 390m per 50g). Jamiesons have an excellent range of colours in "2ply laceweight" which states: This yarn can be used in vintage patterns which call for "3ply yarns". . Susan Crawford offers a lovely range of bright colours in Fenella which is designed for use with 3 ply vintage patterns. As usual with vintage patterns if you are substituting, you cannot rely on the quantities given in the instructions. |
Materials6 (6 : 7) ozs 3 ply crepe in "Flamingo" A pair each Nos 11 (3mm) and 13 (2¼mm) needles. Tension32sts x 40 rows to 4 ins in stocking stitch on No 11 needles. Size mattersTo fit 33-34 (35-36 : 37-38) inch chest; length from top of shoulders 20 (20½ : 21) inches. Abbreviationsstocking stitch: one row knit and one row purl, ("stockinette"). k2tog or p2tog: knit or purl 2 sts together (decrease one stitch). tbl: through back loops. Disclaimer
|
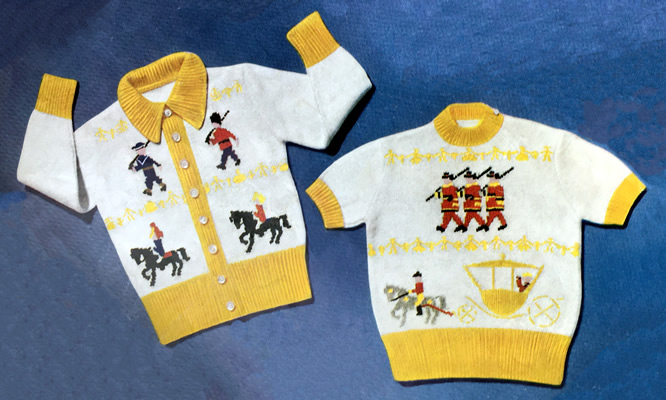
Just to mark the occasion, for a child (from 3-4 years apparently): a cute little twin set with royal processional motifs.
Even if you don't make this twinset for the event, it has some cute military motifs, which cleverly catch the essence of the servicemen depicted despite the simplicity of the design.
This pattern was created to mark the Queen's coronation in 1953 and depicts the historic Gold State Coach; the latter will also be used by King Charles - but only for the somewhat shorter procession back to the Palace after his Coronation on May 6th. For the outward journey, the more modern and altogether more comfortable Diamond Jubilee Coach will be used.
Instructions:Motifs may be worked in Fair Isle or embroidered when garment is completed. ChartsThe charts are included with the pattern instructions below, but for a full version of the charts you can right click on the icon below and choose "save link as" or "save target as" (browser dependent options) to download and save a pdf file. If you want to view chart images full size in the browser then right click on the image and choose "view image". THE JUMPERJumper Front Using No 13 needles and gold (L) wool cast on 106 stitches. Commence 1st panel: 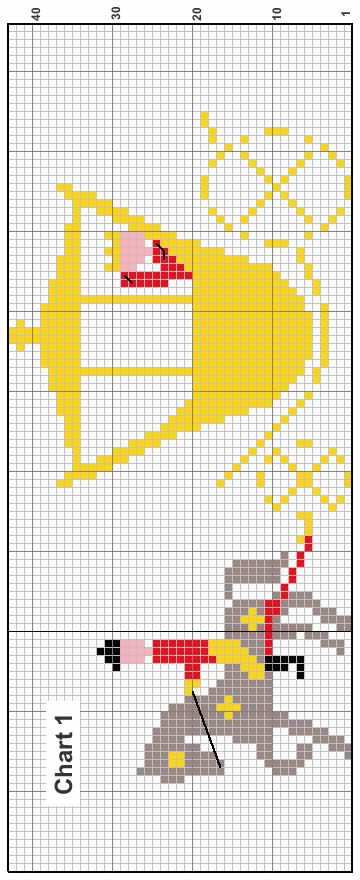
Work 1 row in white (W). Commence 2nd panel: 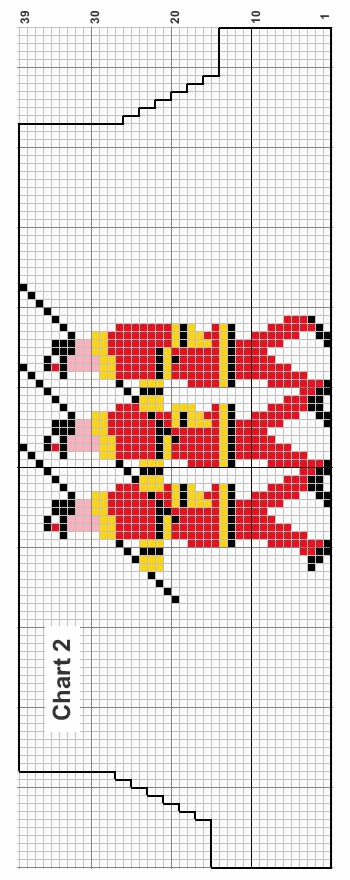 Shape the Armholes Continuing to work from chart, cast off 6 stitches at the beginning
of the next 2 rows. Join in L. Shape the Neck Now work on and finish each side separately: Shape the Shoulder: Rejoin the wool to the other side at the neck edge and complete to match the 1st side. Jumper Back Using No 13 needles and L wool cast on 106 stitches. Shape the Armholes: Shape the Shoulders: Jumper Sleeves (both alike)Using No 13 needles and L wool, cast on 60 stitches. Work until sleeve measures 2½ inches from cast on edge, ending with a purl row. Shape Top: Jumper Neck BandJoin the right shoulder seam. Making up the jumperPress or block each piece separately with a warm iron and a damp cloth,
omitting the ribbing. THE CARDIGANInstructions have been given for a boys' cardigan. Cardigan BackWork as for back of jumper. Cardigan Right FrontWith No 13 needles and L. wool cast on 62 stitches. Commence 1st panel:
Work 6 rows in W. Commence 2nd panel:
Shape the Armhole: Join in L and continue as follows: Shape the Neck: Shape the Shoulder: Cardigan Left FrontWith No 13 needles and L. wool cast on 62 stitches. Continue in rib, making one more buttonhole 1½ inches from the 1st
until work measures 3 inches from cast on edge ending at centre-front
edge. Commence 1st panel.
Join in L, and continue as follows : 7th row: *
3W, 3L, 9W, 3L, 6W; repeat from * once more.
Shape the Armhole: Work 7 rows in W ending with a knit row. Continue in W Cardigan Borders Left front border: [Editor's note: In case of tension variations, you may wish to make the plain border first - which will be the right border for a boy and the left border for a girl - so you can see how many rows you need to fit nicely up the front; you can then work out how best to place the buttonholes evenly up the other side.] The CollarUsing No 13 needles and L wool cast on 137 stitches. Cardigan Sleeves (both alike)Using No 13 needles and L wool cast on 50 stitches. Shape top as for jumper sleeve instructions. Making up the cardigan Press each piece separately with a warm iron and damp cloth, omitting
the ribbing. |
Materials3 ply yarn: Jumper: Cardigan: Pair each of No 12 (2¾mm) and No 13 (2¼mm) needles. Tension36sts and 48 rows to 4 inches. Size mattersInstructions for 3-4 years. A word on the woolSusan Crawford, who specialises in vintage knits, offers lovely Fenella wool which "knits up to that elusive vintage ‘3 ply’ tension". Jamiesons have an excellent range of colours in "2ply laceweight" which states: This yarn can be used in vintage patterns which call for "3ply yarns". John Arbon has some wonderful laceweight that looks suitable. Disclaimer
|
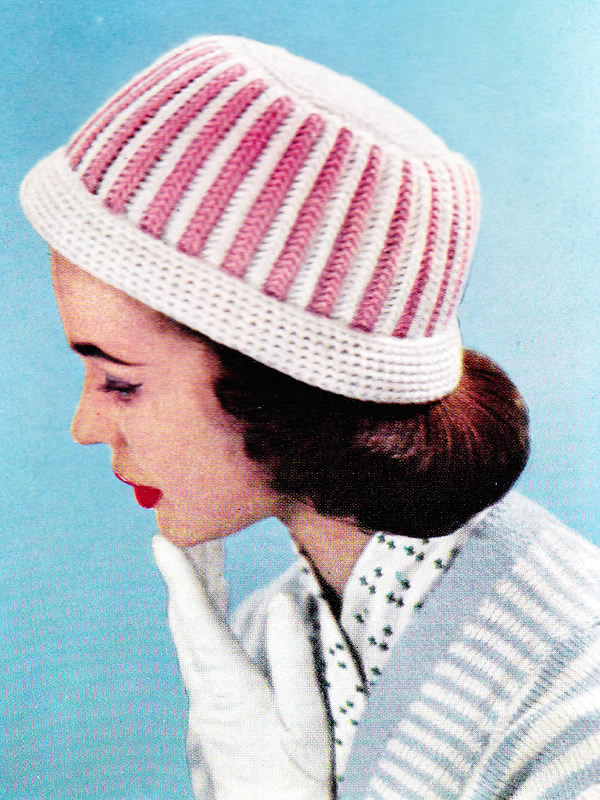
Knitting and crochet combine in this eye-catching candy floss striped hat which can be quickly put together in double knitting weight yarn.
This hat was designed for smart summer holidays (in the UK) in the 1950s, though it's hard to imagine wearing a woolly hat in the summer these days (even in the UK) - which is more a comment on fashion than global warming. However - easy to adapt the colour scheme for autumn and winter days.
Instructions.The main part of the hat is knitted in a fancy striped stitch (which is easier to do than to describe - see below); the top of the crown and brim are in simple double crochet. CrownBegin with the striped part: with pink wool, on No 10 needles, cast on 33 stitches and work in pattern thus: 1st row: k1, *
insert needle into next stitch and knit, winding wool twice round needle;
repeat from * to end. Next row: As 3rd in white. 3rd row forms pattern and this row is now repeated throughout, working
two rows in each shade, ie your next 2 rows will be in pink Continue thus until you have 26 pink stripes. Next 2 rows: in white. Cast off in white as follows: With No 8 hook and white wool, make 3 chain, join into a ring with a 1st round: *
2 dc in 1 dc; repeat from * to end.
[12 dc] Fasten off. Brim:With white wool and No 5 hook, make 101 chain fairly loosely. Join into
a ring with a slip stitch. Next round: *
1 dc in 1 dc but going through the back loop only of each dc; repeat from
* to end. To Make UpPress top of crown only. Don hat with best frock and cotton gloves, and go for a promenade on the sea front. |
Materials
|
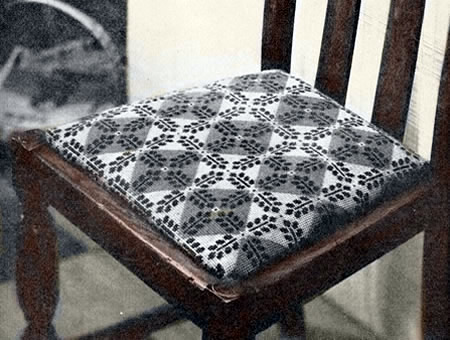
This is a needlepoint design with instructions below. However, needlepoint charts can be used for colourwork in knitting, so I also discuss the possibility of adapting it to use for a "modern" cushion cover.
This chair on which the cover is shown seems far from modern for the 1950s when this pattern was published, but this might have been a way to try an update it. They reassure us: "you can extend this design as required to fit any chair or stool top; with careful colour choosing the pattern would suit period pieces as well as modern furniture".
This particular chair seems very similar to my Mother's dining set purchased in 1938, where the seat is wider at the front that the back (so not quite square), but the chair's construction seems a bit more solid, so it is probably a little older.
Sadly, his type of brown furniture is even less popular today than it was when this was first published - but upcycling with chalk paint and a colourful fabric is always a possibility.
Needlepoint embroidery instructions.As I said in the introduction - these are the instructions for needlepoint, with notes on using the chart for a knitted cushion at the end. Make a paper pattern of seat, and draw round the outline, centring the
pattern, on the canvas. Mark the centre line in each direction and start
the diamond pattern on the centre point.
The main design is worked in tent-stitch (a slanting-stitch over one
Press, stretch and mount finished tapestry as required. Mounting TapestryBefore mounting your work, press it carefully on wrong side under a lightly
damped cloth. If, through not working in a frame, the tapestry has got
out of shape, pin out face downwards on a clean cloth, stretching it to
the correct shape; press the wrong side carefully under a damp cloth,
and leave pinned out for 24 hours. To mount, lay the tapestry flat, wrong side up, then place the seat pad
on top. Bring tapestry up sides of padded cushion part and fix temporarily
with lots of ordinary sewing pins, turning to the front again and again
to check the correct positioning of the design. When it is firmly held with pins all round, fold the surplus edges of
the canvas over the wooden frame of the pad, and nail firmly in position
with tacks and a hammer, or use a staple gun, mitreing the corners as
neatly as possible. Charted cushion adaptation.You can easily use an embroidery chart as a colourwork chart for knitting.
So here is the chart in some nice shades of yellow and grey.
Assuming you are familiar with the idea of working from charts, as usual, the charts show the right, or knitted, side of the work, reading knit rows from right to left; every alternate row worked in purl and read from left to right. The yarn not in use is carried loosely across the back of the fabric all the time, so it will be taken behind the stitches on a knitted row and in front of them on a purled row. Ideally you need to keep within a maximum of about five or six stitches
in each colour so that you don't have to carry the yarn not in use across
too many stitches at the back of the work. It is feasible to carry the
yarn across a greater number of stitches as long as you don't pull the
yarn so tightly that it puckers your work.
Finally - here's a roughly square cushion made up of 3 x 4 distorted motifs showing what it might actually look like:
Making upFor a cushion you need two identical pieces. You could make two knitted
pattern pieces, or make one of them in plain knitting, or back the cushion
with fabric, cut to the right size (don't forget to allow extra on the
fabric to turn in the raw edges). The size (and shape) of the resulting cushion cover will depend on the yarn you choose to work with. For a standard double knitting yarn, a 3 x 4 motif should work out to a size of about 22 inches wide and x 23 inches high. |
Materials
|
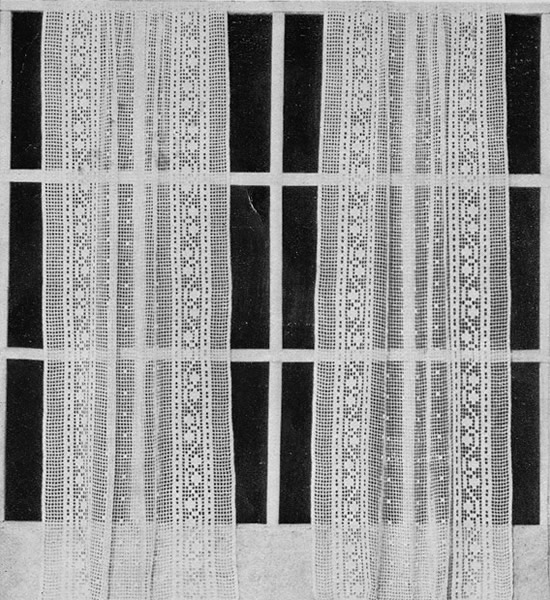
"These delightful curtains will give your home a brighter look."
— which is very true I'm sure, provided you have the skill and patience to make them.
If you are up to speed with crochet — and I'm guessing you won't attempt this unless you are — then it would be quite feasible to adapt to a slightly thicker crochet cotton and fewer repeats, in both width and length, using the chart as a guide.
If you want to crochet a little something, and the mere thought of this gives you a headache, then try the little bonus pattern for a flower spray.
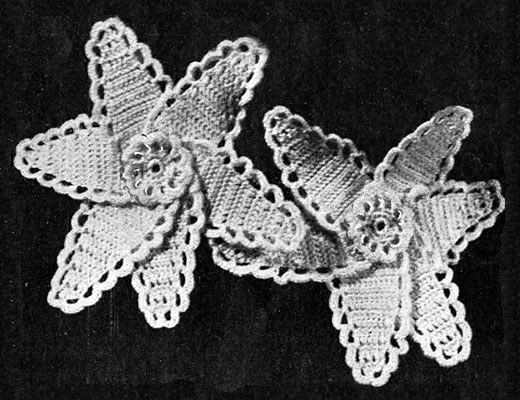
This is a little addendum to the next two crochet curtain patterns providing the theme for this month. If you want to see the other patterns then search for "curtains" using the box in the side bar.
But — if you want to crochet a little something, and the mere thought of making a pair of curtains gives you a headache, then try this little bonus pattern for a flower spray. Again it asks for really tiny hook and lace cottons - but being a flower, you can freely adapt the materials and hook and make it come out any size you like.
Double Double CrochetDbl dc is not a stitch I had come across before, but here it is. I think it makes a rather pretty stitch. To work a dbl dc insert the hook into the stitch and pull thread through. Then thread over hook, and pull through one loop on hook; then thread over hook, and pull through remaining 2 loops. PetalCommence with 13 chain. 1st row: dbl dc into 3rd ch from
hook; 1 dbl dc into each of the remaining ch, 2 ch; turn. Repeat the 2nd row 6 times more. 9th row: Decrease 1 stitch at the
beginning and end of the row; 2 ch, turn. Fasten off. Edging 1st row: Join thread into the dbl
dc of 1st row-end, * 5 ch, miss 1
row-end, 1 dc into next row-end. Repeat from *
6 times more; 2nd row: 6 dc into each loop of 5
ch. Make 5 more petals. Centre.Commence with 6 ch, join with a slip stitch. 1st row: Into ring work 11 dc, join
with a ss. Fasten off. To Make Up.Sew petals together at base. Make another flower the same, and sew on to a piece of fine wire. |
MaterialsCoats Chain Mercer Crochet No 60 Milwards steel crochet hook No 5. Piece of fine wire. Tension12 rows to 1 inch Size mattersThe flower is about 3¼ inches from tip to tip. Crochet abbreviations:ch: chain Remember these are English crochet instructions where dc is equivalent to US single crochet; htr is equivalent to US double crochet - see "Terminology" in the side bar. Disclaimer
|
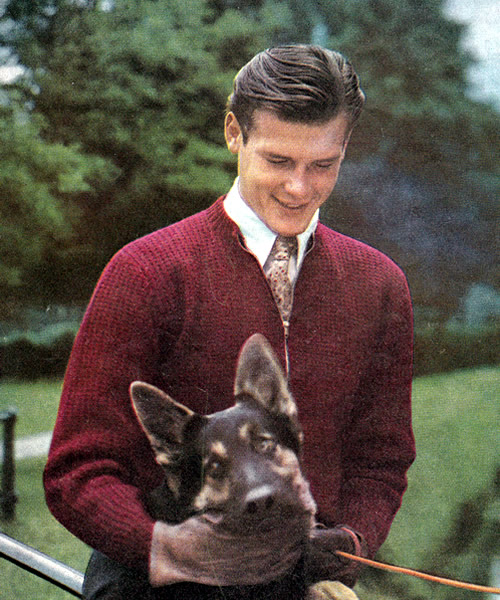
Perfect for our current wintery spring.
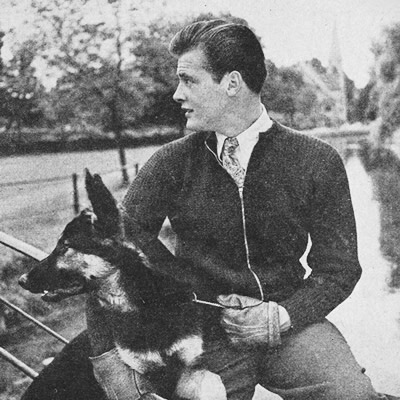
Every man loves a comfortable lumber jacket for casual week-end wear.
[And I'm sure many a woman loves a comfortable man just like this one - if not the dog as well.
Notice that Roger has been wisely supplied with a lovely thick pair of leather gloves for this photo shoot...]
Instructions.Instructions are given for one medium man's size only. BackWith No 10 needles, cast on 109 stitches and work 3 inches in k1/p1 rib, rows on the right side having a k1 at each end. Change to No 8 needles and pattern as follows: 1st row [Right side facing]: *
k1, p1; repeat from * to last stitch,
k1. These 2 rows form the pattern. With right side facing, shape armholes by casting off 7 stitches at the beginning of the next 2 rows, then k2tog at each end of following 2 rows: [91 sts] Work straight until back measures 24 inches. With right side facing, shape shoulders by casting off 10 stitches at the beginning of the next 6 rows; cast off remainder fairly tightly. Left Front:With No 10 needles, cast on 55 stitches and work 34 inches in k1/p1 rib as before. Change to No 8 needles and, in pattern, work straight until front measures 16 inches. With right side facing, shape armhole by casting off 7 stitches at the
beginning of the next row, then k2tog at this edge on the following 2
rows [46 sts] Work 41 rows straight in pattern, then with wrong side facing, shape neck by casting off 6 stitches at the beginning of the next row, then k2tog at this edge on every row until 30 stitches remain. Work a few rows straight until front matches back to the start of the shoulder shaping. With right side facing, shape shoulder by casting off 10 stitches at the beginning of the next and following 2 alternate rows, (armhole edge). Right Front:Work to correspond with the left front, reversing shapings. Sleeves:With No 10 needles, cast on 57 stitches, and work 2½ inches in k1/p1 rib as before. Change to No 8 needles and pattern, increasing 1 stitch at each end of the 7th and every following 6th row until there are 83 stitches. Work straight until sleeve measures 18½ inches or required length. With right side facing, shape top by casting off 5 stitches at
the beginning of the next 2 rows, then k2tog at each end of the next and
every alternate row until 41 stitches remain; then, at each end of every
row until 25 stitches remain. To Make UpPress work on wrong side under a damp cloth. Neckband: Join side and sleeve seams; insert sleeves. |
MaterialsDouble Knitting yarn 19 ozs - shown in colour Wine. A pair each No 8 (4mm) and No 10 (3¼mm) needles. A zip fastener (double-ended - suitable for a jacket). Tension22 sts x 30 rows to 4 inches. Size mattersTo fit 39-41 inch bust; length from top of shoulders: 25 inches; sleeve seam: 18½ inches. Abbreviationsk2tog: decrease by knitting 2 stitches together. inc: increase by working into front and back of stitch dec: decrease by working 2 stitches together. Disclaimer
|
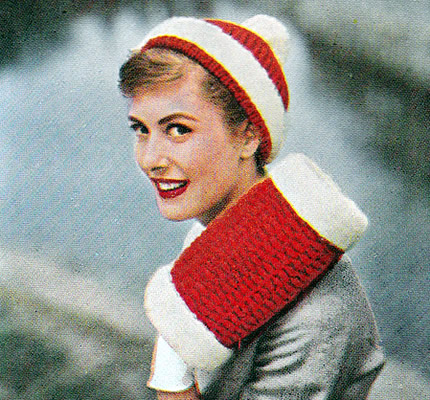
Charming offering from the mid-fifties - the era of the "set".
I'm not sure how much of a commonplace activity skating was or is. I guess the climate in the south of the UK and the constant dangers warned of in skating on lakes and ponds meant that in my youth at least it was not a general pursuit outside of ice rinks. I was very keen on roller skating - another 1950s and 60s popular sport - I even owned my own roller skates etc; however the only times I ever tried skating on ice, was at a rink with hired skates.
In the celluloid world, however, any wintry film would not have been complete without its skating scene, and this would have made the perfect accessory. Luckily you could also consider using it without the skating - though it does rather draw to mind US costume dramas.
InstructionsNote: Muff and all white borders are worked using yarn doubled. MuffPocket lining: Main Part: 1st row (right side facing): k1,
* k1tbl, p1; repeat from *
to last 2 stitches, k1tbl, k1. These 8 rows form the pattern. Next row: Pattern 9, cast off 31,
pattern to end. Continue straight in pattern until work measures 14 inches from start.
Borders: Making upPress work lightly on wrong side under a damp cloth. Join short sides of muff; insert pocket, joining top to 31 cast-off stitches,
then catch down pocket neatly all round. Turn muff inside out. Wrap 2 layers of wadding round muff and join ends.
Join short sides of lining material. Slip lining over wadding and hem
neatly to main work just inside ends of muff. I seem to remember from my youth that muffs generally had a string attached to hang them round your neck so that you could have both hands free if necessary. I'm not sure if this was just because I was a child and was the equivalent to having your gloves on a string (threaded through your coat sleeves!), but it certainly would make it more practical if you planned to use it for more than skating expeditions.] CapUsing single strand of red wool, cast on 108 stitches and work 4½ inches in k1/p1 rib. Change to twisted rib and shape crown as follows: 1st row: *
p1, k1 through back of loop; repeat from *
to end. Continue in twisted rib decreasing 6 stitches in the same way on every
Next row: purl. Break wool, draw through remaining stitches and fasten off. Border: Making upPress lightly on wrong side under a damp cloth. |
MaterialsDouble knitting yarn: 8 oz in Scarlet and 4 oz in white. One pair of No 7 (4½mm) needles. 6-inch zip fastener. White fabric to line muff, and 2 pieces of wadding for padding. TensionCap: 24 sts to 4 inches (10cm) over twisted rib pattern using
single strand of yarn. Size mattersCap to fit "an average head". Abbreviationsk2tog or p2tog: work 2 sts together to decrease. k1tbl/p1tbl: knit/purl 1 stitch through back loop. k2togtbl/p2togtbl: knit/purl 2 stitches together through back loops. stocking stitch: one row knit and one row purl, ("stockinette"). Disclaimer
|
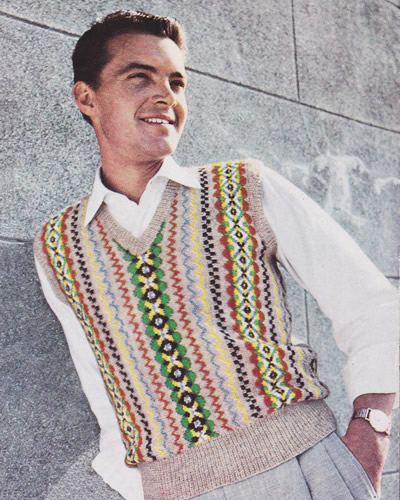
Fair-Isle pullover or vest in bright colours, with the added interest in that it is knitted sideways.
Instructions:The pullover is worked sideways using the Fair-Isle technique. Strand
the wools not in use loosely across the back of the work. BackBegin at the left side edge. Using No 9 (3¾mm) needles and main
shade natural yarn cast on 84 stitches. Continue in stocking stitch, working the pattern from the chart, reading knit rows from right to left and purl rows from left to right. Work the 12 pattern stitches 7 times across. When the 10th row of the chart has been completed, continue in pattern,
working armhole increasings as shown on the chart, and keeping
the extra stitches in pattern as indicated. Continue in pattern, increasing 1 stitch at the shoulder edge at the
end of the 29th, 37th, 45th, and 53rd rows as indicated. [151 sts] For the second half of the back, work down from top of chart, that is:
77th, 76th, 75th, 74th rows, etc, still reading from right to left on
knit rows and left to right on purl rows. Work straight to the end of the chart, then purl 1 row in natural. FrontBegin at the right side and work exactly as for the first half of the back until the 57th row has been completed. [151 sts]. Divide for neck opening: Continue in pattern, casting off 5 stitches at the beginning of the next
9 purl rows as indicated on the chart. [91 sts] For the second half of the front, work down from the top of the chart as before, casting on stitches at the neck edge to correspond with those cast off on the first half, and decreasing at the shoulder and armhole edges as indicated. When the chart is complete, purl 1 row in natural. Ribbed weltWith the right side of the work facing, using No 12 needles and main shade natural, pick
up and knit 140 stitches along the lower edge of the back. Work the front welt in the same way. NeckbandJoin shoulder seams. With the right side of the work facing, using No 12 needles and main shade natural, beginning at the centre back, pick up and knit 88 stitches to centre front. Work 10 rows k1/p1 rib, decreasing 1 stitch at the centre front on alternate rows; cast off in rib. Work the other half to correspond. Armhole bandsWith the right side of the work facing, using No 12 needles and main shade natural, pick up and knit 160 stitches round each armhole. Work 10 rows k1/p1 rib; cast off in rib. To Make UpPress parts well under a damp cloth. |
|
Materials4 x 1oz balls of 4 ply fingering in main shade (natural), plus 1 oz each in 6 contrast colours: brown, yellow, blue, rust, emerald, white. A pair each No 9 (3¾mm) and No 12 (2¾mm) needles. Tension30sts to 4 inches Size mattersChest to fit one size: 39-41 inches. Abbreviationsk2tog/p2tog: decrease by knitting/purling 2 sts together. stocking stitch: one row knit and one row purl, ("stockinette"). A word on the woolOriginal called for Patons Fair Isle Fingering about which there is some information available on Ravelry. This pattern is in ounces but it seems the yarn
stuck around for a while as some vintage stocks can be seen in 25g balls. Jamiesons are Kings (or Queens) of Fair Isle and Shetland knitting - their Spindrift yarn sounds a good substitute: equivalent to a traditional 4ply; ideal for Fair Isle knitting; extensive colour pallet of over 220 colours; supplied in 25g Balls (105m); tension: 30sts x 32 rows on 3¼mm needles. Disclaimer
|
|
For a pdf version of the chart you can right click >>here<< and choose "save link as" or "save target as" (browser dependent options) to download and save a pdf file. |
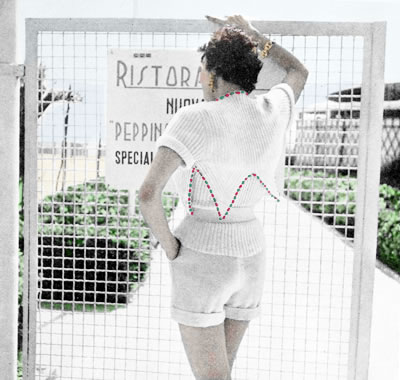
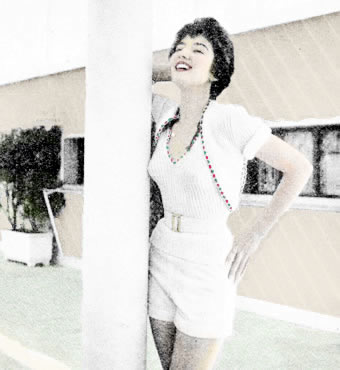
The era of the "set" — a sweet and quirky twin set for you to enjoy while soaking up the sun.
[I would, but I have a serious case of teeny tiny waist envy].
InstructionsThis is a two-piece: a bolero with pointed edge, and a sleeveless top with back and front V-neck. Bolero BackBegin at the back of the neck. With right side facing, continue in rib, casting on 18 stitches at the
beginning of the next 2 rows, then 6 stitches at the beginning of the
With right side facing, shape for armholes by increasing 1 stitch
at the beginning of the next 8 rows, then cast on 8 stitches at the beginning
of the following 2 rows, taking the extra stitches into the ** Here divide for points: Next row (right side facing): rib 78, turn, and leave remaining stitches on a spare needle, or stitch holder. ¶Continue to work backwards
and forwards on these 78 stitches using With right side facing, rejoin wool to last 78 stitches and Bolero FrontsLeft bolero front: Begin at the shoulder. With wrong side facing, continue in rib, casting on 6 stitches at the
With right side facing, continue in rib and shape front edge by increasing
1 stitch at the beginning of the next row (front edge) then on every following
4th row, 18 times in all, taking the extra stitches into rib as they are
made; afterwards keep the front edge straight. When the armhole (straight
edge) measures 7½ inches from the end of the shoulder shaping, with
wrong side facing, increase 1 stitch at the beginning of the next and
following 3 alternate rows, then cast on 8 stitches at the beginning of
the following alternate row. [78 sts]. With right side facing, shape as for back by working from ¶ to ¶. Right bolero front: Work as for left, reversing all shapings. Sleeves (two alike)With two No 12 (2¾mm) needles, cast on 116 stitches and work Continue in rib, shaping the top by casting off 4 stitches at the beginning
of the next 2 rows, then decrease 1 stitch at the beginning of every row
until 66 stitches remain, then at each end of every row until 32 stitches
remain. Sun Top (back and front alike)With two No 13 (2¼mm) needles, cast on 126 stitches and work Here divide for points exactly as given for back of by working from ** to ** . Making upPress parts only very lightly on the wrong side under a damp cloth. Join shoulder and sleeve seams of bolero and side seams of sun top. Cords: Take 6 strands of Viridian each 60 inches long and twist
tightly together; then fold in half allowing two halves to twine round
each other to form a cord; thread through holes in crochet edging on inside
edges of points of sun-top; make a similar cord for back inside edges,
then two more in red for outer edges of points. |
Materials3ply fingering:- A set of 4 No 12 (2¾mm) needles. TensionEquivalent to a basic tension of Size mattersOne size only to fit 34-35 inch chest; Abbreviationsk2tog or p2tog: work 2 sts together to decrease. sl1: slip one stitch by passing it between the needles without knitting it. psso: pass the slipped stitch over. sl1, k1, psso: slip 1, knit 1, pass the slipped stitch over; also known as "ssk" (slip, slip, knit). Disclaimer
|
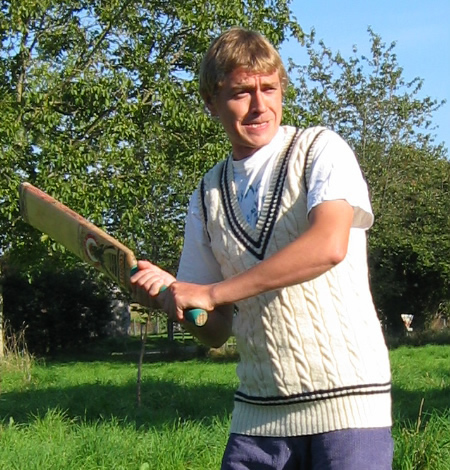
Anyone for cricket?
I made this as a slipover for a long, lean, and lanky chap; it is based on the pattern given but I adapted it to use some Guernsey yarn instead of DK (by knitting a bigger size and making it much longer to fit the chap - seemed like the body was never-ending!).
The instructions are for a full sweater pattern as well as the slipover.
Instructions.The sweater is worked in a good range of sizes, intended to cover kids
and men, but could also fit women, making suitable length adjustments
in body and sleeve. Instructions for the larger sizes are shown in brackets.
Sweater BackWith No 10 (3¼mm) needles and main shade, cast on 77, 83, 89, 95, 99, 105, 111, 117, 121, 127 stitches. ** If not including contrast colours, Repeat 1st and 2nd rows 10 times then the 1st row again, and continue below with 24th (increase) row. If including contrast colours, repeat 1st and 2nd rows once. Change to No 8 (4mm) needles and proceed as follows:- For three smallest sizes only (28, 30 and 32 inch chest): *** For the medium-small sizes only (34, and 36 inch chest): *** For the three medium-large sizes only (38, 40 and 42 inch chest): *** For two largest sizes only (44 and 46 inch chest): *** FOR ALL 10 sizes Under each separate section for the size you are working, the instructions embedded between *** to *** forms the pattern. Keeping continuity of pattern (throughout) continue until work measures 11½ (13, 14, 13½, 15½, 15½, 15½, 15½, 15, 16) inches from the beginning, ending on a wrong side row. Shape armholes: **** Continue without shaping until armhole measures 7½ (8, 8, 8½, 10½, 10½, 10½, 10½, 11, 11) inches, ending on the wrong side. Shape shoulders: Cast off remaining 33 (37, 37, 37, 37, 43, 43, 43, 43, 47) stitches in pattern. Sweater FrontWork exactly as given for back until **** is reached in the armhole shaping section. Divide for neck: Working on these 47 (51, 54, 58, 62, 67, 71, 74, 78, 82) stitches only, proceed as follows: Next row: pattern to last 2 stitches,
p2tog. Work 7 (9, 11,
13, 5, 11,
15, 16, 13,
21) rows, decreasing once at the armhole edge on every row, and
at the same time decreasing at the neck edge on the next
and every alternate row. For one medium and the two largest sizes only (36, 44 and 46 inch chest): Work - (-, -,
-, 3, -,
-, -, 7,
1) rows, decreasing once at the armhole edge in every row, at
the same time decreasing once at the neck edge on the - (-,
-, -, 0,
-, -, -,
4th, 0) row. For the smallest and other large sizes only (28, 30, 32, 34, 38, 40, 42 inch chest): Work 12 (14, 12,
6, -, 6,
2, 1, -,
-) rows, decreasing once at the neck edge only on every following
2nd (2nd, 2nd,
2nd, -, 2nd,
2nd, 1st, -,
-) row. FOR ALL 10 sizes Work 20 (20, 20,
28, 53, 44,
44, 44, 45,
43) rows, decreasing once at the neck edge only on the 4th (4th,
4th, 4th, 1st,
4th, 4th, 4th,
1st, 3rd), and every following 4th
row. Continue without shaping until armhole measures same as Back to "Shape Shoulders" section, ending on wrong side row. Shape shoulders: Work the other half of the front to match the first as follows: With right side facing, slip the first stitch of the the remaining stitches
on to a safety pin (this is the centre stitch). Next row: k2tog, pattern to last
2 stitches, k2tog. Work 7 (9, 11,
13, 5, 11,
15, 16, 13,
21) rows, decreasing once at the neck edge on the next and every
alternate row, and at the same time decreasing once at
the armhole edge on every row. For one medium and the two largest sizes only (36, 44 and 46 inch chest): Work - (-, -,
-, 3, -,
-, -, 7,
1) rows, decreasing once at the neck edge on the - (-,
-, -, 0,
-, -, -,
4th, 0) row, at the same
time decreasing once at the armhole edge on every row. For the smallest and other large sizes only (28, 30, 32, 34, 38, 40, 42 inch chest): Work 12 (14, 12,
6, -, 6,
2, 1, -,
-) rows, decreasing once at the neck edge only on every following
2nd (2nd, 2nd,
2nd, -, 2nd,
2nd, 1st, -,
-) row. FOR ALL 10 sizes Work 20 (20, 20,
28, 53, 44,
44, 44, 45,
43) rows, decreasing once at the neck edge only on the 4th (4th,
4th, 4th, 1st,
4th, 4th, 4th,
1st, 3rd), and every following 4th
row. Continue without shaping until armhole measures same as Back to "Shape Shoulders" section ending on right side. Shape shoulders: Sweater Sleeves (both alike)With No 10 needles and main shade, cast on 43 (43, 45, 45, 55, 55, 59, 59, 59, 61) stitches. Work from ** to ** as given for Back. 24th (increase) row: p6 (6,
8, 8, 11,
11, 11, 11,
11, 13); *
increase once in the next stitch purlwise; repeat from *
to the last 7 (7, 9,
9, 12, 12,
12, 12, 12,
14) stitches: p7 (7, 9,
9, 12, 12,
12, 12, 12,
14). Change to No 8 (4mm) needles and using main shade throughout proceed in pattern as give for 1st (1st, 1st, 1st, 3rd, 3rd, 9th, 9th, 9th, 9th) size of Back and at the same time, increasing once at each end of the 1st (1st, 1st, 1st, 3rd, 3rd, 9th, 9th, 9th, 9th) and every following 1st (1st, 1st, 1st, 3rd, 3rd, 9th, 9th, 9th, 9th) row until there are 87 (81, 89, 81, 117, 117, 107, 107, 125, 125) stitches, working the increased stitches into the pattern. For all sizes EXCEPT the smallest only (30, 32, 34, 36, 38, 40, 42, 44, 46 inch chest): Increase once at each end of the following - (6th, 6th, 6th, 4th, 4th, 6th, 6th, 4th, 4th) row, until there are 87 (95, 95, 101, 129, 129, 129, 129, 137, 137) stitches, working the increased stitches into the pattern. FOR ALL 10 sizes Continue without shaping until sleeve measures 14½ (15½, 16½, 17, 20, 20, 20, 20, 20, 20) inches, ending on the wrong side. Shape Sleeve Top Work 20 (20, 20,
24, 36, 36,
32, 32, 36,
36) rows, casting off 2 stitches at the beginning of every row.
Cast off loosely in pattern. Sweater NeckbandJoin right shoulder seams. If you are including a contrast then proceed as follows, otherwise follow the same instructions using only the main shade. 1st row: Using main shade *
p1, k1, repeat from * to last stitch
pl. Cast off in rib. To Make Up the Sweater Review the yarn ball band for any special washing or pressing instructions.
Slipover Back, Front, and NeckbandWork exactly as given for sweater. Slipover Armbands (alike)Join left shoulder and neckband seams. With right side facing, using No 10 (3¼mm) needles and main shade pick up and knit 101 (107, 107, 113, 135, 135, 135, 135, 141, 141) stitches evenly around the armhole edge. If you are including a contrast then proceed as follows, otherwise follow the same instructions using only the main shade. 1st row: Join in and use contrast,
* p1, k1, repeat from *
to last stitch, p1. Using main shade, repeat 1st and 2nd rows twice. To Make Up the Slipover Review the yarn ball band for any special washing or pressing instructions.
|
MaterialsDouble Knitting yarn in white or ivory. Pair each of No 8 (4mm) and No 10 (3¼mm) needles. Tension29sts and 30 rows to four inches on 4mm needles over pattern.
Size mattersTo fit chest: Abbreviations k: knit A word on the wool.Original yarn was a good quality double knitting woollen blend. Disclaimer
|
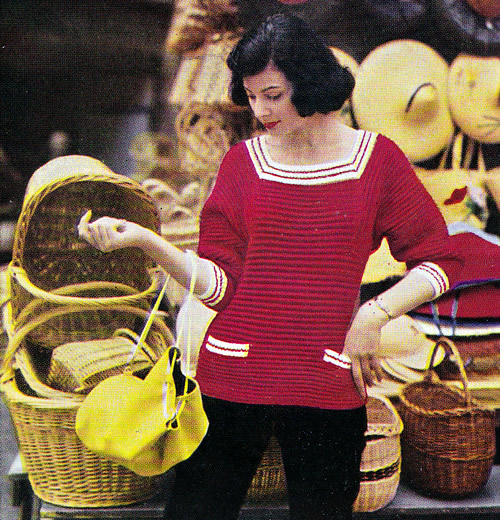
Another highly wearable jumper with a flattering neckline from the 1950's.
The sleeves look to be a pleasing (to me) three-quarter length but with a set in style that is almost a dolman, yet with a flattering line fitted to the neck shaping.
Although cited as a "thickie" in 1950s terms it's made in a standard double knitting weight yarn - so "Spring Thickie" or "Square Neck Casual" - I leave the name up to you.
Instructions.Instructions for the larger size is given in brackets. Where one set of figures is given this applies to both sizes. The sweater is worked in an all-over pattern involving loops and slipped
stitches. It is advisable to practise this stitch to get used to it before
starting the main work. Take particular care not to drop any stitches
as it is difficult to pick them up again without spoiling the pattern.
Pattern stitchWith No 9 needles, cast on 13 stitches, and work 2 inches to practise
the pattern. The 3rd row forms the pattern and this row is now repeated throughout. [Editor's note: Just to encourage you - this pattern is easier to do in practice than to explain.] BackUsing yarn in main shade and No 9 needles, cast on 101 (109) stitches and work straight in pattern starting with 1st and 2nd rows [once 2nd row is done there are 100 (108) stitches]; continue until 31 (31) ridges have been done from start. Continue in pattern and shape for armholes: With wrong side facing, rejoin wool and continue straight in pattern
until 51 (51) ridges have been done
from start. **Continue
thus: Pocket linings (make 2 the same)Begin by making pocket linings. FrontUsing yarn in main shade and No 9 needles, cast on 101 (109)
stitches and work in pattern exactly as given for back, starting with
1st and 2nd Next row (right side facing): pattern
9 (11), leave main shade yarn hanging,
and join in white, [knit the next 2 loops together, winding wool once
round needle] 26 times, slip these 26 white stitches on a spare needle
or stitch holder for the time being; pick up the main shade yarn again
and work across the 26 (26) stitches
of one pocket lining thus [k1 winding wool twice round needle] 26 times,
pattern across the next 30 (34) stitches
of main work, again leave main shade yarn hanging, join in 2nd ball of
white and work across the next 26 (26)
stitches as before and leave on a spare needle or stitch holder; pick
up main shade and work across 26 (26)
stitches of 2nd pocket lining as before, pattern 9 (11).
With right side facing, work striped rib border for neck exactly Left sleeve** Change to No 9 needles and rib 3 rows in white. Join in main shade and work first 3 rows of pattern as given for back.
Continue repeating the last row until there are 123 (123)
stitches ‡With right side facing shape
top. Right sleeveWork as for left sleeve from ** to
** [123 (123)
sts]. To Make UpDo not press. With No 11 needles and white wool, work a further 3 rows rib across each pocket top, then 2 rows main shade, 3 rows white; cast off in rib in white Catch down sides of pocket tops and pocket linings. Press seams lightly. |
Materials
|
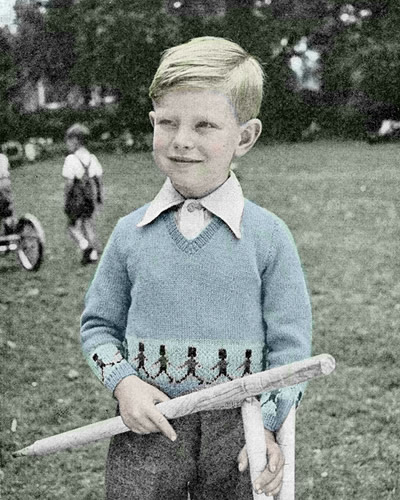
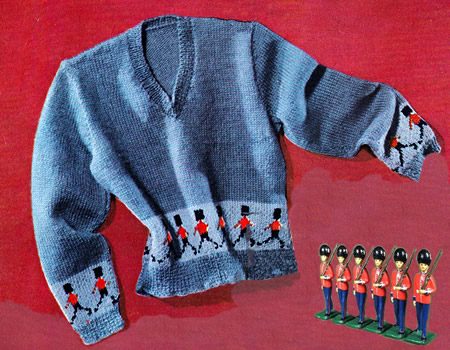
Suitable for all 5 year olds who aren't expecting an iphone, (and who like to play out of season cricket).
Instructions:The jersey is worked in one size - stated as a 5 year old but remembering that children now tend to be larger than they were in the early 1950s. BackUsing No 12 (2¾mm) needles and main shade (mid blue) cast on 84 stitches, and work 1½ inches in k1/p1 rib, increasing to 85 stitches on the last row. Change to No 10 (3¼mm) needles and stocking stitch, and changing from the main mid-blue wool to the pale blue as the background colour for the motifs, work the soldier pattern from chart, reading knit rows from right to left and purl rows from left to right.
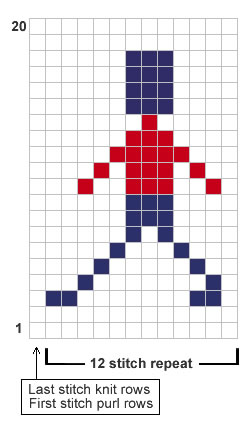
Work the 12 pattern stitches 7 times across with last stitch on knit
rows and first stitch on purl rows as indicated. When 20 rows have been completed, change back to the mid-blue main shade and work straight in stocking stitch until back measures 8 inches. Then, with right side facing, shape armholes by casting off 5 stitches
at the beginning of he next 2 rows. Then k2tog at each end of every knit
row until 65 stitches remain. With right side facing, shape shoulders by casting off 12 stitches
at the beginning of the next 4 rows. FrontWork exactly as for back until the first 2 rows of the armhole shaping have been done. [75 sts] Now divide for the neck: Continue on these 35 stitches for back, decreasing 1 stitch at the armhole edge on the next 4 rows, then keeping the armhole edge straight, and at the same time, decreasing at the neck edge on every following 3rd row until 24 stitches remain. Work straight until front matches back, then with right side facing, shape shoulders by casting off 12 stitches at the beginning of the next and following alternate row, armhole edge. Join the wool to the remaining stitches, at the neck edge; cast off 1,
then work to correspond with first half, reversing all shapings. SleevesUsing No 12 (2¾mm) needles and main shade (mid-blue) cast on 48 stitches and work 1 inch in k1/p1 rib, increasing to 49 stitches on the last row. Change to No 10 (3¼mm) needles and stocking stitch, and work the 20 rows from the chart as for the back. When these are done, change back to the main mid-blue wool and continue in stocking stitch, increasing 1 stitch at each end of the next and every following 6th row until there are 63 stitches. Work straight until sleeve measures 10½ inches. With right side facing, shape top by casting off 3 stitches at
the beginning of the next 2 rows, then k2tog at the beginning of every
row until 21 stitches remain. NeckbandJoin right shoulder seam. With right side facing, using No 12 (2¾mm) needles and mid-blue main shade, pick up and knit 48 stitches down left front, 1 stitch from centre, 48 stitches up right front, and 18 stitches across back of neck. Work ¾ inch k1/p1 rib; decreasing 1 stitch either side of centre
front stitch on alternate rows. Making UpOmitting ribbing, press each piece carefully on wrong side using a warm
iron and a damp cloth. |
Materials3 oz Fair Isle Fingering in main shade (mid blue) and 1 oz in paler blue. Small balls in red and navy for the soldier motifs. A pair each No 12 (2¾mm) and No 10 (3¼mm) needles. Tension30 sts and 38 rows to 4 inches over stocking stitch. Size mattersOne size - width all round chest 25 ins. Abbreviations:k1: knit 1. A word on the woolOriginal called for Patons Fair Isle Fingering about which there is some information available on Ravelry. This pattern is in ounces but it seems the yarn
stuck around for a while as some vintage stocks can be seen in 25g balls. Jamiesons are Kings (or Queens) of Fair Isle and Shetland knitting - their Spindrift yarn sounds a good substitute: equivalent to a traditional 4ply; ideal for Fair Isle knitting; extensive colour pallet of over 220 colours; supplied in 25g Balls (105m); tension: 30sts x 32 rows on 3¼mm needles. Disclaimer
|
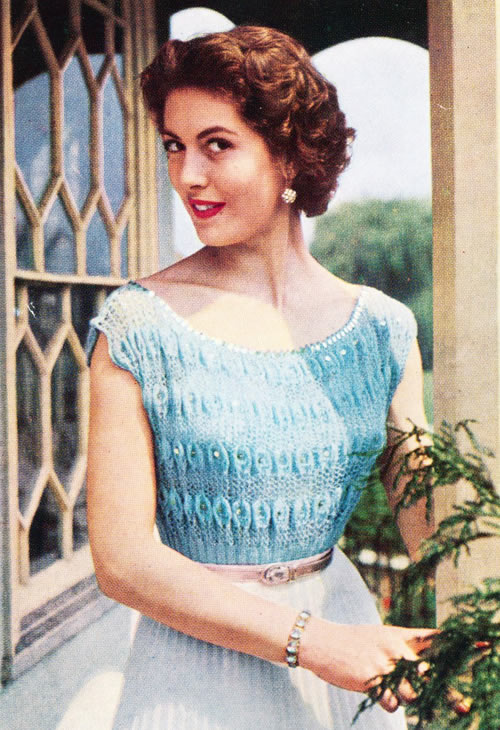
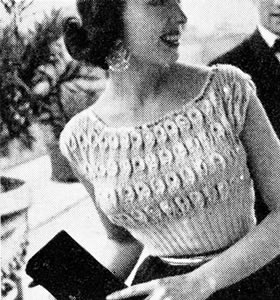
Another "summer" top, which I always thought would be eminently suited to a winter cocktails evening, (and clearly they did too, as it is additionally shown in a black-tie setting). It's made in a fingering 2ply or laceweight yarn, with a stitch that forms "bubbles", which each have a sequin or bead sewn at the centre.
Instructions. Instructions for one size only. Backand Front alikeWith No 12 (2½mm) needles cast on 108 stitches and work 4 inches k2/p2 rib. Change to pattern thus: 1st row (right side facing): *
wrn, p2tog, won, k1, wfd, k1, wfd, k2tog; repeat from *
to end. Rows 1-22 inclusive form the pattern. Repeat these 22 pattern rows 3 times more. Next row (right side facing): pattern 26. Turn, and leave remaining stitches on a spare needle or stitch holder. Continue on these 26 stitches, decreasing 1 stitch at the neck edge fairly loosely on the next 5 rows. With right side facing, shape shoulder: by casting off 3 stitches loosely at the beginning of the next and following 4 alternate rows, at the same time, decreasing 1 stitch at the neck edge on every row, 6 times. Return to the remaining stitches; cast off the centre 56 stitches loosely, then work on last 26 stitches to correspond with the first shoulder. Making UpDo not press. Neck edging: With right side facing, work 2 rows of double crochet (American single crochet) all round the neck, then work picot edge thus: * 4 chain, 1 dc in first of these 4 chain, 2dc in next 2 dc; repeat from * all round; fasten off. Sew 1 sequin or bead in the centre of each stocking-stitch bubble, as
shown in photograph, using a matching sewing cotton (you must sew on each
sequin separately), then sew sequins about inch apart all round dc of
neck. Press seams. Altering the sizeIt would be feasible to increase the size by knitting in a thicker yarn
- but you do need to make a swatch and do some arithmetic. All those "wool overs"won: "wool over needle" - bring the wool over the needle
so that when you knit the following stitch, you will have created an extra
stitch, in a way that makes a decorative eyelet hole. Now you know everything..... |
Materials
|
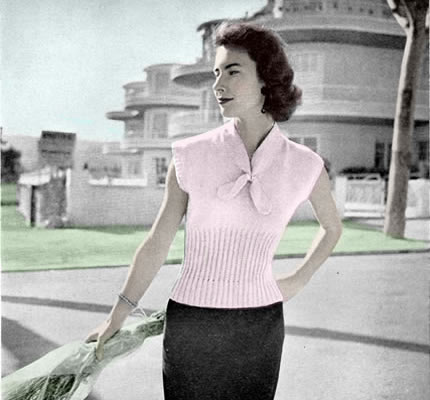
A pretty knitted "blouse" - spoken with a soft "s" as in "mouse" I suspect (maybe you pronounce it like that anyway). Presumably you could go wild and try wearing it other than in daylight hours.
Instructions. Instructions for larger size is given in brackets. Where one set of
figures is given this applies to both sizes. Back** 1st row (right side facing): *
p2, k3; repeat from * to last 2 stitches,
p2. Now increase as follows: Next row: * p1, pick up horizontal thread before next stitch and purl into back of it, p1, k3; repeat from * to last 2 stitches, p1, pick up and purl horizontal thread as before, p1. [141 (153) sts] Continue in k3, p3 rib until work measures 8 (8½)
inches from start. With right side facing, change to stocking stitch,
starting with a knit row, and shape sides by increasing 1 stitch at each
end of the 3rd (5th) and every following
6th row until there are 153 (163)
stitches. With right side facing, shape armholes by casting off 9 (9)
stitches at the beginning of the next 2 rows, then decrease 1 stitch at
each end of every knit row until 121 (131)
stitches remain. Now continue straight in stocking stitch until armholes measure 6 (6½)
inches from markers. With right side facing, shape shoulders by
casting off 10 (11) stitches at the
beginning of the following 8 rows; cast off remaining 41 (43)
stitches. FrontWork as for back from ** to **. [121 (131) sts] Next row: Purl. With right side facing, divide for neck as follows: With right side facing, shape shoulder by casting off 10 (11) stitches at the beginning of the next and following 3 alternate rows, at the armhole edge. With right side facing, rejoin wool to remaining 61 (66)
stitches, cast off centre stitch and knit to end. Making UpPress only the stocking stitch parts on the wrong side under a damp With the pair of No 13 needles and right side facing, pick up and knit
148 (156) stitches all round each
armhole. Join side seams. Collar:
Next row: Purl. * Continue in stocking-stitch, increasing
1 stitch at each end of the following 6 knit rows, then decreasing 1 stitch
at each end of the following 6 knit rows*.
Repeat from * to *
once more. Fold the collar in half with right side inside, then join points and side edge of the cast-on stitches for bow. Turn right side out and press, then fold rest of collar in half all round neck to wrong side and slip-hem in position. Press seams and collar. Slip ends of collar through scarf ring to form a bow as shown in photograph. Altering the sizeIt would be feasible to increase the size by knitting in a thicker yarn - but you do need to make a swatch and do some arithmetic. Even changing to a 4 ply with 3¼mm needles could change your chest size from a modest 34 to over 40 inches. |
Materials
|
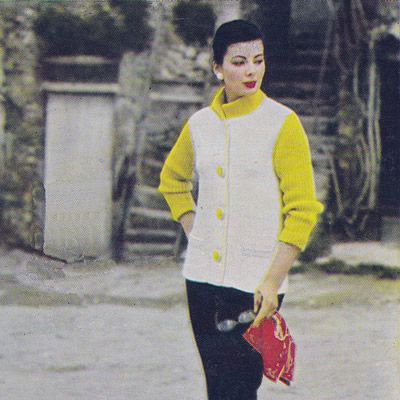
I was told last autumn that red was definitely THE colour of the season, and then - after my wardrobe became impossibly bold - I was told that it was all about neutrals! Similarly last Spring I was told that yellow was the colour - just a splash or dash - and now apparently it is definitely THE colour for Spring.
Whatever you believe, this is a staple 50s jacket which you can knit in a single colour - entirely in yellow - or entirely without yellow. Whatever colour scheme you go for, make sure of those wonderful coordinating giant buttons before you start.
So: "Use a clear sharp sulphur yellow -- vivid contrast with white."
Instructions.Instructions give for 2 sizes- larger size given in brackets thus ().
BackWith No 8 needles white yarn (W), cast on 104 (110) stitches and work 1½ inches in twisted stocking stitch [that is: knit into the back of every stitch on the knit rows throughout], ending with a purl row. Next row (right side facing): Purl,
working into the back of every stitch. With right side facing, continue straight in twisted stocking stitch until back measures 15 (15) inches from hemline ending with a purl row. Shape armholes by casting off 5 stitches at the beginning of the next 2 rows, then decrease 1 stitch at each end of following 6 (8) knit rows. [82 (84) sts] Work straight until back measures 23½ (23½) inches from hemline. With right side facing, shape shoulders by casting off 6 (6)
stitches at the beginning of the next 2 rows, then 5 (5)
stitches at the beginning of the next 8 rows. Pocket linings (make 2 the same)Begin by making pocket linings. Left Front: With No 8 needles and W, cast on 44 (48)
stitches and work 1½ inches in twisted stocking stitch, ending with
a purl row. Next row (right side facing): Purl,
working into the back of every stitch. Continue in twisted stocking stitch as follows: Introduce pocket as follows: Now continue straight in twisted stocking-stitch as before until front measures 15 (15) inches from hemline, ending with a purl row. Continue in pattern shaping armhole and increasing 6 stitches in the border after the slipstitch as follows: Next row: Cast off 5, knit to last
18 stitches, Slip 1 purlways, [increase 1 by picking up horizontal thread
before next stitch and knitting into back of it, k3] 5 times, increase
1 as before, k2. Next row (wrong side facing): join
in yarn Y, (k1, wool forward, slip 1 purlways, wool over needle] 11 times,
k1 in Y; rejoin W and purl to end in W. Repeat the last 2 rows 5 (7) times
more. Now continue straight until front measures 21½ inches from the hemline, keeping 23 stitches of border in twisted rib pattern in Y for revers as before. With wrong side facing, shape neck by casting off 23 stitches in Y. Continue in twisted stocking stitch in W decreasing 1 stitch at the neck
edge on the next 8 (8) rows. [26 sts].
With right side facing, shape shoulder by casting off 6 (6) stitches at the beginning of the next row, then 5 (5) stitches at the beginning of the following 4 alternate rows, at the armhole edge. Right Front: With No 8 needles and W, cast on 44 (48)
stitches and work 1½ inches in twisted stocking stitch, ending with
a purl row. Work to correspond with left front reversing shapings and with the addition of 3 double buttonholes. First to come 3½ inches up from lower edge and remaining 2 at 5-inch intervals. To make a buttonhole: Your pocket row will read: (right side facing), k17, slip 1 purlways, k22 (23), cast off 24 (26), k15 (16). The increase row before start of armhole will read: (right side facing), k2, increase 1 by picking up horizontal thread before next stitch and knitting into back of it, [k3, increase 1 as before] 5 times, slip 1 purlways, knit to end. On the next row start armhole shaping and introduce fancy rib
in Y. as follows: Sleeves:With Y yarn, cast on 53 stitches. 1st row (wrong side facing): *
k1, wfd., Slip 1 purlways,won; repeat from *
to last stitch, k1. Continue in fancy rib for 3 inches ending with 2nd pattern row. Continuing in pattern start to increase 1 stitch at each end of the next
and every following 6th row until there are 93 stitches Work straight in pattern until sleeve seam measures 18 (19) inches from start of fancy rib pattern, ending with 2nd pattern row. With wrong side facing, continue in pattern shaping top by casting
off 5 stitches at the beginning of the next 2 rows, then k2tog at each
end of the next and every alternate row until 59 stitches remain, then
at each end of every row until 19 stitches remain. CollarJoin shoulder seams. With right side facing and yarn Y, pick up and k. 93 stitches all round
neck, beginning and ending at the slipped-stitch of front borders. Next row: Purl, across all stitches,
picking up horizontal loops in the same way. To Make UpPress stocking stitch parts lightly on wrong side under a damp cloth.
Now make up double collar and double front borders as follows: Slip-hem front facing in position on wrong side [note that the slipped stitch in the knitting marks the edge of the fold up the front edges]. Oversew loosely around the double buttonholes. Join side and sleeve seams; insert sleeves. Turn under 1½ inches of stocking-stitch up to hemline all round lower Catch down pocket linings, then with yarn W and (right side facing), pick up and knit 24 (26) stitches along cast-off edge of each pocket opening. Work 2 inches twisted stocking-stitch; cast off loosely. Fold pocket tops in half to wrong side and slip-hem, then catch down sides of pocket tops to main work. Press all seams and hems. |
Materials
|
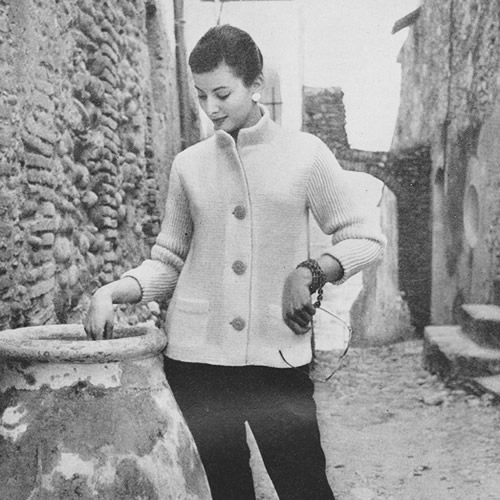
It is interesting to note that this jacket is referenced as being a revamp of a previous model (which I have yet to find). This picture above is obviously how it was made up for the photo shoot - ie in a single colour. You can peer at the detail in the colour photo and pretty easily see that the yellow colour has been painted in after the event. I am keen on trying out changes to the photos - lightly tinting black and white pictures etc - but these changes would have been made by skillful application using a real air brush technique rather than Photoshop.
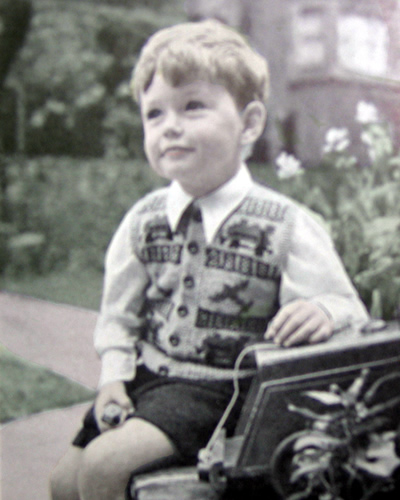
A jolly little waistcoat for the lucky 3 year old who is having a new toy engine or or aeroplane.
... what little boy wouldn't be thrilled to receive this attractive woolly on Christmas morning, teaming up with his new toys. Quickly knitted in tough Fair Isle Fingering, and you can use up your odds and ends for the various motifs.
How far away those days seem - or actually "are"! Even in my era - as attested by James May in Top Toys - boys (not girls of course!) were fixated by rockets and action men - though Airfix was as popular as ever.
Nonetheless - a "jolly little waistcoat" - for retro 3 years olds and their retro parents.
Instructions:The waistcoat is worked in one piece and in one size - stated as a 3 year old but remembering that children tend to be larger than they were in the early 1950s. As usual, you could probably increase the size successfully by using a heavier wool and larger needles. Back and Fronts in oneUsing No 12 (2¾mm) needles and main shade (MS) cast on 145 stitches, and work 1½ inches in k1/p1 rib - rows on the right side having k1 and each end. Change to No 10 (3¼mm) needles and stocking stitch, and work in pattern from chart, reading knit rows from right to left and purl rows from left to right.
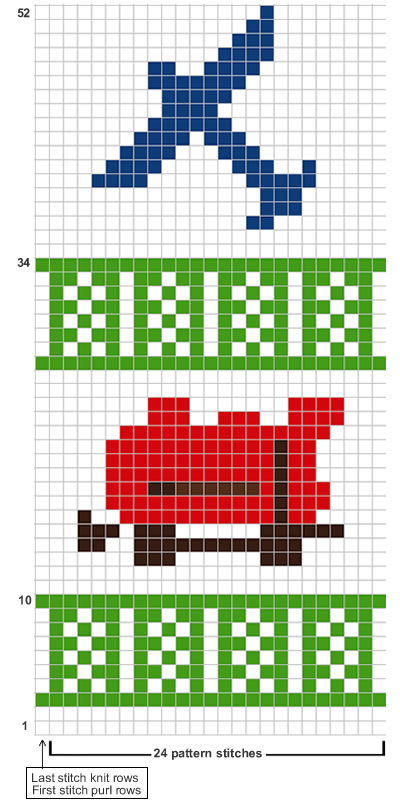
Work the 24 pattern stitches 6 times across with last stitch on knit rows
and first stitch on purl rows as indicated. Work the 52 rows once, then, continuing to work motifs from the chart, and with right side facing, divide for armholes thus: Next row: pattern 36, turn, and
leave remaining stitches on a spare needle or stitch holder. Continue in pattern on these 33 stitches for the right front, decreasing 1 stitch at the armhole edge on the next 6 rows. [27 sts] Work straight in pattern to the end of the 34th row of the chart. With right side facing, continue in MS only, shaping neck by casting
off 4 stitches at the beginning of the next row, then k2tog at the neck
edge on the next 5 rows. With wrong side facing, shape shoulder by casting off 9 stitches at the beginning of the next and following alternate row, (armhole edge). With right side facing, join wool to the remaining stitches. Continue on these 67 stitches for back, decreasing 1 stitch at each end of the next 6 rows. Work straight to end of the 34th row of the chart. Change to MS only and work 8 rows straight, then with right side facing, shape shoulders by casting off 9 stitches at the beginning of the next 4 rows; cast off remaining stitches loosely. With right side facing, join wool to last 36 stitches, armhole edge, and cast off 3, pattern to end, then work to correspond with right front. Ribbed Front BordersUsing No 12 (2¾mm) needles and main shade (MS) cast on 11 stitches
and working in k1/p1 rib, with rows on the right side having a k1 at each
end, make a strip to go up the right front when slightly stretched. Make a similar strip for left front with the addition of 7 buttonholes,
the first to come in the 3rd and 4th rows from the bottom edge, and the
7th about 1 inch from the top (allowing for 8th to be worked in the neckband
later), and the remaining 5 at equal intervals. To make a buttonhole: Neck BorderJoin shoulder seams. Using No 12 (2¾mm) needles and main shade (MS), rib the 11 stitches from the right front border, pick up and knit 43 stitches all round the neck, then rib the remaining 11 stitches from the left front border. [65 sts] Work ½ inch in k1/p1 rib making the 8th buttonhole after ¼ inch has been done. Cast off in rib. Armhole BordersWith right side facing, using No 12 (2¾mm) needles and main shade
(MS), pick up and knit 89 stitches round each armhole. Making UpOmitting ribbing, press each piece carefully on wrong side using a warm
iron and a damp cloth. |
Materials 2 oz Fair Isle Fingering in main shade and 1 oz each in emerald and
scarlet. A pair each No 12 (2¾mm) and No 10 (3¼mm) needles. Eight buttons. Tension32 sts to 4 inches on No 10 (3¼mm) needles over Fair Isle pattern. Size mattersOne size - width all round under arm 22 inches. Abbreviations:k1: knit 1. A word on the woolOriginal called for Patons Fair Isle Fingering about which there is some information available on Ravelry. This pattern is in ounces but it seems the yarn
stuck around for a while as some vintage stocks can be seen in 25g balls. Jamiesons are Kings (or Queens) of Fair Isle and Shetland knitting - their Spindrift yarn sounds a good substitute: equivalent to a traditional 4ply; ideal for Fair Isle knitting; extensive colour pallet of over 220 colours; supplied in 25g Balls (105m); tension: 30sts x 32 rows on 3¼mm needles. Disclaimer
|
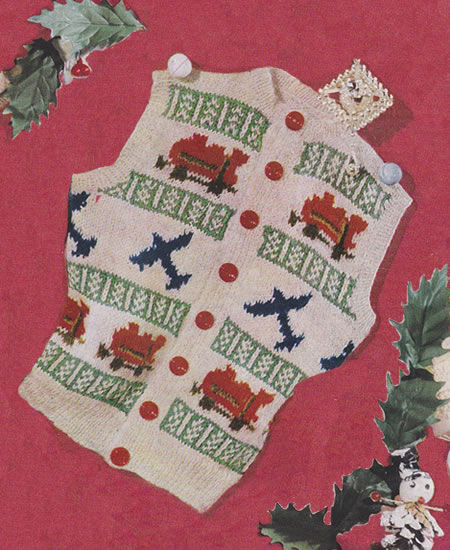
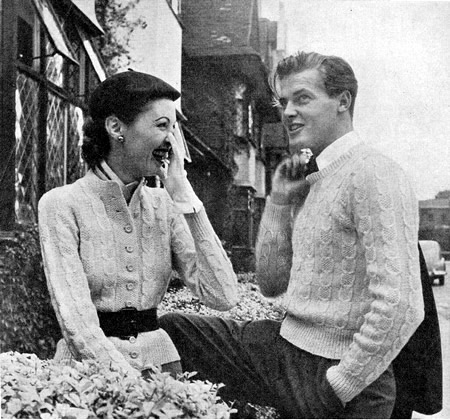
"Their woollies match - her warm button-up and his comfortable sweater"
But still so sad to have to say goodbye to the the lovely man.
Instructions.Pattern rows used throughout: 1st row (wrong side facing):
p3, * slip the next 2 stitches on
to the cable needle and place to back of work, k2, k2 from cable needle
(this will be called cable back), slip next 2 stitches on to cable needle
to front of work, k2, k2 from cable needle (this will be Repeat 2nd and 3rd rows 4 times more, then 2nd row again. 13th row: As 1st row. These 24 rows form the pattern. Cardigan BackWith No. 12 needles cast on 98 stitches and work 3½ inches in k1/p1 rib. Next row: k3, * p8, k6; repeat from * to last 11 stitches, p8, k3. Change to No 9 (3¾mm) needles and pattern, shaping sides by increasing
1 stitch at each end of the 25th and every following 6th row, 6 times
(110 sts), taking increased stitches into reversed stocking-stitch. With right side facing, shape armholes by casting off 8 stitches
at the beginning of the next 2 rows, then k2tog at each end of the next
and every row until 76 stitches remain. With right side facing, shape shoulders by casting off 9 stitches
at the beginning of the next 6 rows; then cast off remaining stitches
loosely. Cardigan Left FrontWith No 12 needles cast on 42 stitches and work 3½ inches Next row: k3, * p8, k6; repeat from * to last 11 stitches , p8, k3. Change to No 9 needles and pattern, shaping side edge by increasing 1 stitch at the beginning of the 25th and every following 6th row, 6 times, taking increased stitches into reversed stocking-stitch. Work straight until front matches back at side edge. With right side facing, shape armhole by casting off 8 stitches
at the beginning of the next row, then k2tog at this edge on every row
until Work straight until front measures 18½ inches. With wrong side facing, shape neck by decreasing 1 stitch at the beginning of the next row, then on the following 3 rows at this edge. Work straight until front measures 20 inches, then, with right side facing, shape shoulder by casting off 9 stitches at the beginning of the next and following 2 alternate rows, armhole edge. Cardigan Right FrontWork to correspond with left front, reversing all shapings. SleevesWith No 12 needles cast on 50 stitches and work 3 inches k1/p1 rib. Next row: k7, * p8, k6; repeat from * to last 15 stitches, p8, k7. Change to No 9 needles and pattern but keeping the 7 stitches at each end of the needle in reversed stocking stitch instead of 3. Thus your 1st row will read: Continue thus in pattern, shaping sides by increasing 1 stitch at each end of the 3rd and every following 6th row until there are 64 stitches , taking the increased stitches into the pattern as they are made (you will now have 5 cable panels across sleeve). Continue increasing as before on every 6th row until there are 78 stitches, taking the increased stitches into reversed stocking stitch. Work straight until sleeve measures 18 inches. With right side facing, shape top by casting off 3 stitches at
the beginning of the next 2 rows, then k2tog at the beginning of every
row until 36 stitches remain, then at each end of every row until 24 stitches
remain; cast off. Making Up the CardiganUsing a warm iron and slightly damp cloth, press parts very lightly on
wrong side, omitting welts. Front bands: Make a similar strip for the right front with the addition of 11 buttonholes, the first to come ¼-inch from lower edge, and the 11th about ½-inch from the top (allowing for 12th hole to come in the neckband later) and the remainder at equal intervals. First mark position of buttons on left front with pins to ensure even spacing, then work holes on right front to correspond. To make a buttonhole: Neckband: Work 1 inch in moss-stitch, making 12th buttonhole after ¾-inch has been done; cast off in moss stitch. Join side and sleeve seams; insert sleeves. Pullover Back With No 11 (3mm) needles cast on 126 stitches and work 3½ inches
Next row: k3, * p8, k6; rep. from * to last 11 stitches, p8, k3. Change to No 9 needles and work straight in pattern, until back measures
14 inches at centre. Work straight until back measures 23 inches, then with right side facing, shape shoulders by casting off 10 stitches at the beginning of the next 6 rows; leave remaining stitches on a spare needle or stitch holder. Pullover FrontWork exactly as for back to end of armhole shapings (96 stitches). Work straight over all stitches until front measures 18½ inches
at centre. Here divide for neck: Work straight until front matches back to shoulder shaping. With right side facing, shape shoulder by casting off 10 stitches at the beginning of the next and following 2 alternate rows, (armhole edge). Now return to the remaining stitches. Slip the centre 20 on a spare needle or stitch holder, and rejoin the yarn to the last 38 stitches, at the neck edge, and work to correspond with first shoulder. SleevesWith No 11 needles cast on 64 stitches and work 3 inches in k1/p1 rib, increasing 6 stitches evenly across the last row (70 stitches). Next row: k3, * p8, k6; repeat from * to last 11 stitches, p8, k3. Change to No 9 needles and working in pattern, increase 1 stitch at With right side facing, shape top by casting off 3 stitches at the beginning of the next 2 rows, then k2tog at the beginning of every row until 25 stitches remain. Cast off. Neckband Join right shoulder seam, and with right side facing, using No 11 needles,
pick up and knit 120 stitches all round neck, including those on spare
needles at back and front. Work 1 inch k1/p1 rib. Making Up the PulloverPress work lightly on wrong side under a damp cloth. |
Materials
|
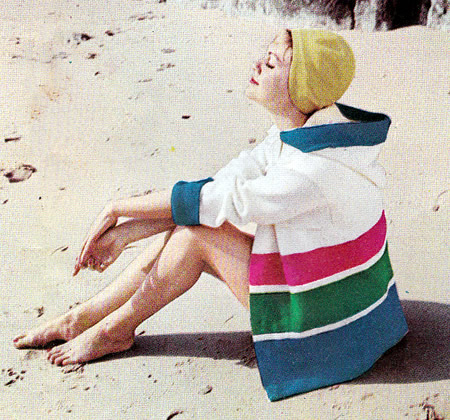
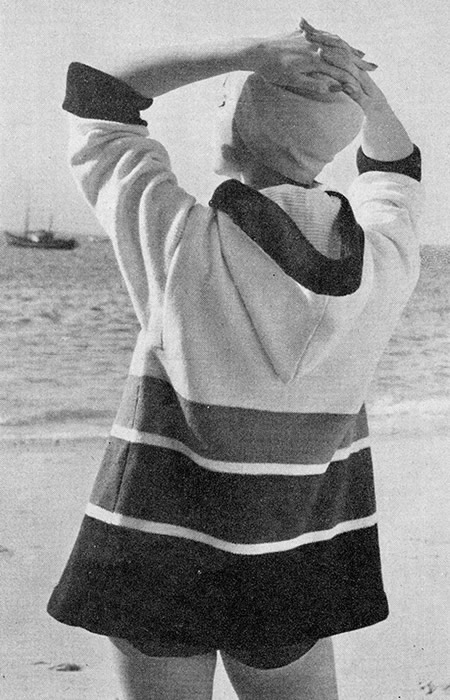
Warm wrap for the beach with a hood - completely appropriate for a breezy British summer's day!
The wrap is lined with towelling (optional) - and I think this is an excellent idea for a beach wrap. You will need to choose as fine (thin) a towelling fabric as you can because the wrap will already be fairly chunky even though it is made from a light weight quickknit or 5ply.
Instructions.Instructions for two sizes with larger sizes given in brackets. The pattern is in three colours - White is represented by W, Navy Blue by B, Green by G, and Pink by P. BackWith colour B, cast on 130 (138)
stitches and work 3 inches straight. Shape shoulders by casting off 8 (9)
stitches at the beginning of the next 8 rows. Work 8 rows straight on
remaining 46 (46) stitches Right FrontWith Colour B, cast on 68 (72) stitches and work 3 inches straight. Next row (right side facing): Fold
work in half and make hem. Continue straight in B until work measures 6 inches from lower edge.
Break B. Continue in W until front measures 16 inches from lower edge, Next row (wrong side facing): shape shoulder by casting off 8 (9) stitches at the beginning of the next and following 3 alternate rows, (armhole edge). Next row (right side facing): Cast
off 10 (10) stitches at the front
edge, then work 8 rows straight on remaining 26 (26)
stitches. Left FrontAs for right front, cast on 68 (72) stitches in colour B, and work 3 inches straight. Next row (right side facing): Fold
work in half and make hem. Work to correspond with right front reversing the shapings. SleevesWith colour B, cast on 80 (80) stitches
and work 4 inches straight in stocking-stitch for facing. Break B. Continue in W and shape sides by increasing 1 stitch at each end
of the next and every following 6th row until there are 100 stitches,
then at each end of every following 4th row until there are 120 stitches. HoodFirst Half: Next row (wrong side facing): * p2; purl twice in next stitch; repeat from * to last stitch, p1. [65 sts]. Continue in W and work 2 rows straight, then cast on 17 stitches at front
edge for facing. Work 12½ inches straight. Second Half: Facing: To Make UpEditor's note: lining the coat with fine towelling is optional (as is the colour of the lining material). However, if you are planning to do so, it is a good idea to cut out the lining using the knitted pieces as a pattern guide, at this point - before you sew the coat together. Allow ¼-½ inch turnings for the seams. Press parts on wrong side under a damp cloth, pinning out each piece
to shape and taking care not to stretch centre edges on fronts. Fold under 10 facing stitches down front edges and slip-hem lightly in position;
catch down neatly at neck and lower edge. Press lightly and turn back 2½ inches of facing on to right side
for cuffs. Sew blue facing all round front of hood, right sides facing, and along cast-on stitches at each side; turn width of facing on to wrong side and press; catch down neatly all round so that stitches do not show through on right side. Fold back on to right side and catch down at sides to keep in position. Press all seams. Line back, fronts and hood with yellow towelling if required. |
MaterialsQuick-knit, 5ply, or light double knitting: 14(15) 1oz balls in White, 6(6)oz in Royal Blue, and 2(2)oz each in Carnival Pink, and Shannon Green. A pair of No 9 (3¾mm) needles. 2 yards of fine yellow towelling for the lining; 1 yard of white facing ribbon; 1¼ yards white cord. Tension26 sts to 4 ins on No 9 (3¾mm) needles. Size mattersTo fit chest Abbreviationsstocking stitch: one row knit, one row purl. k2tog or p2tog: work 2 sts together to decrease. A Word on the WoolThe original yarn was Patons Quickerknit Botany. I believe "quicknit" wools evolved as a compromise yarn for
baby designs. They were half way between traditional DK and 4 ply; Phildar
marketed Pronostic (a synthetic) which was much used for their
baby patterns, being hard wearing and practical. Debbie
Bliss Baby Cashmerino is one such yarn being of superb quality and
available in wonderful range of colours. [Though if you really want to
use it a lot on the beach you might want to look for a less luxurious
fibre option]. Disclaimer
|
Make a HemThere are a number of tutorials on You tube about making an invisible hem as you knit. This one shows you two ways - the first part of the tutorial applies to the type you need here. This one shows you a number of ways to make a hem starting with just making the hem at the end when you sew up. The latter part of the tutorial applies to the type you need here. |
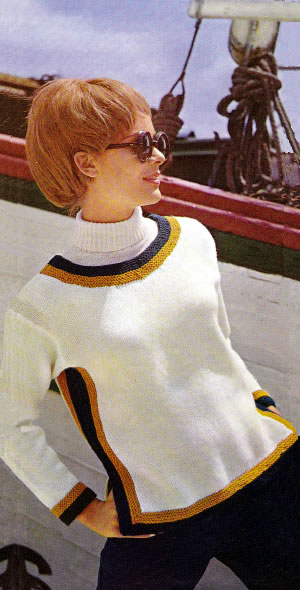
I admit that including the word "tabard" in the description of a pattern is not so inspiring - for one such as I anyway, a teenager in an era where tabards were ubiquitous and possibly naff even then. However it was named prior to that time and is after all merely descriptive - and I love this pullover. Styled perfectly as shown, worn over a polo-neck - very glamorous, very European, very sixties.
Sail away on a windy day in this attractive tabard style overpull. Jaunty and gay in snug and wind-proof yarn -- heavier than double-knit, yet so light and crisp in feeling. Gold and dark blue colour bands stripe the lower edges and smart side slits, and note the special crew neckline, designed to slip easily over a polo sweater.
Instructions.Instructions for three sizes with larger sizes given in bold or colour
between slashes. The pattern is in three colours - White is represented by W, Gold by G and Navy Blue by B. Back and Front alike (knit 2)With No 7 needles and white yarn W, cast on 76/82/88 stitches and work straight in stocking stitch until piece measures 17/17/17½ ins, ending with a purl row. Shape neck: Continue straight until work measures 21 /21
/21½ inches, ending with a purl row.
SleevesWith No 8 needles and blue yarn B, cast on 46/46/48
stitches, and work 8 rows in garter-stitch, (every row knit). Break off
B. Work straight until sleeve seam measures 18½/18½/19
inches.
Cast off loosely using a larger needle. BordersFront Neck: With right side facing, using yarn G, and No 8 needles, pick up and knit 30/30/30 stitches round left side of neck, knit 16/18/20 from stitch-holder, pick up and knit 30/30/30 stitches round right side. {76/78/80 sts} Next row: knit. Back Neck: Work as for front neck Lower Edge: With right side facing, No 8 needles and G, pick up and knit 76/82/88 stitches along lower edge of front. Work 7 rows garter-stitch, increasing 1 stitch at each end of the next
and every alternate row. Join in B, and work 8 rows garter-stitch, increasing stitch at each end
of every alternate row. Side edges:
To Make UpPress parts lightly on wrong side under a damp cloth. |
MaterialsAran or worsted weight yarn: 13/14/15 1oz balls in White and 3 1oz balls in each of Gold and Light Navy Blue. A pair each of Nos 7 (4½mm) and 8 (4mm) needles. Tension20 sts x 25 rows to 4 ins on No 7 (4½mm) needles. Size mattersTo fit chest Abbreviationsstocking stitch: one row knit, one row purl. k2tog or p2tog: work 2 sts together to decrease. A Word on the WoolThe original yarn was Patons Flair - one of those "tripleknit" yarns which never caught on in the UK. More or less Aran or American worsted weight . As usual no clues as to the yardage, but it was 60% wool, 40% courtelle (acrylic). Disclaimer
|
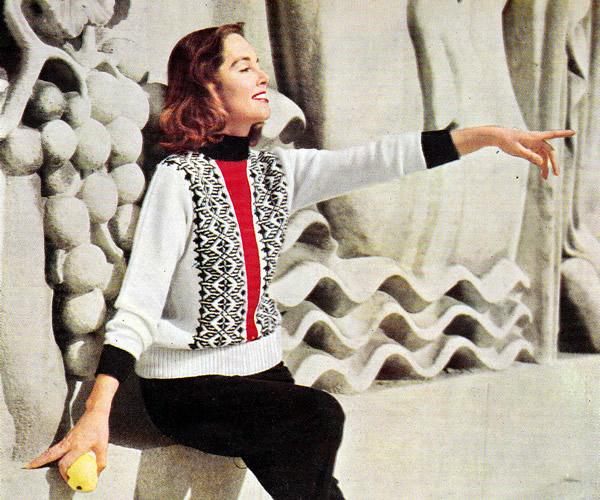
Continental after-ski casuals - fifties style .
... even though my sporty friends tell me that even more recent items that I think of as acceptable ski-wear have very quickly dated on the slopes.
"Hey look - over there - someone's wearing socks to match my sweater!"
[...and in case you were wondering - I think it's an orange she's holding.]
Instructions.The pattern is in three colours - White is represented by W, Black by
B, and Red by R. FrontWith No 8 needles and white yarn W, cast on 99 stitches and work 3 inches in k1/p1 rib, rows on right side having a k1 at each end, and ending with a wrong side row. With right side facing, change to pattern introducing the fair-isle pattern (worked from the chart) in stocking-stitch and the red panel in red yarn (R) worked in rib up the centre.
Continue setting out the panels as follows:— Keeping centre rib and pattern correct work 9 rows straight. Next row: k12 W; k2tog W; pattern
31; k1 R; using R pick up horizontal loop before next stitch and knit
into the back of it; p1 R, k1 R, p1 R, using R pick up horizontal loop
before next stitch and knit into the back of it, k1 R; pattern 31; p1
W, k1 W, k2tog W through back of loops, k12 W. Next row: k11 W; k2tog W, k1 W, p1
W; pattern 31, k1 R; using R pick up horizontal loop before next stitch
and purl into the back of it; using R (k1, p1) twice, k1 R, using R pick
up horizontal loop before next stitch and purl into the back of it, k1
R; pattern 31; p1 W, k1 W, k2tog W through back loops, k11 W. Keeping pattern and rib correct work 14 rows straight. Continue in pattern increasing the rib stitches in this way and decreasing in the White panel at each end, on the next and every following 16th row until work measures 13½ inches from the start, and ending with right side facing. Shape sleeves as follows: This completes the sleeve shaping Continue in pattern shaping on every 16th row as before until sleeve edge measures 4 inches ending with right side facing. Shape neck as follows: Next row: Work 124, rib the next 17 stitches, placing them on to a stitch-holder and leave for the time being; work 124 stitches to end. Continue on the last 124 stitches only, decreasing 1 stitch at the neck edge on the next 2 rows. Next row: Cast off 31, work to last
2 stitches, p2tog. With wrong side facing, shape shoulder by casting off 7 stitches
at the beginning of the next and following alternate row. With wrong side facing, rejoin yarn to the remaining 124 stitches, work
to end. Decrease 1 stitch at the neck edge on the next 2 rows, then finish
to correspond with right shoulder. BackWith No 8 needles and W yarn, cast on 95 stitches and Change to stocking-stitch, working in White throughout, and work straight until side edge measures same as front ending with right side facing for next row. Shape for sleeves by casting on: 2 stitches at the beginning
of the next 10 rows; 5 stitches at the beginning of the next 4 rows; 6
stitches at the beginning of the next 2 rows; 7 stitches at the beginning
of the next 2 rows; 8 stitches at the beginning of the next 2 rows; 9
stitches at the beginning of the next 2 rows; 10 stitches at the beginning
of the next 2 rows; 11 stitches at the beginning of the next 2 rows; 12
stitches at the beginning of the next 2 rows. [261 sts] Continue straight in stocking-stitch until sleeve edge measures 4 inches
ending with right side facing. Shape sleeves and shoulders by casting
off 31 stitches at the beginning of the next 6 rows; 7 stitches at the
beginning of the next 4 rows; 9 stitches at the beginning of the next
2 rows. [29 sts] NeckbandJoin shoulder seams. Work in rounds of k1/p1 rib for 2½
inches. Cuffs With right side facing, using two No 10 needles and Black yarn B, pick
up and knit 40 stitches along sleeve edge. Work 3 inches k1/p1 rib. To Make UpPress work lightly under a damp cloth, avoiding ribbing. |
MaterialsOriginal pattern calls for double knitting yarn: 13 oz in white (W), 3 oz in black (B), and 1 oz in "lipstick" red (R). One pair of No 8 (4mm) needles 2 stitch holders. Tension22 sts x 30 rows to 4 ins on No 8 (4mm) needles. Size mattersTo fit chest Abbreviationsstocking stitch: one row knit, one row purl. k2tog or p2tog: work 2 sts together to decrease. Disclaimer
|
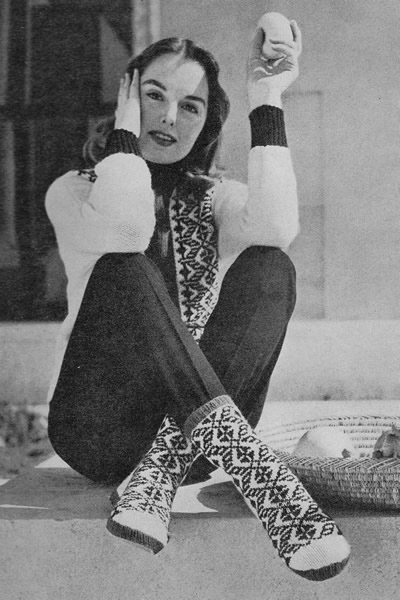
And here we see the whole splendid outfit.
[... and she's still holding on to that orange...]
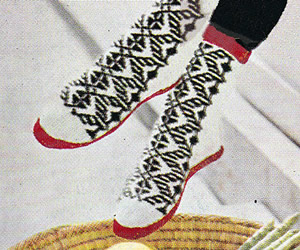
Sports wear.... skiing!
... even though my sporty friends tell me that even the items I think of from more recent years as acceptable ski-wear have very quickly dated on the slopes.
Anyway - to kick off in fifties style - "ankle-warm slipper boots".
InstructionsMake two socks alike. Main body:Using the pair of No 10 needles and red (R) yarn, cast on 51 stitches, and work as follows: 1st row: k2, *
p1, k1; repeat from * to last stitch,
k1 7th row: k2, (p1, k1) 5 times, p1,
(k3, increase in next stitch) 6 times, k1, (p1, k1) 5 times, p1, k2. [57
sts] Join in white (W) and purl 1 row. Now introduce black yarn B and work the fair-isle pattern over the centre
31 stitches, using stocking stitch and reading from the chart, and keeping
13 stitches on either side in rib as before.
Work rows 1 through 12 from the chart, 3 times in all, then 1st and 2nd rows again. Next row: Rib 13 and slip these stitches
on to a length of wool or a stitch holder for the time being, pattern
across the next 31 stitches, slip the remaining 13 stitches on a length
of wool as before. Next row: (k2, k2tog.) 7 times, k1,
k2tog. [23 sts] Adjust length of foot here: For size 5 foot work 2 rows straight in stocking stitch; Continue in stocking stitch, shaping toe by decreasing 1 stitch at each
end of the next and every knit row until 15 sts remain, then at each end
of every row until 9 stitches remain. To make heel:Slip the 26 stitches left on spare wool or stitch holders on to one needle
and with right side facing, join in W 1st row: k2, (p1, k1) 5 times, p2tog.,
(k1, p1) 5 times, k2. To shape instep, using needle with the 1 stitch remaining, pick
up and knit 10 stitches along the side of the heel. With right side facing, pick up and knit 11 stitches along the other
side of the heel and work to correspond. Making upPress the pattern parts lightly under a damp cloth. Stitch slipper firmly to sole. |
MaterialsOriginal pattern calls for double knitting yarn: 2 oz in white (W), 1 oz in black (B), and 1 oz in "lipstick" red (R). One pair of No 10 (3¼mm) needles Two 4 inch zip fasteners. A pair of slipper soles. Tension24 st and 32 rows to 4 inches (10cm). Size mattersTo fit UK women's size 5,6,7. Abbreviationssl1: slip one stitch by passing it between the needles without knitting it. psso: pass the slipped stitch over. k2tog or p2tog: work 2 sts together to decrease. Disclaimer
|
A slightly clearer picture of the boots, showing the snazzy back zip closing.
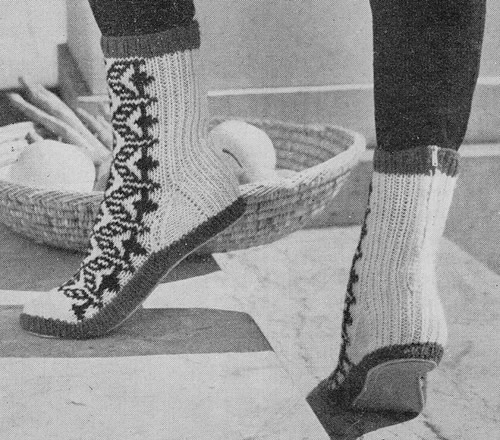
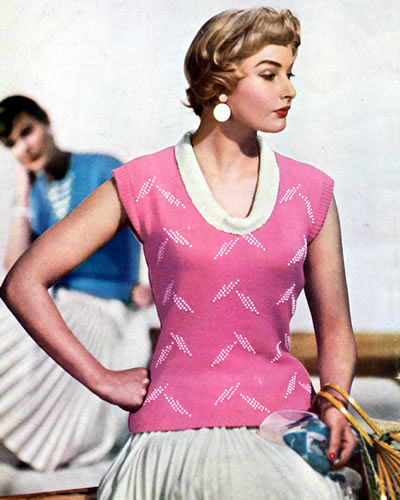
I admit this is clearly styled for summer but I always thought to make it in black with gold beads and perhaps a gold metallic yarn for the collar.
Either way it's a lovely flattering top in fine yarn.
This pattern offers you the option of beads - which are threaded on in advance and then knitted in - or "trimmmed with embroidery". I found a good alternative to pre-threading beads which is hooking them, where you can work them in as you go. I wrote about this technique in an earlier entry, and repeat the instructions here at the end of these pattern instructions.
I think beads would be lovely for a winter version and perhaps embroidery for summer.
Instructions. Instructions for larger size is given in brackets. Where one set of
figures is given this applies to both sizes. Instructions in square brackets
also apply to both sizes. 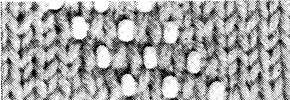 To thread beads on to the wool, make a needle with a 4-inch length of fuse wire by folding up 1½ inches of wire into a loop, slip the end of the wool through the loop, then twist the wire very tightly to form a smooth needle with the wool fixed firmly at the end. [Editor's note: I wrote about threading beads in a previous article - go to this link to see some pictures.] Back** For bead version: break wool and thread 126 beads. 1st - 6th rows: Work in stocking
stitch, starting with a knit row. For bead version, break wool and thread 126 beads. 45th - 70th rows: As 7th to 32nd
rows but reverse, motif by reading pattern rows (odd rows) backwards,for
example 45th (7th) row will read: 71st - 76th rows: As 1st to 6th rows. These 76 rows form pattern. Continue in pattern, shaping sides by increasing 1 stitch at each end
of next and every following 6th row until there are 125 (131)
stitches, taking increased stitches into stocking stitch a few rows straight
until back measures 15 inches down centre. With right side facing, shape armholes by casting off 7 stitches at the beginning of the next 2 rows, then k2tog at each end of the next and every alternate row until 97 (99) stitches remain. Continue straight in pattern until 5 lines of motifs have been done,
then continue in stocking-stitch until back measures 22½ inches down
centre. With right side facing, shape shoulders by casting off
10 (10) stitches at the beginning of the
next 6 rows. FrontWork as for back from ** to **.
Continue in pattern shaping armholes by casting off 7 stitches at the
beginning of the next 2 rows, then k2tog at each end of the next and following
alternate row. [107 (113) sts] Now shape neck: Next row: k2tog, pattern 45 (48),
turn and leave remaining stitches on a spare needle or needle holder.
Continue in pattern, decreasing 1 stitch at the armhole edge, on the following 3 (5) alternate rows, then keep this edge straight, and at the same time decrease 1 stitch at the neck edge on every following 4th row until 30 stitches remain. Work straight in stocking-stitch until front matches back. With right side facing, continue in stocking stitch, shaping shoulder
by casting off 10 (10) stitches at the
beginning of the next and following 2 alternate rows (the armhole edge).
Finish to correspond with first shoulder. CollarJoin shoulder seams. With No 11 needles and white (contrast) wool, cast
on 31 (33) stitches. Repeat the last 2 rows until strip fits comfortably all round neck. Cast
off in rib; join short sides. Making UpPress work lightly on wrong side under a damp cloth. With No. 11 needles,
right side facing and pink wool, pick up and knit 110 (110)
stitches all round each armhole. 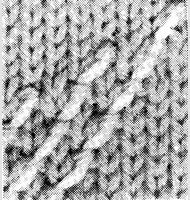 Join side seams. |
Materials
|
This method means you don't have to pre-string the beads on your yarn - I think it is good for placing a few beads amid a lot of knitting, when you don't want to carry just a few beads across miles of yarn before you use them, and you also don't want to break your thread.
This information appeared in Knitty.com. (Spring 2006 edition) in an article by Sivia Harding.
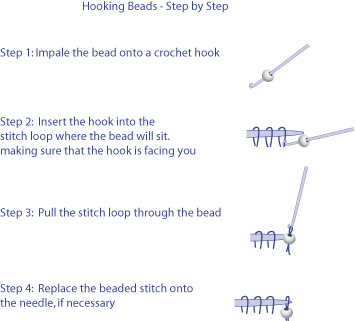
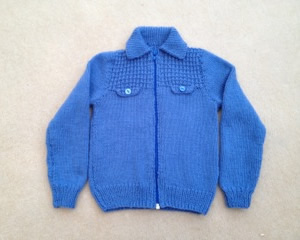
A delightful little child's jacket from the 1950s. Beryl knitted it for her grandson and it looks lovely on him - see pictures at the end. [She also gives useful feedback on the sizing].
Instructions:Two sizes are given - see notes on sizing with the photos at the end. Larger size is shown in brackets, and where only one number is shown it applies to both sizes. Pocket Flaps (make 2)Using No 8 (4mm) needles cast on 13 stitches. 1st row: Purl. Break off wool and leave stitches on a spare needle or stitch holder. Right FrontUsing No 10 (3¼mm) needles cast on 33[35] stitches. 1st row: K2, *
p1, k1; repeat from * to the last
stitch, k1. . Work these two rows 8[9] times more, increasing one stitch the beginning of the last row on the larger size only. {33[36] sts}. †† Shape armhole by casting off 3[3]
stitches the the beginning of the next row. Decrease 1 stitch the the
armhole edge on every row until 26[28]
stitches remain. Work 3[4] rows in stocking stitch thus finishing at the side edge. Place pocket flap: Proceed in yoke pattern as follows: 1st row (right side of work facing):
P8[8]; slip 13 pocket flap stitches
on to left-hand needle, purl across these stitches; purl to end. ††† Keeping yoke pattern correct, shape neck by casting off 5[6] stitches at the beginning of the next row. Decrease 1 stitch at the neck edge on every row until 17[18] stitches remain. Continue on these stitches until work measures 5[5½]inches from the beginning of the armhole shaping, finishing at the armhole edge. Shape shoulder: Left FrontUsing No 10 (3¼mm) needles cast on 33[35] stitches. Work rows 1 and 2 of rib as on Right Front 9[10] times, increasing one stitch the end of the last row on the larger size only. {33[36] sts} Work as for Right Front from †† to
††. Place pocket flap: Proceed in yoke pattern as follows: 1st row (right side of work facing):
P5[7]; slip 13 pocket flap stitches
on to left-hand needle, purl across these stitches; purl to end. Complete as for right Front working from ††† to end. Back:Using No 10 (3¼mm) needles cast on 65[71] stitches. Work rows 1 and 2 of rib as on Right Front 9[10] times. Change to No 8 (4mm) needles and proceed in stocking stitch until work measures same as fronts up to the armhole shaping, finishing at the end of a purl row. Shape armholes by casting off 3[3]
stitches at the beginning of the next 2 rows. Decrease 1 stitch at both
ends of every row until 51[55] stitches
remain. Proceed in yoke pattern as follows: 1st row (right side of work facing):
Purl. Continue in yoke pattern as on these 6 rows until work measures same as fronts up to shoulder shaping. Shape shoulder by casting off 8[9]
stitches at the beginning of the next 2 rows, 9[9]
stitches at the beginning of the following 2 rows. Sleeves (both alike):With No 10 (3¼mm) needles, cast on 32[34] stitches and Work 2¼[2½] inches in k1, p1 rib. Next row: Rib 1[2], (increase in next stitch, rib 3) 7 times; increase in next stitch, rib to end. {40[42] sts}. Change to No 8 (4mm) needles and proceed in stocking stitch, increasing 1 stitch at each end of the 7th and every following 10th[10th] row until there are 50[54] stitches. Continue on these stitches until work measures 10½[12] inches from the beginning. Shape top by casting off 3[3] stitches at the beginning of the next 2 rows. Decrease 1 stitch at each end of the next and every alternate row until 14[16] stitches remain. Cast off. Collar:Using No 10 (3¼mm) needles, cast on 85[89] stitches. 1st row: K2, *
p1, k1; repeat from * to the last
stitch, k1.. Work rows 2-5 inclusive 3 times more, then the 2nd row once. Cast off 9 stitches at the beginning of the next 6 rows. Pockets (make 2):Using No 8 (4mm) needles, cast on 13 stitches. Making UpOmitting the ribbing, with wrong side facing, block each piece by pinning
out round edges. Omitting ribbing, press each piece carefully using a
warm iron and a damp cloth. |
Materials7 [9] oz Double Knitting Yarn. A pair each No 8 (4mm) and No 10 (3¼mm) needles. 12[14] inch open ended zip. Tension22 sts and 30 rows to 4 inches on No 8 (4mm) needles in stocking stitch. Size mattersTo fit 23½[25½] inch chest. Abbreviations:yf: yarn forward; makes an extra stitch which forms a small pattern
hole when knitted on the next row. A word on the woolOriginal called for Patons Moorland, Double Quick, or Totem DK. Disclaimer
|
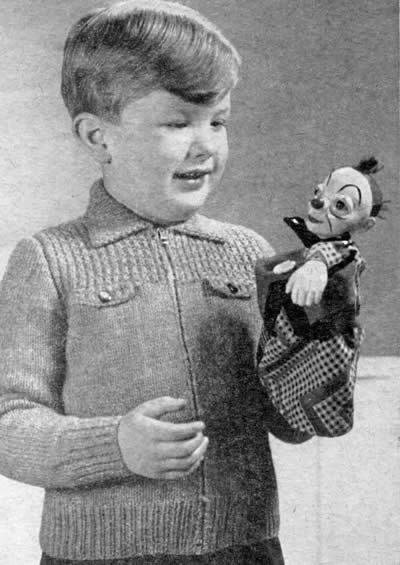
And here is a picture of the cardigan knitted by Beryl in a modern yarn: 2½ balls of Sirdar Snuggly Double Knitting:
Beryl had some notes on the sizing. The original pattern was for 4-7 year olds; her grandson was only 20 months old and she left the length as it was written - she says: "he is a chunky littel chap" and previous feedback for the Little Raglan Reefer suggested the lengths of these old patterns works up a bit short for modern taste. The sleeves could have been shortened (for a 20 month old) as you can see the cuffs are turned back. Beryl found the zip a challenge and ended up using the sewing machine.
Her conclusion is that if the knitter does the length longer and leaves the sleeves as they are it would be more suitable for a 2-3 year old.
Beryl said: "I love the jacket on my grandson and I have recently found a picture of my brother wearing the same cardigan that my Mum made for him!"
[And needless to say this one is my personal favourite - how is it that all our brothers from that era have such wonderful cheeky grins? All of them "Just William".]
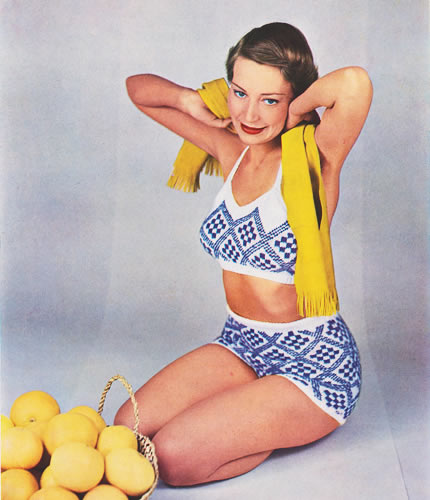
I have a weakness for blue and white so I find this very appealing. I note that they emphasise the firmness of the diamond stitch - whether this is for modesty or keeping its shape one cannot be certain.
I am not altogether sure of the relevance of the props - basket of grapefruit (tropical beaches?), an apparently woolly scarf ("gosh it's chilly in this photo studio"?).
Instructions.Strand unused wool loosely across back of work. Pattern rows as follows: These 30 rows form the pattern. [Editor's note: You can see how the pattern looks in the photo and on the chart but the chart is an adapted version specially designed to be used for the top.] Trunks (front)With L wool and No 13 needles, cast on 107 stitches and work 24 rows
k1, p1 rib. Work straight to the end of the 14th row of the 3rd pattern. Continue in pattern, shaping legs by casting off 8 sts at the beginning of the next 2 rows, and then 6 sts at the beginning of the following 14 rows. [23 sts remain and 3 complete patterns have been worked]. Work 6 rows straight in L on these 23 sts. Trunks (back)Work waist ribbing exactly as for front. Top (front)With L wool and No 13 needles, cast on 101 sts and work 1 inch in k1,
p1 rib. Change to No 10 needles and increase for bust thus: Continue straight in pattern, working from chart, and reading knit rows
from right to left, purl rows from left to right. Your first 2 rows will
read: Continue thus until 26th row of chart has been worked.
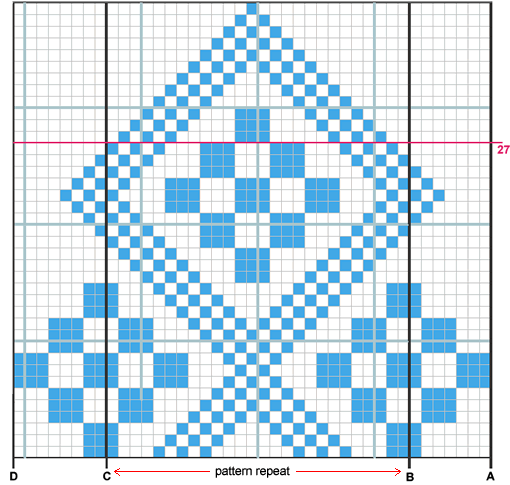
With right side facing, continue working chart, and at the same
time shaping top by casting off 6 sts at the beginning
of the next 2 rows, and 3 sts at the beginning of the following 2 rows. Continue in pattern on first half of work, decreasing 1 stitch at centre
Change to No 12 needles and continue in l.. wool only, casting off 3
sts With right side facing join wool to remaining stitches at centre front; cast off 1, then work to correspond with first shoulder, reversing shapings. Top (back)Left Back: Right back: Work to correspond with left, reversing shapings. To Make UpPress all pieces well under a damp cloth. TRUNKS: Join under-leg seam. With TOP: With right side facing, L wool, and No 13 needles, pick
up and knit 54 sts along top of left back. Work ¾ inch in k1,
p1 rib. With right side facing, begin at left side of front and pick up and knit
45 sts to top of left point, 26 down to centre, 26 to top of right point
and 45 sts down right side. With L wool and No 13 needles, cast on 9 sts and work 2 strips each
14 inches long in k1, p1 rib for ties. Sew in position, one at top |
Materials
|
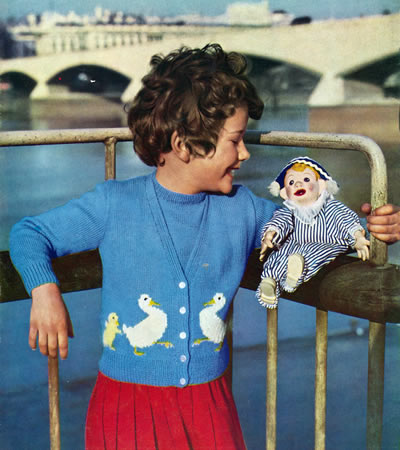
A twin set with a duck motif for Easter. However, the biggest charmer here is in the photo. Not only is the girl cute and looking like she having a lovely day out, but we have a real star in the shape of an original Andy Pandy himself. Even if the cardigan set does not appeal, these are cute little duckling motifs and the charts could be used for cushions or as cross stitch patterns.
Instructions:The individual ducklings are worked intarsia style, but main shade is
stranded loosely across back of work when not in use. ChartsThe charts are included with the pattern instructions below, but for a larger version of the charts you can right click on the icon below and choose "save link as" or "save target as" (browser dependent options) to download and save a pdf file. If you want to view chart images full size in the browser then right click on the image and choose "view image". Cardigan BackBegin by winding 4 balls each of Lemon (L) and Gold (G) wool. Change to No 11 needles and stocking stitch and work 30 pattern rows
from chart B, reading odd rows knit from right to left and even rows purl
from left to right.
When the 30 rows are completed, continue straight in stocking stitch in main shade (M) only until back measures 9 inches. Then with right side facing, begin to shape armholes by casting off 5 sts at the beginning of the next 2 rows, then k2tog at each end of every knit row until 83 sts remain. Work straight until back measures 14½ inches. With right side facing, shape shoulders by casting off 8 sts at the beginning of the next 6 rows; cast off remaining stitches. Left FrontWith No 12 needles and main shade (M), cast on 50 sts and work 2 inches k1/p1 rib, increasing 1 stitch at the end of the last row. [51 sts] Change to No 11 needles and stocking stitch and work 42 pattern rows
from chart C, reading odd and even rows as on back and joining in a separate
ball of G for each bird.
When the 42 rows are completed, continue straight in stocking stitch in M only until front measures 7 inches. Here shape front edge: Work 3 rows straight. Continue thus, decreasing 1 stitch at front edge on the next and every
following 4th row. Meanwhile, when front matches back at side edge, with
right side facing, shape armhole by casting off 5 sts at the beginning
of the next row, then k2tog at this edge on the following 5 knit rows,
after which you keep the armhole edge straight. Work straight until front matches back. With right side facing, shape shoulder by casting off 8 stitches at the beginning of the next and following 2 alternate rows, armhole edge. Right Front:Work as for left front, reversing all shapings. Sleeves (both alike):With No 12 needles and B. wool, cast on 52 sts and work 2 inches in k1,
p1 rib. With right side facing, shape top by casting off 3 stitches at the beginning of the next 2 rows, then k2tog at the beginning of every row until 46 sts remain, and then at each end of every row until 20 sts remain. Cast off. Front Borders:Join shoulder seams. To make a buttonhole: right side facing, rib 4, cast off 2, rib to end. On the next row casting on 2 over those cast off. Jumper Front:** Change to No 11 needles and work 2 rows in stocking stitch, starting
with a knit row.
When the 26 rows are completed, continue straight in stocking stitch
in M until front measures 9 inches. Then, with right side facing, shape
armholes by casting off 4 sts at the beginning of the next 2 rows,
then k2tog at each end of the next and every following knit row until
80 sts Work straight until front measures 12½ inches. Then, with right side facing, shape neck as follows:- Next row (right side facing): K30, k2tog, turn, and leave remaining stitches on a spare needle. Continue on these 31 sts , decreasing 1 stitch at the neck edge on every
row until 27 sts remain. Then decrease on every alternate row Work a few rows straight until front measures 14 inches. With right side facing, shape shoulder by casting off 8 sts at
the beginning of the next and following 2 alternate rows, (armhole edge). Finish to correspond with first shoulder. Jumper Back Work as for front from ** to ** . [80 sts] Work straight over all stitches until back measures 11½ inches.
Next row (right side facing): K42,
turn, and leave remaining stitches on a spare needle. To make a buttonhole: with right side facing, knit to last 3 sts, wool forward, k2tog, k1. When back measures same as front, with right side facing, shape shoulder by casting off 8 sts at the beginning of the next and following 2 alternate rows, (armhole edge); leave remaining 18 sts on a spare needle. With right side facing, rejoin wool to last 38 sts, cast on 4 sts for underlap. Next row: Knit. Finish to correspond with right shoulder, omitting buttonholes. Jumper SleevesWith No 12 needles and M, cast on 63 sts, and work ¾ inch k1/p1 rib, rows on right side having a k1 at each end. Change to No 11 needles and stocking stitch, shaping sides by increasing 1 stitch at each end of the 3rd and every following 4th row until there are 71 sts. Work a few rows straight until sleeve measures 2¾ inches. With right side facing, shape top by casting off 3 sts at the
beginning of the next 2 rows, then k2tog at the beginning of every row
until 47 sts remain, and then decrease at each end of every row until
19 sts Cast off. Jumper NeckbandJoin shoulder seams. With right side facing, using No 12 needles and M, pick up and knit 87 sts all round neck, including those on spare needles at back and front. Work inch k1/p1 rib, making 4th buttonhole after inch has been done and remembering to keep 4 sts at each end in garter stitch as before. Cast off in rib. Making UpPress parts carefully on wrong side under a damp cloth. Cardigan: embroider eyes and beaks of ducklings as for jumper. |
Materials 3 ply yarn: A pair each No 11 (3mm) and No 12 (2¾mm) needles. Four small buttons for jersey and 5 larger ones for cardigan. Tension32 sts and 40 rows to 4 inches on No 11 (3mm) needles in stocking stitch. Size mattersChest all round at underarm: on jumper, 25 ins; on cardigan, 26 ins;
A word on the woolOriginal called for Patons Beehive Fingering 3-ply. You can find some
nice 3 plies available to meet the tension specified. Disclaimer
|
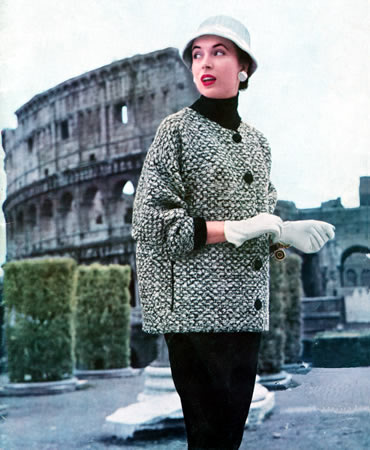
Wonderfully stylish mid-1950s tweed coat-style cardigan. I had to leave the background in the photo - indicating knitwear alla moda - and an exotic photo-shoot.
"Double-knitting and bouclet are worked together to produce this attractive tweed-knit fabric."
The style is simple enough to knit (all boxy shapes) and one feels could be adapted to larger sizes. However the real issue here will be choosing an appropriate yarn; the pattern indicates it is mostly knitted in a bouclé yarn knitted double and yet the resulting tension seems relatively fine (over the pattern stitch).
Instructions.The DK is used singly throughout and the Bouclet is used double with
either one ball of white together with one ball of black or two balls
of black, as stated in the pattern instructions. BackWith No 9 needles and black and white bouclet held together, cast on 142 sts fairly loosely and work in pattern as follows: 1st row
(right side facing): Knit in double boucle. These 8 rows form the pattern. Continue straight in pattern until back measures 14½ inches at centre. Place a coloured thread at each end of the row here to mark the start of the armholes as no actual shaping is done. Continue straight in pattern until back measures 24½ inches. With right side facing, shape shoulders by casting off 10 sts at the beginning of the next 10 rows; cast off remainder. Pocket linings (make 2 the same)Begin by making pocket linings. Left Front:With No 9 needles and black and white bouclet held together, cast on 82 sts and work 2½ inches straight in pattern ending with same pattern row as the pocket lining. Here start pocket opening. Next row (right side facing): pattern across 15 sts; (slip last 67 sts on a spare needle or a needle holder for the time being); pattern across 32 sts of one of the pocket linings [47 sts] Work 5½ inches straight in pattern on these 47 stitches, ending with a row on the right side of the work. Next row (wrong side facing): cast off 32 fairly loosely and pattern to end; leave these 15 sts on a second spare needle or a needle holder. With right side facing, rejoin wool to the remaining 67 sts. Next row (right side facing): pattern across 15 sts on spare needle, then on to the same needle pattern across the last 67 sts [82 sts] Continue straight in pattern over all stitches until front matches back
to Then keep the neck edge straight, and at the same time, when front Right Front:Work as for the left, reversing all shapings and making To make a buttonhole: For the right front, your 1st row of the pocket shaping will read: Next row (right side facing): pattern
across 67 sts and slip on a spare needle or a needle holder for the time
being. With right side Finish to correspond with left front reversing the instructions in line with the above. Sleeves:With No 12 needles and double black bouclet, cast on 62 sts and work 1½ inches k1, p1 rib. Break off 1 ball of black and join in 1 ball of white bouclet. Work straight until sleeve measures 15½ inches. Cast off right across fairly loosely. NeckbandJoin shoulder seams. With right side facing, No 12 needles and double black bouclet, begin
at right shoulder seam and pick up and knit 42 sts across back of neck,
* turn and rib back, picking up and purling
4 sts from side of neck at end of row; turn and rib back, picking up and
knitting 4 sts from Rib to end of row; cast off in rib. To Make UpPress parts on wrong side under a damp cloth. Face both front edges on wrong side with ribbon, turning under 1 stitch of the knitting as you do so and taking care not to stretch the knitting. Cut holes in the ribbon to correspond with those in the knitting, then oversew around the holes with matching sewing cotton. The original pattern intended for you to cover button moulds with rounds
of single black bouclet in double crochet, drawing crochet With right side facing, No 12 needles and double black bouclet, pick
up and knit 26 sts down front piece of each pocket slit. Press all seams. |
Materials
|
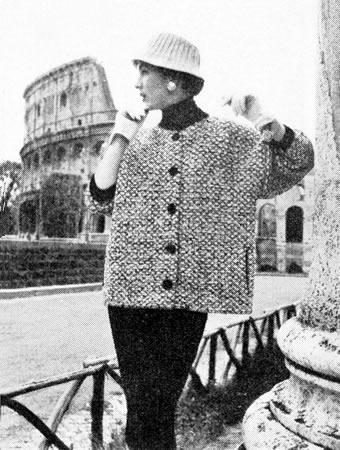
|
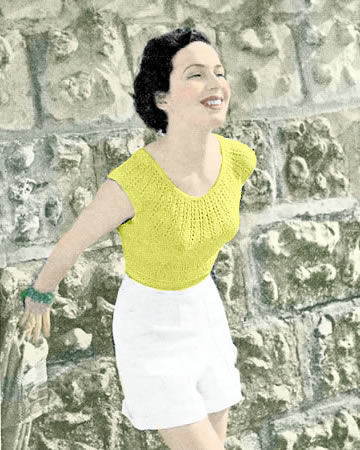
By the sea in 1950 - a quick (ish) knit in fine yarn.
"This intriguing affair is knitted short for a sun top or as long as you like for a jumper.
For evening wear decorate the lattice ribs of the sun-ray yoke with sequins or beads."
Instructions.These instructions are for a sun top - which is essentially a cropped top ending at the waist, and a "jersey" version which is slightly longer. In both versions the front and back are knitted separately in stocking stitch (one row knit, one row purl) and then joined to form a patterned yoke with intergral cap sleeve. Sun Jersey FrontWith No 11 needles cast on 112 stitches and work 16 rows in stocking-stitch, starting with a knit row. Continue in stocking stitch, shaping waist as follows:- Change to No 13 needles and work 1½ inches straight, ending with a purl row. Change back to No 11 needles. Next row: increase in 1st stitch,
k27, increase in each of next 2 sts, k28, increase in each of next 2 sts,
k27, increase in last stitch. [94 sts] Continue in stocking stitch, shaping sides by increasing 1 stitch at
each end of the next and every following 6th row until there are 114 stitches.
** With right side facing, divide for yoke as follows:- Next row: k53; turn and leave remaining stitches on a spare needle. Continue on first 53 sts, working 3 more increasings at the side edge
on every 6th row as before; then, keeping this edge straight, at the same
time start to shape the yoke by casting off 4 sts. at the beginning of
the next 7 purl rows, then 2 at beginning of following 4 purl rows. With right side facing, shape armhole by casting off 6 sts at the beginning of the next row; then k2tog at this edge on next 6 knit rows, while at the same time continuing to shape the neck by casting off 2 sts at the beginning of the next 2 purl rows and then p2tog at the beginning of the following 4 purl rows. Fasten off. Return to remaining stitches and slip centre 8 sts on a spare needle or safety pin. With right side facing, rejoin wool to last 53 sts and work to correspond
with first shoulder, reversing all shapings. Sun Jersey BackWork exactly as for front until there are 114 sts, then continue in stocking
stitch, increasing at side edges on every 6th row as before until there
are 118 sts. ** With right side facing, divide for yoke as follows:- Next row: k55; turn and leave remaining stitches on a spare needle. Continue on these 55 sts, working 1 more increase at side edge as before, then keep this edge straight, and at the same time shape yoke by casting off 4 sts. at beginning of next 5 purl rows. [36 sts] With right side facing, shape armhole by casting off 8 sts at the beginning of the next row; then k2tog at this edge on next 7 knit rows, while at the same time continuing to shape the neck by casting off 2 sts at the beginning of the next 10 purl rows. Fasten off. Return to remaining stitches and slip centre 8 sts on a spare needle or safety pin. With right side facing, rejoin wool to last 55 sts and work to correspond
with first back shoulder, reversing all shapings. YokeBack: With No 11 needles, cast on 32 sts, then with right side
facing, on to this needle, pick up and knit 40 sts down right side of
back, k8 from spare needle, pick up and knit 41 sts up left back. Now work in pattern thus:- 1st row (right side facing): k3;
* wfd, slip 1, k2tog, psso, wfd,
k6; repeat from * ending last repeat
k3 instead of k6. These 4 rows form the pattern. Work 6 more rows. Next row (decrease row on 3rd pattern row):
k8, k2tog, * k7, k2tog; repeat from
* to last 8 sts, k8. [137 sts] Continue in pattern, decreasing 1 stitch in centre of each stocking stitch
panel as laid out above on every following 8th row until 2 sts remain
in each panel. [Editor's note: This is one of those things that is easier to do with the knitting in front of you than to explain. Each decrease row reduces the number of sts by 16. So on the 7th row following your 4 initial pattern rows, you do your first set of decreases as above [137 sts]; your next decreases are on the 15th row where you also decrease one stitch at each end of the row as well as in the panels so this decreases 18 sts in the row [119 sts]; on the next 8th row you decrease 16 sts in the panels only [103 sts]; and finally on the next 8th row you decrease in the panels as well as each end - 18 sts [85 sts remain]. Note that you have to place your decreases in the stocking stitch panels by centering them by eye rather than counting.] Now work straight until the yoke is 4 inches deep. Front: With No. 11 needles, cast on 32 sts, then with right side
facing, pick up and knit 54 sts. down left front, k8 from spare needle,
pick up and knit 54 sts up right front. Finish exactly as for the back, but you will have 100 sts on needle at end of the decrease rows instead of 85. [Editor's note: So - same sequence as on the back but this time each decrease row reduces the number of sts by 19. So on the 7th row following your 4 initial pattern rows, you do your first set of decreases using the same layout for the decrease row as given for the back [161 sts]; your next decreases are on the 15th row where you also decrease one stitch at each end of the row as well as in the panels so this decreases 21sts in the row [140 sts]; on the next 8th row you decrease 19 sts in the panels only [121 sts]; and finally on the next 8th row you decrease in the panels as well as each end - 21 sts - and voilà - 100 sts remain.] Cropped Sun Top FrontWith No 13 needles, cast on 102 sts and work 2½ inches k1, p1 rib. Change to No 11 needles and stocking stitch and increase at each end
of the 1st and every following 6th row until there are 114 sts. Now work as for Sun Jersey front from ** to end. Cropped Sun Top BackWork exactly as for front until there are 114 sts then continue in stocking
stitch, increasing at side edges on every 6th row as before until there
are 118 sts. Now work exactly as for the back of Sun Jersey from **
to end. Cropped Sun Top YokeWork exactly as given for the Sun Jersey. Making UpPress pieces on wrong side under a damp cloth. Work a row of double crochet all round armholes and lower edge of the
Jersey. Press seams. |
Materials
|
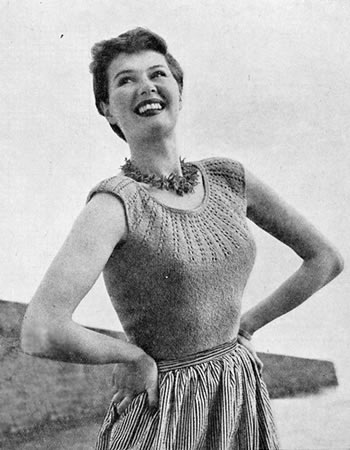
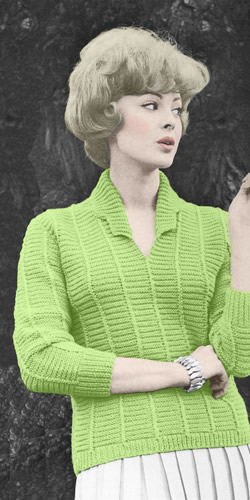
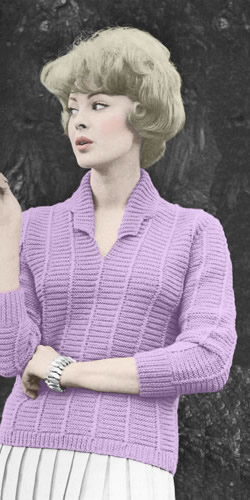
I thought this looked like highly wearable jumper with a very flattering neckline. From the picture it looks like it has bracelet length sleeves - which I very much favour - but the instructions imply they are full length; I like the look of the pushed-up sleeves in the photo so much that I think I would knit them shorter. There is shaping through the body but this could be omitted - you would need to cast on 106 (112) instead of 94 (100) and knit straight to the armhole.
The pattern suggests using a violet colour but I envisioned it in chartreuse.
Instructions.Instructions for large size given in brackets. Where one set of figures is given this applies to both sizes. Back‡‡ With No 10 (3¼mm) needles cast on 94 (100) stitches and work 1 inch in k1/p1 rib. Change to No 9 (3¾mm) needles and pattern as follows: 1st row (right side facing): k10, * cross2K, k10 (11), repeat from * to last 12 stitches, cross2K, k10. 2nd row: p10, * cross2P, p10 (11), repeat from * to last 12 stitches, cross2P, p10. 3rd row: p10, * cross2K, p10 (11), repeat from * to last 12 stitches, cross2K, p10. 4th row: k10, * cross2P, k10 (11), repeat from * to last 12 stitches, cross2P, k10. These 4 rows form the pattern.
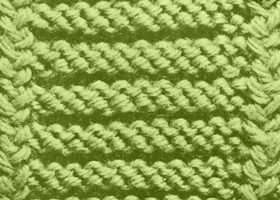
Continue straight in pattern until back measures 4 inches. ‡‡ With right side facing, shape armholes by casting off 5(5)
stitches at the beginning of the next 2 rows, then decrease 1 stitch at
each end of the next and every following alternate rows until 86 (90)
stitches remain. With right side facing, shape shoulders by casting off 9 (9)
sts at the beginning of next 4 rows, then 9 (10)
sts at the beginning of next 2 rows. FrontWork as back from ‡‡ to ‡‡. With right side facing, shape armholes and divide for neck as follows: Next row (right side facing): cast
off 5 (5) stitches, pattern 47 (50). Next row: cast on 2, pattern to end, taking the 2 cast-on stitches into the ridge pattern. [49 (52) sts] Continue shaping armhole by decreasing 1 stitch at this edge on next and following 4 (5) alternate rows. [44 (46) sts] Work a few rows straight until front opening measures 2 inches. With wrong side facing, cast on 10 sts for collar, pattern to end, taking the 10 cast-on stitches into the ridge pattern. [54 (56) sts] Work straight until outside edge of collar measures 2 inches from the
10 cast-on stitches. Continue straight in pattern until front matches back at armhole edge. With right side facing, shape shoulders by casting off 9 (9)
sts at the beginning of the next and following alternate row, then 9 (10)
sts at the beginning of the following alternate row. With right side facing, rejoin wool to remaining 54 (57) sts, pattern to end. Next row (wrong side facing): cast off 5 (5) stitches, pattern to end. Now decrease 1 st at armhole edge on following 5 (6) alernate rows. [44 (46) sts]. Finish to correspond with first shoulder, with reversed shapings. SleevesWith No 10 needles, cast on 48 (50) stitches and work 2½ inches in k1/p1 rib, increasing 2(3) sts evenly across last row. Change to No 9 needles and pattern across as follows: 1st row (right side facing): k6, * cross2K, k10 (11), repeat from * to last 8 stitches, cross2K, k6. 2nd row: p6, * cross2P, p10 (11), repeat from * to last 8 stitches, cross2P, p6. 3rd row: p6, * cross2K, p10 (11), repeat from * to last 8 stitches, cross2K, p6. 4th row: k6, * cross2P, k10 (11), repeat from * to last 8 stitches, cross2P, k6. These 4 rows form the pattern. Continue in pattern increasing 1 stitch at end of next and every following
8th row until there are 76 (79) stitches,
taking the increased stitches into the pattern as they are made. With right side facing, shape top by casting off 4 (4) sts at the beginning of the next 2 rows, then decrease 1 stitch at each end of the next and every following alternat row until 30 (37) sts remain, then at each end of every row untl 14 (15) sts remain. Cast off. To Make UpPress parts very lightly on wrong side under a damp cloth, taking care
not to spoil the ridge pattern. |
Materials
|
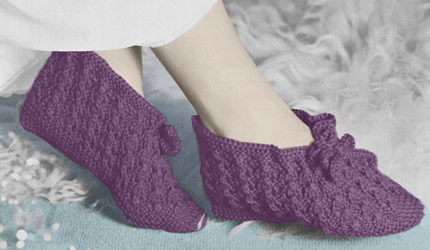
A lovely old-fashioned pair of knitted slippers. Make them using a luxury yarn in a striking colour for a quickly knitted Christmas gift.
InstructionsInstructions in 3 sizes, each size separated by forward slash (/). Both slippers are worked alike. Slipper (make 2)With No 11 needles, cast on 90/95/100
stitches and work 12 rows in garter stitch (that is: every row knitted). Change to pattern as follows: 1st row: k4, *
p2, k3; repeat from * to last 6 stitches,
p2, k4. 3rd row: k1, *
wfwd, slip 1, k2tog, psso, wrn, p2, *
to last 4 stitches, wfwd, slip 1, k2tog, psso, wrn, k1. Repeat these 4 rows 3 times more, then rows 1-3 inclusive again: 19 pattern rows. Work 5 rows in garter stitch. Cast off. Make a second slipper in the same way. To Make UpPress parts lightly on wrong side under a damp cloth. Fold foot pieces in half and join centre back and foot seams neatly with a flat seam. Thread ties through holes made in 19th row of the patterning. Press seams. Note: |
Materials
|
An extra Christmas gift just for you. Don't bother to thank me - it's priceless I think you'll agree.
Perfect if you are thinking of elf-themed fancy dress this Christmas - and I can recommend that you use any left-over felt to make a matching elfish pointy collar.
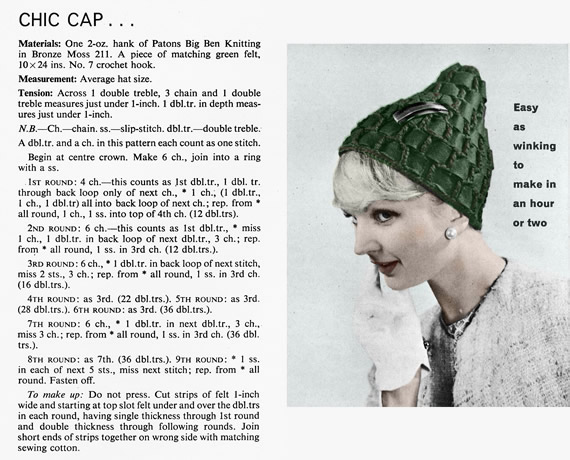
They miss out the key instruction at the end of the making up section .... "Do not wear".
Joking apart, this method of threading ribbon or fabric strips through a crocheted mesh base is a good technique for creating an interesting textured fabric to work with. I have seen it used to good effect making, for example, an evening clutch bag, using more luxurious starting materials.
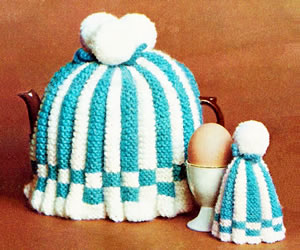
The archetypal cosy design (maybe with a few too many pom-poms for historical verisimilitude but who's counting?). And - no idea why the British are quite so obsessed with hats for their eggs, but it does seem that there is always a matching egg cosy* to complete the set.
*
I think with very fine wool and a bit of adaptation these could become knitted hats for the Big Knit - a campaign from Innocent Smoothies, who are again putting knitted hats on their bottles this year in aid of Age UK (helping older folk face the winter). The advertising says "knit a hat this November" however unfortunately the deadline for knitting is past as the campaign aims to have the hats in place during November - so maybe next year....
However, you can still join in by designing your own virtual hat and sharing on Facebook (10p donation from Innocent), or by buying a smoothie with a hat (25p donation by Innocent), or with a direct donation. Have a look on their website - there are free mini-hat patterns!
InstructionsThe pleats are formed by each colour being drawn up across the back of the colour just used and keeping all the strands to the wrong side of the work throughout. Tea Cosy (make 2 pieces)With No 8 needles and light colour (L), cast on 98sts and knit 5 rows. Join in Dark colour (D) and proceed in pattern as follows: 1st row: k1L, k6D; *
k7L, k7D; repeat from * to last 7
stitches, k6L, k1D. Repeat 1st and 2nd rows until work measures 6 inches from beginning finishing at the end of 2nd row. Shape top as follows: Break off wool, thread end of Light colour through the remaining stitches,
draw up and fasten off securely. Make another piece in same manner. To Make Up the Tea CosyStitch side and top seams leaving openings for handle and spout. Egg Cosy (make 1 piece)With No 10 needles and light colour (L) in 3 ply, cast on 72sts and knit 3 rows. Join in Dark colour (D) and proceed in pattern as follows: 1st row: k1L, k5D; *
k6L, k6D; repeat from * to last 6
stitches, k5L, k1D. Repeat 1st and 2nd rows until work measures 2¾ inches from beginning finishing at the end of 2nd row. Shape top as follows: Work from ‡ to ‡
as on Tea Cosy. To Make Up the Egg CosyStitch side seam. |
Materials
|
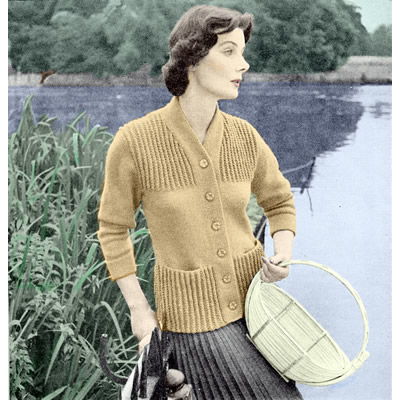
This is a lovely 1950s Autumn jacket which is defined as "chunky" though this means "not fine" in modern parlance, as the wool weight is a pretty standard double knitting.
I love this style and always meant to make for myself but have not yet done so - hence it is untested, and the original instructions are available in only one size. The instructions are not intended for a beginner - you need to keep your eye on right and wrong sides, and preserving the button band stitches - but having said that, I think it is fairly clearly explained.
Instructions.Fancy rib pattern worked as follows: 1st row (wrong side facing): *
k2, p3tog; repeat from * to last 2 sts, k2 These 2 rows form pattern. BackWith No 8 (4mm) needles cast on 90 stitches loosely and work 4 inches
in stocking stitch, ending with a purl row. Next row: Purl, increasing 3 sts, evenly across the row [93 sts] Work straight in stocking stitch until back measures 7 inches from lower edge. With right side facing continue in stocking-stitch, shaping waist as
follows: Next row: k2tog, k25, k2tog, k27;
sl1, k1, psso; k25; k2tog. [81 sts] With right side facing continue shaping as follows: Next row: Increase in 1st stitch,
k26; increase 1 by picking up horizontal thread before next stitch and
knitting into back of it; k31; increase 1 as before; k26; increase in
last stitch [89 sts] Next row: Increase in 1st stitch,
k27; increase 1 by picking up horizontal thread before next stitch and
knitting into back of it; k33; increase 1 as before; k27; increase in
last stitch [93 sts] Next row: Increase in 1st stitch,
k28; increase 1 by picking up horizontal thread before next stitch and
knitting into back of it; k35; increase 1 as before; k28; increase in
last stitch [97 sts] Next row: Increase in 1st stitch,
knit to last stitch, increase in last stitch [99 sts] Next row (wrong side facing): P9; * purl twice in next stitch, p6; repeat from * to end [89 sts] Next row (right side facing): * p2, wrn, p1, wrn; repeat from * to last 2 sts, p2. [147 sts] With wrong side facing. change to fancy rib pattern, starting with 1st
pattern row and work straight until back measure 23½ inches down
centre ending with 1st pattern row [89 sts] Pocket LiningsWith No 8 needles, cast on 26 sts and work 6 inches in stocking stitch
ending with a knit row. Make second pocket in the same way. Left FrontWith No 8 needles, cast on 95sts and work as follows: Next row (right side facing): purl to last 23 sts; k11, sl1 purlways, k11. Change to pattern with button border in stocking stitch and remainder
in pattern as follows: 1st row (wrong side facing): p23;
* k2, p3tog; repeat from *
to last 2 sts, k2 Repeat these 2 rows until front measures 7 inches, ending with 1st pattern
row [67 sts] Next row: K5; increase 1, k4, cast off 26, k20 sl1 purlways, k11. Next row: P32, pur1 across one set of 26 pocket stitches in place of those cast off; p10 [68 sts]
Next row: K2tog, k27. k2tog, knit
to end. Next row: K2tog, k26. k2tog, knit
to end. Next row: K2tog, k25. k2tog, knit
to end. [62 sts] With right side facing, continue shaping as follows: Next row: Increase in 1st stitch,
k 25, increase 1, knit to end. Next row: Increase in 1st stitch,
k 26, increase 1, knit to end. Next row: Increase in 1st stitch,
k 27, increase 1, knit to end. Next row: Increase in 1st stitch,
k 28, increase 1, knit to end. Next row: Increase in 1st stitch, knit to end [71 sts] Work straight until front measures same as back at side edge. With right side facing, shape armhole by casting off 6 sts at the beginning of the next row, then k2tog at this edge on the following 4 alternate rows [61 sts] Next row: Purl. Next row: * p2, wrn, p1, wrn; repeat from * to last to last 25 sts; p2, k11, sl1 purlways, k11. [85 sts] With wrong side facing, continue in fancy rib pattern as follows: 1st row (wrong side facing): P23;
* k2, p3tog; repeat from *
to last 2 sts, k2 Repeat these 2 rows until front measures 20 inches, ending with 1st pattern row. Shape neck as follows: Next row: * p2, wool round needle, p1, wool round needle; repeat from * to last 25 sts; p2tog, k11, sl1 purlways, k11. Continue decreasing thus inside the 23 border sts on the following 10 alternate rows. Pattern back (1st pattern row). [50sts] Work a few rows straight in pattern, until back measures same as front
ending with 1st pattern row. With right side facing, continue in p2/k1 rib keeping stocking-stitch border as before, and shape shoulder by casting off 9 sts at the beginning of the next and following 2 alternate rows - armhole edge. Leave remaining 23 sts on a spare needle or stitch holder. Right FrontWith No 8 needles, cast on 95sts and work as follows: Next row (right side facing): K11, sl1 purlways, k11, purl to end. Change to pattern as follows (button border in stocking stitch as before): 1st row (wrong side facing): *
k2, p3tog; repeat from * to last 25sts; k2,
p23. Repeat these 2 rows for 1½ inches, ending with 1st pattern row. With right side facing, make double buttonhole in next 2 rows as follows: k4, cast off 3, k4, sl1, k4, cast off 3, k4, work to end and back, casting on 3 sts over those cast off Finish as for left front reversing all shapings, making another 5 double buttonholes as above at 3-inch intervals. Your pocket row will read: SleevesWith No 10 needles, cast on 48 sts loosely and work 5 inches in stocking stitch, ending with a purl row. With right side facing, change to No 8 needles and continue in stocking-stitch,
shaping sides by increasing 1 stitch at end of 3rd and every following
6th row until there are 78 sts. With right side facing, shape top by casting off 4 sts at the beginning of the next 2 rows, then k2tog at the beginning of every row until 40 sts remain; then k2tog at each end of every row until 20 sts remain. Cast off. To Make UpPress stocking-stitch parts only under a damp cloth. Join shoulder, side and sleeve seams; insert sleeves. Now with No 8 needles, k23 border sts. from spare needle at top of right
front and work straight on these sts, slipping centre stitch as before
until border fits to centre back of neck. Cast off. Oversew round double buttonholes. |
Materials
|
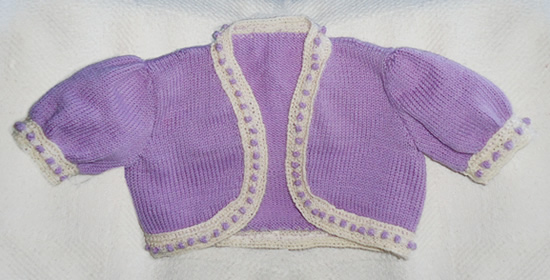
The bolero as such a popular wardrobe accessory for women in the 1950s - it went with all those off-the-shoulder/strapless little numbers (see footnote **) which was the only way to make them respectable day-wear.
This toddler adaptation with its cute puffy sleeves was clearly intended for a little girl.
InstructionsThe instructions are for two sizes - the larger size is given in bold
blue in curly brackets thus: "Intended to fit 1{2}
year old.". BackWith No.10 needles and main shade (M), cast on 70 {76} sts and work straight in stocking stitch, starting with a knit row, until back measures 2¼ {2¾} inches. With right side facing, shape armholes by decreasing 1 stitch at each end of next and every following alternate row until 58{64} sts remain. Work straight until back measures 5¾ {6¼} inches. With right side facing, shape shoulders by casting off 8 {9} sts. at beginning of next 4 rows. Cast off remaining 26 {28} sts. loosely. Left frontWith No 10 needles and M, cast on 18 {21} sts and work 2 rows in stocking stitch, starting with a knit row. Continue in stocking stitch, shaping the front edge by increasing 1 stitch
at the end of the next row, then at this edge on every following row until
there are 27 {30} sts. Right frontWork to correspond with left front, reversing all shapings. SleevesWith No 12 needles and M, cast on 43 {43}
sts and purl 1 row. Next row (right side facing): k2tog,
across entire row. BordersJoin shoulder seams. Main border: With No. 12 needles and contrast yarn C, cast on 7 sts and work in pattern as follows: 1st row (wrong side facing): Using
contrast C, * k1, p1; repeat from
* to last st, k1. These 6 rows form the pattern. Pin in position as you go along Sleeve Borders: In the same way work a strip in the pattern to
fit all round each sleeve edge. To Make UpPress parts gently on the wrong side under a damp cloth. |
MaterialsOriginal materials called for: 2 {2}
ozs Patons Beehive Fin- A pair each Nos 10 and 12 (3¼mm and 2¾mm) needles. Tension30sts and 38 rows to 4 ins over stocking stitch on No 10 needles. Size mattersWidth all round at underarm. 18 {20}
inches; length from top of shoulders, 6½ {7}
ins; sleeve seam, 2½ {2½}
ins. A word on the wool.I used some vintage 3 ply yarn which had no label (but I believe is wool) for the main shade, and some Patons pure wool 3ply in white for the contrast. Disclaimer
|
**Footnote: Have you seen Dana Wynter's outfit at the start of Invasion of the Body Snatchers (1956)?? Here - take a peek - it did have a bolero but she immediately removed it on entering the room.

All this for a visit to the dentist - ok,ok, he was her old boyfriend whom she was trying to impress....
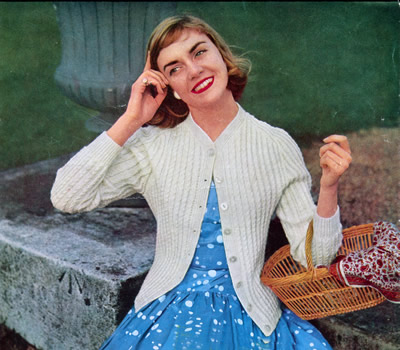
Doesn't this picture have a wonderful fresh spring feel? As if summer is just around the corner. It looks just right with a summer dress, to fling casually over the shoulders for those cooler English summer breezes - or for a more formal look - buttoned up with a scarf plus a narrow tweed skirt (and possibly gloves!) to complete the outfit (see photo at the end).
This design has been calling to me for quite some time but as usual I have yet to find the time to try it out. So here it is untested.
"raglan armholes and and firm ribbed bands for this useful cardigan in white to go with everything"
Instructions.Figures in bold blue given in brackets, refer to the larger size; where
only one figure is given, this refers to all sizes. BackWith No 13 needles cast on 123 (133) stitches
and work 10 rows in k1/p1 rib, starting the first row, k1. 1st row (right side facing): *
p3, k2; repeat from * to last 3 sts, p3. These 4 rows form the pattern. Continue straight in pattern until back measures 12½ (13)
inches at centre. Now with right side facing, shape shoulders as follows: Left FrontLeft. With No 13 needles, cast on 58 (63)
sts and work 10 rows in k1/p1 rib as before. With right side facing, shape armholes by casting off 5 (5) stitches at the beginning of the next row, then k2tog at this edge on every following alternate row until 48 (53) stitches remain. Work straight until back measures 20 (20½)inches, ending with a wrong side row. Now with right side facing, shape shoulder and neck edge as follows: Next row (armhole edge): cast off
3 (4) stitches; pattern to end. Continue in pattern, decreasing 1 stitch at the neck edge on the next
15 (15) rows, and at the same time
shape at the shoulder edge by casting off 3 (4)
stitches; at the beginning of the next and following 3 alternate rows,
then 3 (3) stitches at the beginning of the
following 5 alternate rows. Right FrontWork as for left front reversing all shapings. SleevesWith No 13 needles, cast on 59 (59) sts, and work 2½ inches k1/p1 rib, increasing 4sts evenly across on last row. [63 (63) sts] Change to No 8 needles and work pattern as for back, shaping sides by increasing 1 stitch at each end of the 7th and every following 6th row, until there are 97 (97) sts, taking the eextra stitches into the pattern as they are made. Work straight until sleeve measures 16 inches or required length. With right side facing, shape top by casting off 2 sts at the beginning of the next 2 rows. ** Repeat from ** to **
3(5) times more: [85 (81)
sts] Next row(right side facing): p2,
p2tog, p1. Front Borders and NeckbandPin sleeves into armholes - top of sleeve fits right across shoulders to neck edge. Sew carefully in position. Front Borders: With No 13 needles, cast on 13 stitches and work
a strip in k1/p1 rib to go up right front, round back of neck, and down
left front. Sew border strip in position as you go along. Cast off. To Make UpPress parts only very lightly on wrong side under a damp cloth.
|
Materials
|
A word on the wool.Yarns called "quick knit" "quickerknit" and such variations evolved as a compromise for baby designs. They were half way between traditional DK and 4 ply. These days, there are quite a few yarns that might have a suitably similar tension as "light weight" double knits. Debbie Bliss Baby Cashmerino ( 125m per 50g ball) is one such yarn being of superb quality, highly practical, and knitting to this convenient gauge. If I were going to knit this cardigan, this is what I would use. BUT - how much you might need is open to question. Most of the baby quick-knits
were blended or completely synthetic and thus probably had a better yardage
than pure wools. The name of the original yarn "Botany" implies
it might have been a pure wool but who knows what "Patonised"
implied and I have no idea of the yardage. The French manufacturer Phildar has traditionally offered ranges in this kind of yarn weight, but in practical wool/synthetic blends, currently for example: Laine Merino Alpaga, Phildar Partner 3.5, Fil Oxygene - all coming in at around 110-130m per 50g equivalent. Bergere de France is a manufacturer whose yarns I know little of but they seem to have at least two suitable offerings eg: Annecy, Coton Fifty. It was a bit of a surprise to me to find that I can't find much in the
way of baby yarns with this designation any more. |
|
|
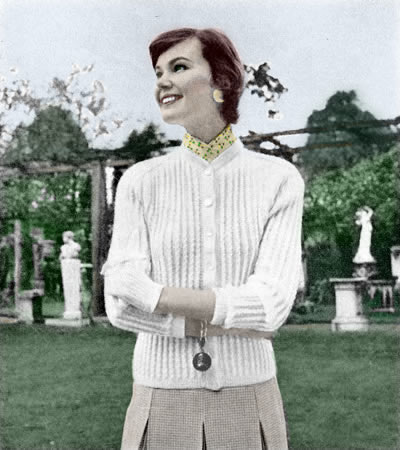
|
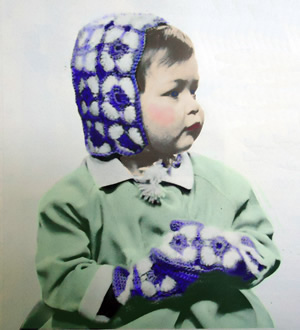
This looks like a little Victorian cherub, though the pattern is much later. It uses a combination of smooth and fluffy 4 ply yarns in a relatively simple crochet motif.
I think the bonnet is particularly cute.
Instructions:The items are made by piecing together a basic motif: Using blue colour (B), make 8 chain and join into a ring with a slip
stitch. Bonnet:Make 14 motifs the same and join together as shown in diagram.
Back of bonnet: 1st row: 1 dc into 2nd ch from hook,
1 dc into each of next 27 ch Continue in dc increasing 1 stitch at each end of every 4th row until
there are 36 dc. Making up the Bonnet: Pin one edge of front piece up sides and all round top edge of back piece.
With right side of work facing and B, crochet the 2 pieces together but
working 4 dc into edge of back piece only between motifs Fasten off. Mitts:Starting with the front of the mitts: Using B, make 21 ch Now work the back of the mitts: Work 2 motifs as given for bonnet and join together as before. With right side of motifs facing, start in corner and work along one
long edge as follows:- Turn and work 9th and 10th rows as given for front of mitt. Thumb: Using B, make 2 ch. Join thumb seam from top down as far as marker. Making up the mitts: Make another mitt in the same way but inserting thumb on opposite side
to first mitt when making up. |
Materials2 ozs 4 ply, in Powder Blue and One No 12 (2¾mm) crochet hook. TensionEach motif measures about 2 inches square. 6½ dc to an inch over
plain dc. Size mattersBonnet: All round front edge measures 15½ inches. Crochet abbreviations:ch: chain [Editor's note: Remember these are English crochet instructions where dc is equivalent to US single crochet - see "Terminology" in the side bar.] A word on the wool.Original yarn was Patons Beehive 4ply and Fuzzy Wuzzy angora. Disclaimer
|
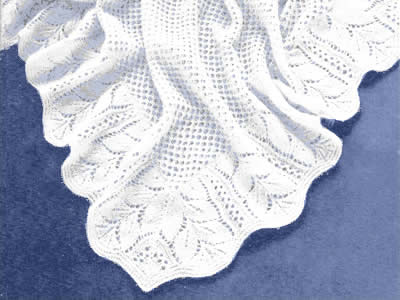
A lace baby shawl made in a 3 ply fingering weight, which makes it a bit more feasible to contemplate as a viable project than the traditional 2 ply, while yet remaining fine and lacey. Added to that, it is made up in sections, rather than a single piece which makes it easier to handle, with all the decreasing lace stitches.
Note added September 2018: since I first transposed this pattern I have had a number of queries so I have recently checked the pattern by knitting it myself from the instructions, and as a consequence corrected some scripting errors (random capital letters and typos), plus I have added the number of stitches after each alternate pattern row on the border pieces. I hope this will help, because despite the fact that the stitches overall are gradually decreasing, on some rows the stitch count increases.
I hope I have caught all the remaining issues, but, as ever, I always welcome anyone sharing any problems they may encounter while knitting it.
InstructionsThe shawl is made in 5 pieces: first a centre square, and then 4 mitred borders that are sewn on each side of the centre. Centre SquareWith No 8 needles, cast on 162 stitches. 1st row: knit. Repeat the last 4 rows until work measures 21 inches. Borders (make 4)With No 9 needles, cast on 206 stitches. 1st row: knit. Repeat 2nd and 3rd rows twice more [200 sts]. Change to pattern as follows:- 1st row: p2tog, p4, k2tog, wrn, p2,
* (k1, wfd) twice, k2, k2tog, p1,
sl1, k1, psso, k1, k2tog, p1, sl1, k1, psso, k1, k2tog, p1, sl1, k1, psso,
k2, (wfd, k1) twice, p2, k2tog, wrn, p2; repeat from *
5 times more, p2, p2tog. [186 sts] Cast off 162 stitches. Make 3 more pieces the same. To Make UpPin parts out and press very lightly under a damp cloth (so not to flatten the pattern stitches too much). |
Materials
|
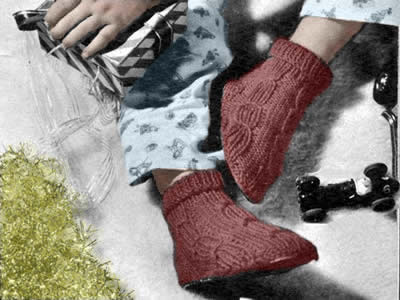
Toddler slippers for a quickly knitted Christmas gift. The top of each slipper is knitted, and is designed to be attached to a purchased leather sole. You could make your own out of leather (but be prepared to line it - perhaps with quilt batting and fabric, fleece fabric, or a shaped piece of knitting. If you design your own knitted sole you can make it non-slip by sewing on sole-shaped cut-outs from cushioned fabric ("slip-a-grip"); various brand options can be purchased on a roll from kitchen suppliers, or you can buy specialist sewing fabrics for this purpose.
Below I've added a great You Tube link for instructions on how to make your own non-slip soles.
InstructionsBoth slippers are worked alike. The following special abbreviation is used throughout the pattern, making a wide ribbed cable. Tie 5: Insert right-hand needle between 5th and 6th stitches from point of left-hand needle, draw loop through and place on point of left-hand needle, then k2tog, p1, k1, p1, k1.
Slipper (make 2)With No 11 needles, cast on 45 stitches and work 2½ inches in k1/p1
rib, rows on right side having a k1 at each end. Slip first and last 6 stitches on safety-pins for heel. With right side facing, rejoin wool to the centre 33 stitches and with No 9 needles continue in pattern for instep as follows:- 1st row: p4, (rib 5, p5) twice, rib
5, p4. Repeat the last 2 rows once more. 5th row: p4, tie 5, p5, rib 5, p5,
tie 5, p.4. Repeat 1st and 2nd rows twice more. 11th row: p4, rib 5, p5, tie 5, p5,
rib 5, p4. These 12 rows form pattern. Repeat, them once more, then rows 1-6 inclusive again. Continue in pattern decreasing 1 stitch at each end of next and following 2 alternate rows: 27 stitches remain. Now decrease 1 stitch at each end of every row until 15 stitches remain. Cast off. Join side edges of ribbing to form back seam. For the heel: Next row: p twice in 1st Stitch,
p to last stitch, p twice in last stitch. FinishingPin out patterned part and heel of each slipper and press on wrong side
under a damp cloth, avoiding ribbing. Pin tops to slipper soles and sew firmly in position. |
Materials
|
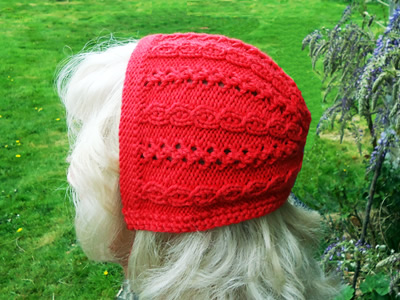
This type of bonnet was very popular in the 1950s - at least it was much favoured by Paton and Baldwin, using their Fuzzy Wuzzy angora**. I think, following the 1940s roll, it went with the more modern shorter hairstyles, and was possibly the half-way house to what was essentially the demise of the hat for everyday wear. Anyway - I am sure they explored every possible variation on this basic style.
**Perhaps not the best marketing brand for today's knitters.... However, angora wool is very light weight and was sold in half ounce balls; this gives you the clue that it was relatively expensive, so a tiny little cap - or perhaps bolero - was ideally affordable. (And did I mention fluffy? even I - never allergic to anything - am prone to fits of sneezing when wearing angora).
Note that there are two versions of the bonnet for different yarn weights.
Instructions for the double knitting bonnetPattern stitch is worked over 6 rows: 1st row (right side facing): *
p3, k3, p3; leave wool forward (wfd), k2tog; repeat from *
to last 9 sts; p3, k3, p3. [Editor's note: The above pattern repeat of 6 rows is as given in the original instructions. If you compare the photo below with my version, you will see the eyelet arrangement is slightly different between the two. I worked (k2tog, wrn) and then (wrn, k2tog) alternately on the right side rows; this does not fit with the 6 row repeat of the mock cables. I have not written out my resulting 12 row repeat for you, but if you want to do this it is quite simple to keep track of the two patterns as you knit, one having a 4 row repeat, and the other, a 6 row repeat. Knit to the correct number of rows overall, and make sure you keep it consistent when you get to the decrease rows. ]
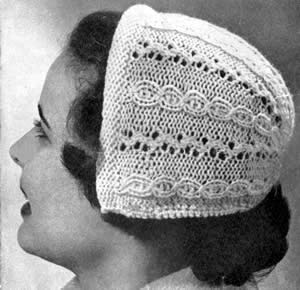
To Make:Cast on cast on 64sts using the knit cast-on method to give a loose edge.
Work 9 rows in stocking stitch (one row knit, one row purl), ending with
a knit row. Now make the hem for the hair-band casing as follows: Hem row (purl side facing, which is the
right side of the work): Fold the hem so that the cast on edge
is aligned at the back of the needle containing your working sts; *
knit one stitch on the needle with one loop from the cast on edge; repeat
from * to end. Now commence the pattern - work the 6 pattern rows five times. Start the shaping: 31st row (first shaping row): p3,
k3, p3; * leave wfd, k2tog, p2tog,
p1, k3, p1, p2tog; repeat from * to
last 11sts; leave wfd, k2tog, p3, k3, p3. [56sts] 37th row (second shaping row): p3,
k3, p3; * leave wfd, k2tog, p2tog,
k3, p2tog; repeat from * to last 11sts;
leave wfd, k2tog, p3, k3, p3. [48sts] 43rd row (third shaping row): p3,
k3, p3; * leave wfd, k3tog, k2, sl1,
k1, psso; repeat from * to last 11sts;
leave wfd, k2tog, p3, k3, p3. [40sts] Next row: Cast off 9sts; knit to
the last 9sts; cast off 9 and fasten off. To CompletePin out and press the work lightly on the wrong side with a warm iron
over a damp cloth. With the right side of the bonnet facing you, join the wool to one side
edge, at the inner edge of the hem (ie do not crochet the ends of the
hem together, as you need to thread your plastic hair band into it), and
work one row of double crochet all around the neck edge, finishing atthe
same position on the opposite side of the front. Draw the edge in slightly
as you work. Slip the hair band through the front casing, and then seam the short ends to close it off. Sew in and neaten all ends. |
MaterialsOriginal materials called for: 2 ozs double knitting wool. One pair of No 7 (4½mm) needles. One No 11 (3mm) crochet hook. 1½ yards elastic thread. A plastic hair band. Tension21 sts and 29 rows to 4 inches. Size mattersTo fit "an average head". Abbreviationsinc: increase by working into the front and back of the next stitch. dc: double crochet. A word on the wool.Original yarn Sirdar Majestic. I used Phildar Partner 6 in a lovely red shade, (50% nylon, 25% wool,
25% acrylic).
Disclaimer
|
Here is the same bonnet in a finer yarn. Normally, I would say finer yarns make a better result, (I know: "it depends"...). However, I actually prefer the double knit version of this style which seems better proportioned.
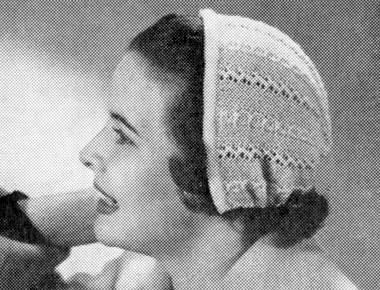
Instructions for the 3-ply bonnetPattern stitch is worked over 6 rows: 1st row (right side facing): *
p5, k3, p5; leave wool forward (wfd), k2tog; repeat from *
to last 13sts; p5, k3, p5. To Make:Cast on cast on 103sts using the knit cast-on method to give a loose
edge. Work 11 rows in stocking stitch (one row knit, one row purl), ending
with a knit row. Now make the hem for the hair-band casing as follows: Hem row (purl side facing, which is the
right side of the work): Fold the hem so that the cast on edge
is aligned at the back of the needle containing your working sts; *
knit one stitch on the needle with one loop from the cast on edge; repeat
from * to end. Now commence the pattern - work the 6 pattern rows eight times. Start the shaping: 49th row (first shaping row): p5,
k3, p5; * leave wfd, k2tog, p2tog,
p3, k3, p3, p2tog; repeat from * to
last 15sts; leave wfd, k2tog, p5, k3, p5. [93sts] 55th row (second shaping row): p5,
k3, p5; * leave wfd, k2tog, p2tog,
p2, k3, p2, p2tog; repeat from * to
last 15sts; leave wfd, k2tog, p5, k3, p5. [83sts] 61st row (third shaping row): p5,
k3, p5; * leave wfd, k2tog, p2tog,
p1, k3, p1, p2tog; repeat from * to
last 15sts; leave wfd, k2tog, p5, k3, p5. [73sts] 67th row (fourth shaping row): p5,
k3, p5; * leave wfd, k2tog, p2tog,
k3, p2tog; repeat from * to last 15sts;
leave wfd, k2tog, p5, k3, p5. [63sts] 73rd row (fifth shaping row): p5,
k3, p5; * leave wfd, k2tog, k1, k3tog,
k1; repeat from * to last 15sts; leave
wfd, k2tog, p5, k3, p5. [53sts] Next row: Cast off 13sts; knit to
the last 13sts; cast off 13 and fasten off. To CompletePress and complete as for the double knitting version of the bonnet. |
MaterialsOriginal materials called for: 1oz of 3-ply fingering wool. One pair of No 11 (3mm) needles. 1½ yards elastic thread. A plastic hair band. Tension30 sts and 44 rows to 4 inches. Size mattersTo fit "an average head". Abbreviationsinc: increase by working into the front and back of the next stitch. dc: double crochet. A word on the wool.Original yarn Sirdar Majestic. Disclaimer
|

This pair of cool cats are really going places. (You can tell - they've got a map and goggles and a scooter and .... everything.
The jackets are plain stitch with a fair-isle yoke, and as the title suggests, a zip closure at the front. Sizes are not very large as the pattern seems to be intended to appeal to the youth of the day. (Small hope I fear).
"Gay Patterning for him and her in to-days fashion" [sic]
InstructionsBack and fronts are worked separately then joined to work the yoke. A simple pattern around the yoke is worked from the charts. The sleeves are set-in, not raglan. Back:Using No 13 (2¼mm) needles and main shade, cast on 124 {136}sts Next row: Rib 6 {5}, * inc. in next st, rib 10 {8}; repeat from * 10 {14} times; inc. in next st, rib to end. [135 {151}sts] Change to No 11 (3mm) needles and proceed in stocking stitch until work measures 12½ {13¾} ins from the beginning. Shape armholes by casting off 9 {12} sts at the beginning of the next 2 rows. Decrease 1 st at both ends of the next and every alternate row until 103 {113} sts remain. Work 10 {16} rows. Shape Back Yoke as follows: Next row: Work across 46 {49} sts, cast off 11{15}; work to end. Continue on this group of 46 {49}
sts as follows: Continue on these sts. until work measures 7½ {8¾} ins from beginning of armhole shaping. Cast off. Rejoin wool to remaining group of sts, and complete to match the other side. Right Front:Using No 13 (2¼mm) needles and main shade, cast on 64 {70}sts Next row: Rib 8 {5}, * inc. in next st, rib 11 {9}; repeat from * 4 {6} times; increase in the next st, rib to end. [69 {77}sts] Change to No 11 (3mm) needles and proceed in stocking stitch until work measures the same as the back up to the armhole, finishing at the side edge (at the end of a knit row). Shape armholes by casting off 9 {12} sts at the beginning of the next row. Decrease 1 st at the armhole edge of the next and every alternate row until 53 {58} sts remain. Continue straight on these sts until work measures 2 {2½}
ins from beginning of armhole shaping, finishing at the front edge (after
a purl row). Shape Back Yoke by casting off 7 {9}
sts at the beginning of the next row. Cast off 4 sts at the beginning
of every alternate row at the neck (front) edge until 38 {41}
sts remain; then cast off 3 sts on every alternate row until 20 {23}
sts remain. Continue on these sts until work measures the same as the back up to the cast off. Cast off. Left Front:Work to match Right Front reversing all shapings. Sleeves: Using No 13 (2¼mm) needles and main shade, cast on 64 {68}sts Next row: Rib 5 {6}, * inc. in next st, rib 5 {4}; repeat from * 9 {11} times; increase in the next st, rib to end. [74 {80} sts] Change to No 11 (3mm) needles and proceed in stocking stitch increasing 1 st at both ends of the next and every following 8th row until there are 104 {114} sts. Work straight until sleeve measures 18 {18½} ins from the beginning. Shape top by casting off 3 sts at the beginning of the next row
6 rows, and then 2 sts at the beginning of the next row 8 rows. Decrease
1 st at both ends of every row until 50 {60}
sts remain; then decrease 1 st at both ends of every following 3rd row
until 26 {36} sts remain. Cast off 4 {6} sts sts at the beginning
of the next row 4 rows. Front Bands (work 2):Using No 13 (2¼mm) needles and main shade, cast on 5 sts. 1st row: K2, p1, k2 Rep. these 2 rows until work measures 14½ {16½}
ins from the beginning (when slightly stretched). Change to main contrast,
Royal Blue {Brown} and continue in
rib until Band measures 19 {21} ins,
from the beginning (when slightly stretched), finishing at the end of
a 2nd row. Slip thesse sts on to safety-pin and leave. Yoke:Join back to fronts at the (tiny) shoulder seams. With right side of work facing, using No 13 (2¼mm) needles and main shade, knit up 289 {369} sts around the yoke, then turn and purl one row. Work the 1st to 13th rows from Chart A. 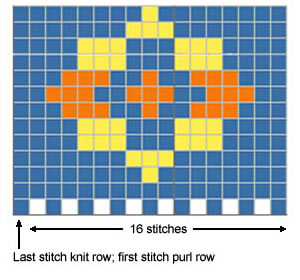 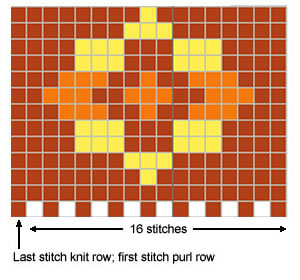 From here ensure you work the decrease rows according to the size you are knitting. 14th row: 15th row (both sizes): Using Brown (B) and Pale Yellow (Py), * k1B, k1Py, repeat from * to last stitch, k1B. Work the 16th to 23rd rows as rows 1 to 8 from Chart B. Left: her colourway. Right: his colourway.
24th row: 25th row (both sizes): Using Brown (B) and Pale Yellow (Py), * k1Py, k1B, repeat from * to last stitch, k1Py. Work 26th to 37th rows as the 2nd to 13th rows from Chart A. 38th row: 39th row (both sizes): Using Brown (B) and Pale Yellow (Py), * k1B, k1Py, repeat from * to last stitch, k1B. Work 40th to 47th rows as the 1st to 8th rows from Chart B. 48th row: 49th row (both sizes): Using Brown (B) and Pale Yellow (Py), * k1Py, k1B, repeat from * to last stitch, k1Py. 50th row (both sizes): Using Royal
Blue {Brown}, Purl. Proceed for Neckband as follows: Using Royal Blue {Brown}, k2, p1, k1, p1 across these front band sts; knit across the Yoke sts; slip sts from top of 2nd Band on to empty needle, and p1, k1, p1, k1, k2 across these sts. [109 {115} sts] 1st row: *
K1, p1, repeat from * to last stitch,
k1. To Make UpOmitting the ribbing, with wrong side of work facing block each piece by pinning out round edges. Omitting ribbing, press each piece using a warm iron and damp cloth. Using a flat seam for the ribbing and a back-stitch seam for the remainder, join side and sleeve seams. Stitch Sleeves into position. Flat stitch Front Bands into position. Fold Neckband at centre and stitch down on wrong side of work. Stitch zip into position. Press seams. |
Materials
|
Her colourway - detail:
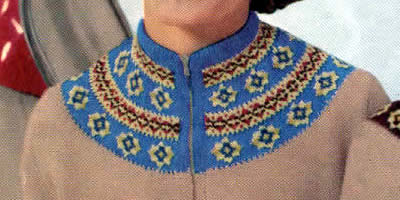
His colourway - detail:
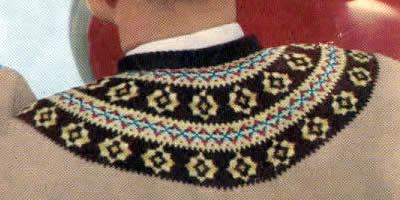
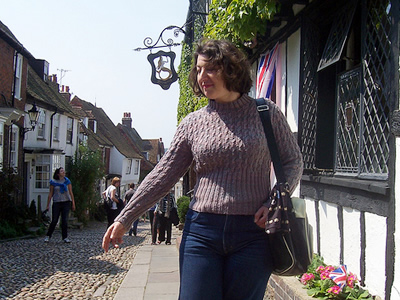
Sara, playing her part again as the ultimate 1950's sweater-girl. Unlike the original model (I'm guessing) Sara knitted this elegant creation herself. It's another shapely close-fitting design and has a deep twisted-rib welt which extends flatteringly high over the waist before the cable pattern begins.
InstructionsInstructions for medium size in round brackets thus ().
Large size in square brackets thus []. Where
one set of figures is given, this applies to all sizes. Front:Using No 11 needles, cast on 84 (88)
[96] sts and work 6 inches k2, p2 rib. Change
to No 10 needles and work a further 2 inches in rib, increasing (6)
[8] sts. evenly across on last row of medium
and large sizes only. {84 (94) [104]
sts} 1st row (right side facing): * k4, p2; then "twist 2" by knitting into front of 2nd stitch on left needle, and then into front of 1st stitch and slipping both sts off needle together; p2; repeat from * to last 4 sts, k4. 2nd row: *
p 4, k2, p2, k2; repeat from * to
last 4 sts; p4. These 10 rows form the pattern. Continue in pattern, shaping sides by increasing 1stitch at each end of the next and every following 4th row until there are 96 (106) [116] sts, and incorporating the increased sts into the pattern as you go. Work straight until front measures 13½ (14) [14] inches at centre. With right side facing, shape armholes by casting off 6 (6) [6] sts at beginning of the next 2 rows, then k2tog at each end of the next and every following alternate row until 76 (82) [90] sts remain. Workstraight until front measures 18½ (19) [19½] inches at centre. With right side facing, divide for neck: Next row: Pattern 29 (32) [34], k2tog; turn and leave remaining sts on a spare needle. Continue on first 30 (33) [35] sts, decreasing 1 stitch at neck edge on alternate rows until 24 (27) [27] sts remain. Work straight until front measures 21 (21½) [22] inches at centre. With right side facing, shape shoulder by casting off 8 (9)
[9] sts at the beginning of the next and
following 2 alternate rows, (this is the armhole edge). Fasten off. Then return to the remaining sts on the spare needle, and slip the centre
14 (14) [18]
sts on to a spare needle or stitch holder; rejoin the wool to the last
31 (34) [36]
sts at the neck edge (right side facing), k2tog, pattern to end. Back:Work exactly as for front until armhole shapings have been completed:
76 (82) [90]
sts Work straight in pattern over all sts until back measures
same as front up to the shoulder. Sleeves:Using No 11 needles, cast on 52 (52)
[56] sts and work 4 inches in k2/p2 rib.
Change to No 10 needles and continue in rib until 8 inches have been worked
from the start, increasing 2 (2) [8]
sts. evenly across on the last row: 54 (54)
[64] sts taking increased sts into the pattern
as you go. Cast off. Neckband:Join right shoulder seam. With right side facing and No 10 needles, pick up and k. 92 (92) [96] sts all round neck, including those on spare needle at front and back. Work 1 inch k2/p2 rib; change to No 11 needles and work a further inch in rib. Cast off loosely in rib. To Make UpPress parts on wrong side under a damp cloth, taking care not to spoil the pattern. Join side, left shoulder and sleeve seams; insert sleeves. Press seams. |
Materials
|
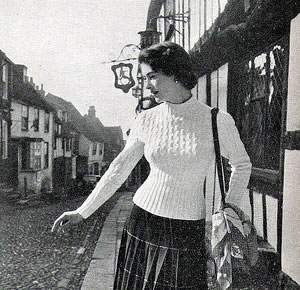

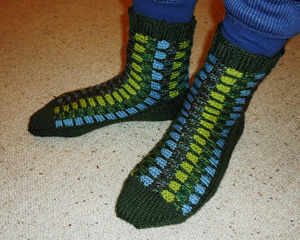
Father George: so fond of his bedsocks that they get worn out. [Since he is not bedridden I can only surmise he does not restrict their use to the bedroom!] Hence - by request - here are some more.
The patterned section of the sock is knitted sideways using a variation of a honeycomb stitch; it's an opportunity to use up really small amounts of double knitting yarn. I rotated 4 contrast colours but you could use a different colour for every set of rows; the key is to keep some consistency in the main colour.
Instructions.The first section of these socks is knitted sideways making a "T"
shape where the upright of the "T" is the upper foot, and the
cross bar curls around the leg to form the cuff, meeting at the back seam. First section (knit 2)Starting at the back leg seam, with main shade (M) cast on 23 sts on 2 needles and knit one row. Commence pattern. Join in contrasts (C1, C2 etc): Repeat rows 1-10 using different contrasts, once more. Next row(wrong side facing): Cast
on 40 sts, and then work across them and all sts, as for 1st row of pattern. [63sts] Continue to work the pattern on these 63 sts, working rows 1-10 three
times, and then rows 1-4. Next row(wrong side facing): Using main shade, cast off 40 sts, and purl across remainder. [23sts] Continue to work the pattern on these 23 sts, working rows 6-10, then
rows 1-10 once, times, and then rows 1-4. Second section (heel and sole).The remainder of the socks are worked entirely in the main shade. For the heel: with right side of the first section facing, oriented like an upside down "T" pick up 11 sts from each side of the instep:
Pick up and knit 11 sts from the left side first, ending at the cast on edge (which will be the centre back, and then turn the work over and bend round the second side, and pick up 11sts from the right side. The sock cuff now forms a circle with the back seams together, but not yet sewn.
Turn and purl 1 row across these 22 sts. Next row(right side facing): *
Sl1, k1, repeat from * to end. Repeat the last 2 rows 10 times more. Turn the heel: Next row: Sl1, k12, k2tog, k1. Turn. Continue to work short rows and decrease in this way until all sts have been incorporated. [14sts]. Next row(right side facing): Sl1,
k13, pick up and knit 13 sts down side of heel. Turn. Now work the instep decreases and sole: Next row: K1, sl1, k1, psso; knit
to last 3 sts, k2tog k1. Turn. Repeat the last 2 rows until 22 sts remain. Continue to work a further 50 rows to make the sole - upper and lower
foot sections should be about the same length. ToeNow we move to working in the round. Knit 11 sts on first double-pointed needle, 11sts on second, then with
right side facing, using third needle, pick up and knit 24 sts across
the toe edge of the first section. Next round: K1, sl1, k1, psso; knit to last 3 sts on third needle, k2tog k1. Complete the round by knitting the 11 sts on each of the first and second needles. [44 sts] Next round: K1, sl1, k1, psso; knit
to last 3 sts on third needle, k2tog k1; on first needle, k1, sl1, k1
psso; knit to end; on second needle, knit to last 3 sts, k2tog k1. Repeat the last 2 rounds until 16sts remain. Making upSew seams on each side of the sole, using a flat seam technique (not mattress stitch for example). Using double pointed needles and main shade, pick up 60-66 sts round top of sock and knit a k3/p3 rib for about 8 rows (or as long as you want), to form the welt. Cast off loosely. Sew in all ends. |
Materials2 x 50g balls of double knitting yarn, and a variety of left over DK colours. One pair and one set of four No 8 (4mm) needles, pointed at both ends. Tension22 stitches = 4ins Size mattersLength of foot, 9 inches (adjustable). AbbreviationsM is main shade (olive). sl1: slip the next stitch k2tog or p2tog: work 2 sts together to decrease. psso: pass the slipped stitch over, (also known as "ssk"; effectively you are "knitting 2 together through back loops") A Word
|
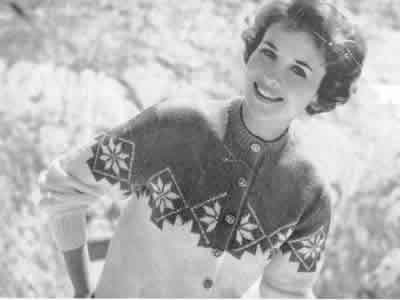
The third (and final) fair-isle design for November is a 1950s or early 60s cardigan in a double knitting weight yarn. No clues as to the original colour scheme here, and although for today it would seem appropriate to go with the grey palette, I am sure the original would have been more colourful.
InstructionsThe Back and Fronts are worked in one piece up to the armhole shaping. Back and Fronts:Using No. 10 (3¼mm) needles and light colour, cast on 146 sts. Change to No 7 (4½mm) needles and proceed as follows: 1st row: Knit Continue increasing in this manner on next and every following 4th row
until there are 183 sts. Next row: P7, (increase in next stitch p12) 13 times, increase in next stitch, purlto end. [197 sts] Work rows 1 to 16 from Chart (odd rows knit, even rows purl), working
bracketed repeat 7 times across row and odd stitch at end of 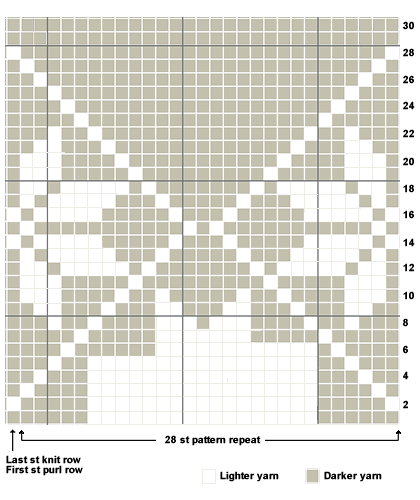 Divide for Back and Fronts:Next row (17th row of chart): Pattern
44 cast, off 10, pattern 88 (there now being 89 sts. on needle after cast-off);
cast off 10, pattern to end.
Proceed on first group of 44 sts. for first front as follows: Keeping pattern correct by working rows 18 to 30 inclusive of Chart,
shape armhole by decreasing 1 st. at armhole edge on next and every
alternate row until 39 sts. remain. Using darker colour for remainder of front, continue in stocking stitch until work measures 5 ins, from beginning of armhole shaping, finishing at front edge. Shape neck: by casting off 4 sts. at beg. of next row. Shape shoulder: by casting off 10 sts. at beg. of next and every alt, row until all sts. are cast off. Rejoin wool to next group of 89 sts. and proceed for Back as follows: Keeping pattern correct from Chart, shape armholes by decreasing 1 st
at both ends of next and every alternate row until 81sts remain. Continue
on these sts. until work matches first front up to shoulder shaping. Rejoin wool to remaining group of 44 sts. and complete to match first
front reversing all shapings. Sleeves:Using No. 10 needles and Light, cast on 50 sts. Change to No. 7 needles and proceed in stocking stitch, increasing 1
st. at both ends of 5th and every following 9th row until there are 73
sts. Next row: P3; (increase in the next stitch, p5) 11times; increase in the next stitch; purl to end. [85 sts] Work rows 1 to 16 inclusive from the chart, noting that bracketed repeat is worked 3 times across row, and odd st. at end of knit row and beginning of purl row as marked on chart throughout. Keeping pattern correct from chart until 30th row of chart has been completed,
and working remainder of sleeve in dark colour, shape top by casting off
4 sts at the beginning of the next 4 rows, 3 sts at the beginning of the
next 4 rows, and then 2 sts at the beginning of the next 4 rows. Right Front Band:Using No. 10 needles and light colour, cast on 11 stitches. 1st row: K2; (p1, k1) 4 times; k1. Left Front Band:Omitting buttonholes, work to match Right Front Band. Neckband:Using a back-stitch seam join shoulders of Back and Fronts. Next row: *
k1, p1, rep from * to last stitch,
k1. Work 3 more rows in rib. To Make UpOmitting k1/p1 rib, with wrong side of work facing, block each piece
by pinning out round edges. "In order to preserve the lovely crepe appearance of Totem fabrics, these must be pressed very lightly as over-pressing will spoil the appearance of the finished fabric." Using a flat seam for k1/p1 rib, and a back-stitch seam for remainder,
join sleeve seams and stitch sleeves into position. Flat stitch front
bands into position. |
Materials
|
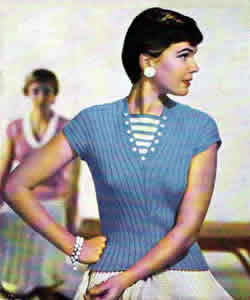
Mid-fifities fashion in fresh blue and white summer colours. The stripes and buttoning give the design a slightly off-kilter nautical look. My version used a stronger blue than the original.
If you are tantalised by the ghostly image of the other sweater in the background then look at these instructions - it is not actually that very knitted top (the one in the background of the photo above has beads - you'll have to trust me on that), but it is very similar, and also dates from the summer of 1956.
My own version is now complete so the pattern is "checked out", and I hope to add a photo soon.
InstructionsKnitted in 2 pieces with a V-neck, and detachable vestee. BackWith No 12 (2¾mm) needles cast on cast on 138sts and work as follows: 1st row (right side facing): k2;
(p2, k4) 22 times; p2, k2. Start centre shaping: Continue thus, keeping continuity of rib and increasing 1 stitch at each
side of centre 2 purl sts on next and every following 4th row until there
are 180 sts, remembering that when increasing for purl sts to purl
into back of loop and when increasing for knit sts to knit into
back of loop,that is: the next 2 sets of increasings will be purl and
the following 4 sets of increasings knit. With right side facing, change to garter stitch, (that is, every row
knit), Then, continuing in garter stitch, shape shoulders by casting off 4 sts
at beginning of next 10 rows, then 12 sts at beginning of following 4
rows. FrontWork exactly as for back until there are 172 sts. Work 3 rows straight, then start to introduce the garter stitch at the centre as follows: 1st row (right side facing): Rib
82, k3, m1k, k2, m1k, k3, rib 82. Divide for neck: Next row: K9, rib 80. Repeat the last 2 rows once more. Put a coloured marker at the end of the row to mark the start of the armhole. Continue in rib and garter stitch, shaping the armhole edge only by k2tog at the beginning of the next and every following 4th row, and at the same time make a buttonhole in the garter stitch border on the 2nd and every following 12th row until 5 in all are done, excluding first buttonhole at the centre front. To make a buttonhole:- With wrong side facing, k2, k2tog, wind wool twice round needle, k2tog, k3, rib to end. On the next row: knit and purl into the two twists as before. When the 5 buttonholes are done, continue in rib and garter stitch, still continue to decrease at the armhole edge on every 4th row until 15 sts have been decreased at this edge, and 75sts remain. Work 3 rows straight. Change to garter stitch over all sts, With right side facing, continue in garter stitch and shape the shoulder by casting off 4sts at the beginning of next and following 4 alternate rows, then 14sts at the beginning of following 3 alternate rows. Cast off remaining 13 stitches. With side facing, rejoin wool to remaining sts, and work, to correspond with first shoulder, reversing the shaping. VesteeWith white wool and No 11 needles, cast on 10 sts and knit 4 rows. 5th row: Knit, increasing 1 stitch
at each end. Work 3 rows straight in stocking stitch, keeping the 4sts at each end in garter-stitch throughout. Repeat last 4 rows once more. Join in blue. Next row (in blue, right side facing): K3, increase in next stitch, knit to last 4sts, increase in next stitch, k3. Work 3 rows straight in blue with border as before. Next row (in white): K4, p34, k4. This completes the 5th white stripe. Break white, join in blue and knit 5 rows. To Make UpPress work very lightly taking care not to spoil rib. Sleeve Edgings: With right side facing, No 11 needles and contrast
yarn, pick up and knit 92 sts between markers on back and front. Knit 8 rows; cast off. Join side seams. |
MaterialsOriginal materials called for: 7 ozs Patons Beehive Fingering 3-ply in main shade (powder blue) and a small ball (less than 1oz) in white. A pair each Nos 11 and 12 (3mm and 2¾mm) needles. 11 small white buttons. My version is knitted in 5 x 50g balls of Adriafil Avantgarde 3 ply using
Nos 13 and 12 needles. TensionRibbing is difficult to measure, but it is equivalent to a basic tension
of 8 sts and 10 rows to an inch over stocking-stitch on No 11 needles. Size mattersOriginal sized for bust 34-36 inches; See "adapting the size". Abbreviationsm1p: pick up loop lying before next stitch and purl into back of it. m1k: pick up loop lying before next stitch and knit into back of it. A word on the wool.I have so many words on the wool I am not sure where to begin. Jamiesons have an excellent range of colours in "2ply laceweight" which states: This yarn can be used in vintage patterns which call for "3ply yarns". I can suggest looking at Susan Crawford's new Excelana range from John Arbon textiles. I have great hopes of this venture solving my knitting issues in the future: 4 ply available now and hopefully 3 ply in the future. I have not yet experimented with either of these two latter yarns. Disclaimer
|
Adaptations:I made quite a few casual adaptations to "improve" the design for my figure - but as usual this had a knock-on effect in some other areas - so I describe what happened here. Adaptation 1: When changing to garter stitch the ribbing pulls at the garter stitch section and causes puckering. You can see this happening slightly in the original photo. To compensate for this, on the first knit row of the garter stitch (right side facing) I knitted across the 4 knit sts and and the k2tog for the 2 purl sts. This changed the number of sts for the casting off. So for the Front sections I worked k2tog 10 times on the p2 sections of the rib; I then shaped the shoulder by casting off 3sts at the beginning of next and following 4 alternate rows, then 13sts at the beginning of the following 2 alternate rows, then 12sts at the beginning the final 2 alternate rows. For the Back, I worked it slightly differently without decreasing
across the back of the neck. So I worked k2tog across the first 11 p2
sections of the rib, but incorporated the centre 7 p2 sections into the
garter stitch as k2, then k2tog across the last 11 p2 sections of the
rib. Adaptation 2: I lengthened the garter stitch sections by about 2 inches to make the V neck lower. This was to avoid "waist boobz" (please see Kate's blog, "needled" ** on the subject). Adding 2 inches at the shoulder, lengthens the whole sweater, so I knitted 2 inches less at the start of the sweater - as it is not overly short in the first place. Having done this, you may find the armhole markers are (up to 2 inches) too low, so check this before you do the sleeve edging and sewing up the side seams. In my case, I have chubby little arms so wanted the armhole slightly larger in any case. ** Unlike Kate I have a large bosom
with a low bust point, so need no assistance in producing waist boobz
- in fact I seek to reverse the effect. See Kate's lovely design "by-the-sea-shore" where she reverses the "waist boob" effect. It is also an off-kilter nautical design in a way so sits nicely with this entry. |
|
Adapting the size:The original pattern is for one size: 34-36 inch bust. The sweater is designed to fit snugly, but is ribbed which allows some leeway on the exact fit. It is designed to be knitted in 3 ply at about 30 sts to 4 inches. I have used a 4 ply at about 28 sts to 4 inches, and the size would have been acceptable for me - a UK size 12 or "medium". I think this may be suitable for using a thicker yarn with larger needles and getting a larger result. |
|

Here we have Jill modeling her charming version of the Paris Line Cardigan from January 1955. It is so successful and comfortable to wear she is planning a second version for the summer.
Instructions.Figures in brackets refer to larger sizes; where only one figure is given,
this refers to all sizes. The BackWith No 9 needles cast on 106 (118) {126}
stitches and work 10 rows in k2/p2 rib, starting and ending k2 on the
first row, and increasing 7 (7) {11}
stitches evenly across on last row by working twice into every 14th (16th)
{11th} stitch. [113 (125)
{137} sts] 1st row (right side facing): k1,
* p3, k1; repeat from * to end. These 8 rows form the pattern. Next row (right side facing): * k2,
p2; repeat from * to last 2 sts., k2. Continue straight in rib until back measures 23 (23½)
{23½} inches. Pocket Linings (make 2)With No. 8 needles, cast on 26 (26) {30}
sts. and work 4½ (4½) {4½}
inches stocking stitch ending with a purl row; leave stitches on a spare
needle or stitch holder. Left FrontLeft. With No. 9 needles, cast on 63 (71)
{79} sts. and work in rib as follows: Repeat these 2 rows 4 times more, and on last row increase 2 sts. as
follows: 1st row (right side facing): k1;
(p3, k1) 10 (12) {14}
times; p1; (k2, p2) 5 times; k3. Repeat these 8 rows until work measures 5 (5) {5} inches from start. Next row (insert pocket): Pattern
8 (12) {14};
(k2, p2) 6 (6) {7}times;
k2; pattern 8 (12) {14};
rib 23. Next row (wrong side facing): rib 23; pattern 8 (12) {14}; cast off 26 (26) {30} in rib; pattern 8 (12) {14}. Next row: pattern 8 (12) {14}; pattern across 26 (26) {30} stitches of one of the pocket linings, in place of those cast off; pattern 8 (12) {14}; rib 23. Continue in pattern with 23 sts. at front edge in rib until front measures same as back at side edge and ending with same pattern row. Then with right side facing, shape armholes by casting off 6 (8)
{8} stitches at the beginning of the next
row, then k2tog at armhole edge on alternate rows until 53 (59)
{65} stitches remain. Work straight until
back measures 17 (17½) {17½}
inches, increasing 6 (4) {2}
sts. evenly across on patterned part of last row: [59 (63)
{67} sts] Right FrontWith No. 9 needles, cast on 63 (71) {79}
sts. and work in rib as follows: Repeat these 2 rows once more. Increase row: rib 3, increase in
next stitch, rib to last 28sts, increase in next stitch, rib to end: [65
(73) {81} sts] Next row: k3, (p2, k2) 5 times; p1;
(k1, p3) 10 (12) {14}
times; k1. Finish to correspond with left front, reversing all shapings and making 4 more buttonholes as before up front edge, the last one to come about 1 inch below start of yoke ribbing, and the remaining 3 evenly spaced between. Mark position of buttons on left front with pins, then work holes to correspond. The first row of pocket top will read: SleevesWith No. 10 needles, cast on 54 (54) {54} sts. and work 3 inches k2/p2 rib, having a k2 at each end on the right side, and increasing 3 sts. evenly across on last row: 57 (57) {57} sts. Change to No 8 needles and work 8 rows in pattern as for back. Continue in pattern and shape sides by increasing 1 stitch at each end of 7th and every following 8th row until there are 73 (73) {73}sts, then on every following 4th row until there are 83 (83) {83}stitches, taking the extra stitches into pattern as they are made. Work straight until sleeve measures 18 inches or required length. With right side facing, shape top by casting off 4 sts. at beginning of next 2 rows, then k2tog at the beginning of every row until 45 (45) {45} sts. remain, then at each end of every row until 25 (25) {25} sts. remain. Cast off. To Make UpPress parts lightly on wrong side under a damp cloth. Roll Collar: On the left front, continue in rib on the remaining 29 (30) {34} sts. working short rows to provide shaping thus: ** Work ½ (½) {1}
inch in rib, ending at the front edge. Join side and sleeve seams; insert sleeves. Catch down pocket linings. |
Materials
|
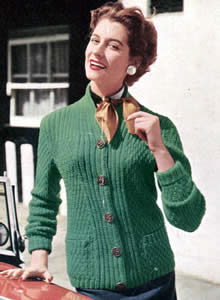
|
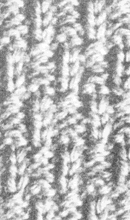
Stitch Detail |
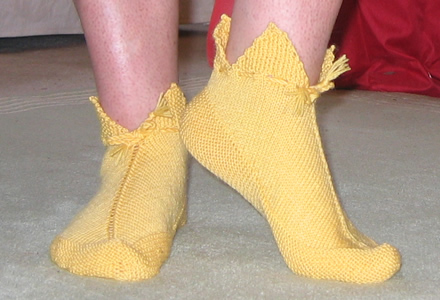
These socks were adapted from a wonderful elderly pattern, and were lots of fun to knit, (and wear!). They make me think of those dusty Jester colours though - mustard yellow, a dull brick red, a saddened teal...
Instructions.Cast on 128 stitches and start working in garter stitch - knit 4 rows. 5th row: increase in first stitch,
k62, increase in next stitch, increase in next stitch, K62, increase in
last stitch. Knit another 13 rows on these 148 stitches. Repeat 29th and 30th rows 14 times, thus completing 58th row. 59th row: K38, k2togtbl, k2tog, k40. Make slots for ribbon on next row thus: 2nd row (first point): P1, (k1, p1) 10 times. Continue in rib but decrease 1 stitch at each ent of the next row and
every alternate row until 3 sts. remain. With right side of work facing you. join wool to inner end of sts on
spare needle, then k1, (p1, k1) 10 times, turn, leaving the remaining
11 sts on the spare needle. Join underfoot and back seam. With right side of work facing you, join wool to inner end of sts on
spare needle. (k1, p1) 5 times, then knit last stitch on spare needle
together with first stitch on on the thread, after which (p1, k1) 5 times
over remaining sts on thread. Make another sock in the same way. Run ribbon through slots at ankles. Cuff VariationYou can see from the photo below that I added another layer of points to my sock.I cast on 64 sts and worked 6 rows in rib. I then worked the points in moss stitch as given for the points on the main sock, but I decreased on every 3rd row instead of every alternate row to make the points longer. When I had finished I sewed the cuff to the inside of the sock matching the points on the second cuff to the gaps between the points on the sock. I attached the cuff just below the eyelet row.
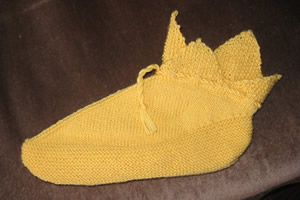
|
Materials2 x 50g balls 4ply A pair each of No A yard of narrow ribbon. Tension32sts x 40 rows to 4 ins over stocking stitch. Size mattersFoot length about 9 inches, length down back about 5 inches. AbbreviationsIncrease: increase by knitting into front and back of the next
stitch. A word on the wool.The original socks were knitted in "Wendy Family Wool 4ply". I chose to use Cygnet yarn not only because it is a good (75/25) blend for socks but also I wanted the lovely bright "Jester" yellow - and I was surprised that in the vast array of available yarns in my local John Lewis, I could not find any true yellows in any weight of wool - obviously not fashionable currently. The "brights" seem to be limited to cotton blends, which in my experience are not good for socks. Disclaimer
|
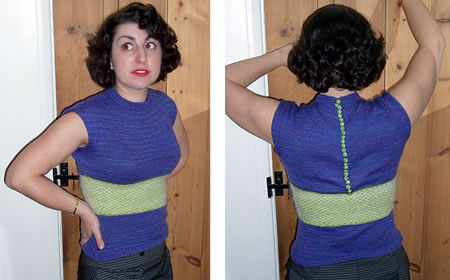
Another beautifully crafted early 1950s recreation by Sara; a neat little design which so suits her figure. Instructions are for one size only, and Sara made hers using Posh Yarns Diana 2ply, which seems to match the tension of the original 3 ply yarn. You might achieve more flexibility in fit and yarn choice if you opt for a standard 4ply instead.
FrontWith No 12 (2¾mm) needles and main shade cast on cast on 120 sts
loosely and work 24 rows in stocking stitch, starting with a knit row.
Make a hem on the next row by knitting 1 stitch from needle together
with 1 stitch from cast-on edge. Change to No.11 needles and work 4 rows stocking stitch, then shape basque as follows: Next row: k33, k2togtbl, k50, k2tog,
k33 Continue decreasing thus on next and every following 6th row until 108
sts. remain. Shape waist as follows: Next row: *k8,
k2tog; repeat from * to last 8 sts,
k8 Begin working the check pattern, introducing the two contrast colours
C1 and C2.
1st row (right side facing): *
k2 C1, k2 C2; repeat from * to end.
Continue in pattern repeating the 4 rows as set above, increasing 1 stitch at each end of the next and every following 6th row. Incorporate the extra sts keeping the chack pattern correct. When work measures 10 inches at centre....
With right side facing, cast on 10 sts at the beginning of the next 2
rows for the sleeves, [150 sts]. Cast off 10, k50; turn and leave remaining sts on a stitch holder. Now decrease 1 stitch at the neck edge on the next 10 rows; then, keep the neck edge straight, but at the same time cast off 5 sts on every alternate row at the armhole edge until all sts are gone. Return to the remaining sts on the stitch holder; slip the centre 30
sts on to a stitch holder, and rejoin the wool to the remaining 60 sts. BackWork as for the front to the end of the check pattern. Work 2 rows in main shade, then divide for back opening. Cast off remaining stitches. Rejoin the wool to the remaining stitches at the centre and work to correspond with the right half of the back. To Make UpPress work on wrong side under a damp cloth. Neck: With right side facing, main shade, and No 12 needles,
pick up and knit 90 sts all round the neck, including 30 sts from the
stitch holder on the front. Join side and under-arm seams; work 2 rows dc round each sleeve edge. Turn back 1 inch of sleeve to form a cuff and catch in position at shoulder and under-arm. [Editor's note: Sara
leaves the sleeves plain after this point - instructions below introduce
additional trim.] Work 3 rows dc down left side of back opening, including neckband, then 3 rows down right side making 24 button loops in 3rd row. Sew on buttons. |
MaterialsOriginal materials called for: 5 ozs Patons Beehive Fingering 3ply in main shade (lipstick red) and 1oz each of grey and white. A pair each Nos 11 and 12 (3mm and 2¾mm) needles. A No 12 (2¾mm) crochet hook. 24 small buttons. Tension 8 sts and 10 rows to an inch. Size mattersOriginal sized for bust 33-34 inch bust; See "adapting the size". Abbreviationsk2tog: decrease by knitting 2 sts together. k2togtbl: decrease by knitting 2 sts together through back loops, sometime called ssk (slip 1 knitwise, slip 1 knitwise, place 2 sts back on left needle and knit 2 slipped sts together through back loops) Crochet abbreviations:ch = chain Remember these are English crochet instructions where dc is equivalent to US single crochet - see "Terminology" in the side bar. A word on the wool.Sara used Posh Yarn Diana 2 ply - about 600 yards for the main colour, and about 90 yards for the green contrast. For the white she used Capricorn Yarns brushed mohair 4 ply. Disclaimer
|
Adapting the size:As with many of these 50s patterns, only one size is given: 33-34 inch bust. The sweater is designed to fit snugly, but probably will not fit most of us. It is designed to be knitted in 3 ply at about 30 sts to 4 inches. You can gain some leeway by changing the yarn - this is a simple shape so it should cope with that - you should check the length you want and adjust the inches you knit accordingly. Sara cleverly converted the pattern to a top down knit on the fly, and this would be ideal to try that that if you are bold enough. |
|
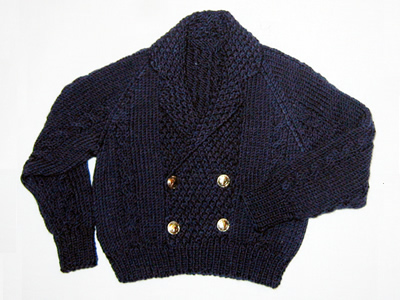
Here is a cute little knitted reefer for a small child (6-24months). It dates from pre 1960s where children's knitwear was not inspiring, but as soon as I saw this I wanted to make it - I am a sucker for any nautical theme, especially for kids (and dolls...)
Instructions.This pattern is given for 2 size options - the instructions for the larger
size are blue bold type in curly brackets. BackWith No 10 (3¼mm) needles cast on cast on cast on 55{61}
sts and work rib as follows: 12th rib row: Rib 3{6}, (increase in next st, rib 6) 7 times, increase in next st, rib to end. [63{69}sts] Change to No 8 (4mm) needles and proceed in cable pattern as follows: 1st row (right side facing): K9{10};
p1, k4, p1; k11{13}; (p1, k4, ) twice,
p1; k11{13}; p1, k4, p1; k9{10}. Continue in pattern until you have completed row 28{32}. Shape raglan: (keep continuity of pattern as you work these rows). [Editor's note: you should be about to begin Row 5 of the pattern sequence for the smaller size and Row 3 (a cable row) for the larger size.] Next row: Cast off 3sts, work to
end. Repeat last 2 rows 18{20} times,
[19{21}sts] FrontWith No 10 (3¼mm) needles cast on cast on cast on 55{61} sts and work rib for the first 11 rows as you did for the back. 12th rib row: Rib 3{6}, (increase in next st, rib 7) 6 times, increase in next st, rib to end. [62{68}sts] Change to No 8 (4mm) needles and proceed as follows: 1st row (right side facing): K9{10}; p1, k4, p1; k8{9}; (p1, k1, ) 8{9} times; k1. Turn and continue working on these 40{44}sts to make the left front (these instructions are intended for a boy - see editor's note below) and slip remaining 22{24} sts on to a stitch holder and leave to work later. [Editor's note: If you want to make this for a girl - maybe in white? - then you will perhaps want to reverse these instructions by working the first 22{24} sts, casting on 20sts and working on these 40{44} sts as written, omitting the button holes. Pick up the rest of the sts to work the right front - and don't forget to work the buttonholes on the right front!] 2nd row: (K1, p1) 9{10} times; purl to the last st, k1. [Editor's note: The centre panel on each of the front pieces is worked in double moss stitch, and I found it convenient to put a stitch marker after I had worked the first 18{20} sts of row 2, to show the limit of this section.] 3rd row: K9{10};
p1, C2B, p1; k7{8}; *
p1, k1; repeat from * to end. Keeping cable and moss stitch panel correct throughout, work 16{20} rows, working buttonholes as before on the 9th of these rows (row 21 for both sizes). Shape raglan: (keep continuity of pattern across the cables and
the centre moss stitch panel as you work these rows). Next row: Cast off 3sts, work to
end. Repeat last 2 rows 10{11} times,
[26{29}sts] ** Keeping continuity of the pattern,
continue to decrease at the armhole edge as before until 18{20}
sts remain of the moss stitch panel. Completing the other side to make the right front: Slip the sts from the stitch holder on to a No 10 needle, point facing
centre of work (right side facing you), and cast on 18{20}sts.
[40{44}sts]. 1st row (right side facing): K2;
(p1, k1) 8{9} times; k7{8};
p1, k4, p1; k9{10}. Shape raglan: (keep continuity of pattern across the cables and the centre moss stitch panel as you work these rows). Next row (wrong side facing): Cast
off 3sts, work to end. Repeat the last 2 rows 10{11} times, [26{29}sts] Next row: Cast off 5sts, work across
in pattern to the last 3 sts, k2tog, k1. Complete to match the left side of front, working from ** to end. Right sleeve:Using No 10 needles, cast on 32{34}sts. Work 13{15} rows in k1, p1 rib. Next row: Rib 3{4}; (increase in next st, rib 4) 5 times; increase in next st, rib to end. [38{40}sts] Change to No 8 needles and proceed in stocking stitch with cable panels set as follows: 1st row (right side facing): K3{3};
(p1, k4, p1, k7{8}) twice; p1, k4,
p1; k3{3}. Continue in pattern as on last 6 rows, increasing 1 st at both ends of
next and every following 6th row, until there are 50{54}sts;
work the extra sts in stocking stitch. Shape raglan by working rows as you did for the back: Next row: Cast off 3sts, work to
end. Repeat last 2 rows 18{20} times,
[6{6}sts] Right sleeve:Work as for the right sleeve, but working C2F instead of C2B. [Editor's note: The sleeves are identical apart from the way the cables twist, and obviously you can choose to sew them into the Reefer in whatever orientation you prefer.] To Make UpBlock each piece from the wrong side, pressing very lightly using a warm iron and a damp cloth, omitting the ribbing. Join side, raglan, and sleeve seams using a flat seam. Stitch down the 20 cast-on stitches at the waist on the inside. |
Materials
|
|
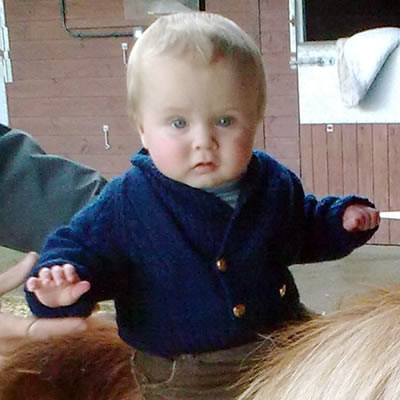
|
|
|
|
|
|
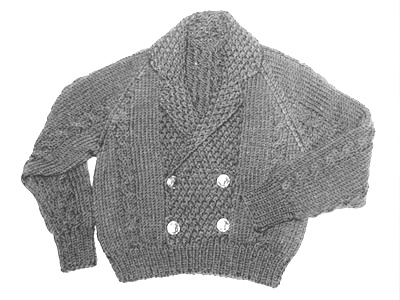
|

Knitted in a light weight yarn and originally designed in the 1950s to wear under or over a sweater with a lower neckline. The original is a "fringed cable yoke" (in case you want to show it off over the sweater) but I have omitted the fringing; I wear it as a convenient alternative to a scarf. The yarn I used is more a 4ply than a 3ply weight so my version is very slightly bulkier and longer than the original.
Instructions.Cables are worked as follows: Cable 8: Slip next 4sts. onto a cable
needle and leave at back of work; k4, then k4 from cable needle. Now begin the yoke, which is worked in one piece. Cast on 288 sts fairly loosely and work in cable pattern as follows: 1st row (right side facing): P4,
* k8, p8; repeat from *
to last 12 sts, k8, p4. Repeat the 1st and 2nd rows 3 times more. 9th row: P4, *
cable8, p8; repeat from * to last
12 sts, cable8, p4. Work 5 rows straight keeping the continuity of the cable rib pattern. 24th row (decrease row): K4, *
p7, k3, k2tog, k2; repeat from * to
last 11 sts, p7, k4. [236 sts] Work 4 rows straight keeping the continuity of the cable rib pattern. 30th row (decrease row): K4, * p3, k2tog, p2, k6; repeat from * to last 11 sts, p3, p2tog, p2, k4. [218 sts] Work 2 rows straight keeping the continuity of the cable rib pattern. 33rd row: P4, * cable6, p6; repeat from * to last 10 sts, cable6, p4. Work a further 2 rows straight keeping pattern as before. Continue thus, working a cable on every 8th row from previous cable, at the same time decreasing alternately in the knit and then in the purl panels, that is: decrease 1 stitch in each of the 15 knit panels on next row, then 1 stitch in each of the 17 purl panels on the following 6th row, omitting the 4 border stitches at each end. Repeat these 2 decrease rows with 5 rows straight between each and always keeping continuity of cable rib pattern until you have worked 10 decrease rows in all, when 113 sts remain and 3 sts remain in each of the knit and purl panels with the 4 border stitches at each end. Work a further 4 rows straight. Next row: P4, * cable3; repeat from * to last 7 sts., cable 3, p. 4. Work a further 5 rows straight in rib, then work another row cabling across the 3 knit stitches as before. Repeat last 6 rows until work measures 8 inches, then work a further 2 rows in rib. Cast off. To work the buttonholes: Optional fringing: To Make UpSew in all ends. |
MaterialsOriginal materials called for: 2 ozs. Patons Beehive Fingering 3-ply. ** A pair of No 12 (2¾mm) needles. TensionOriginal yarn knits 34sts x 42 rows to four inches over stocking stitch on No 12 needles. Substitute yarn knits 27sts x 38 rows to four inches on 2½mm needles. Size mattersOne size. Depth: 8 inches, excluding fringe. **A word on the wool.I used a vintage Phildar yarn called Anouchka (80% acrylic 16%, mohair, 4% wool), in a bright red. It knits to a tension of 27sts x 38 rows on 2½mm needles, and I used No 13 (2¼mm) regardless of tension. CrochetDouble crochet in the UK is equivalent to US single crochet - see "Terminology" in the side bar. Disclaimer
|
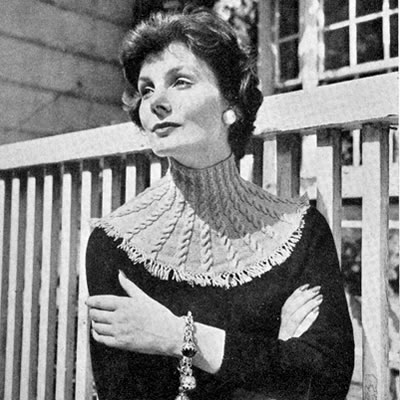 |
|
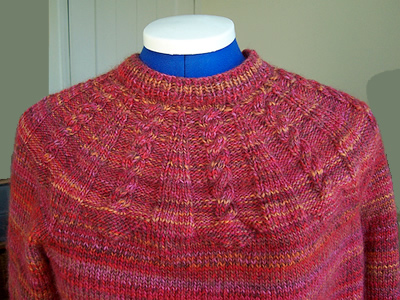
Fabulous sweater-girl look from the 1950s created by Sara.
This is a close-fitting design with some negative ease.
Sara created hers from the top down translating the instructions as she went along; she did not write down her adaptation, but it is far from impossible to convert it dynamically, as Sara did, with this type of design.
Instructions are provided for one size only, but some modifications are possible.
Instructions.The cable over 6 sts is worked as follows: Cable: Slip next 3 sts. onto a cable
needle to back of work; k3, then k3 from cable needle. Back and front alike:With No 11 (3mm) needles cast on 84 sts and work 3½ inches in
k1, p1 rib. Change to No 10 (3¼ mm) needles and stocking-stitch,
increasing 1 stitch at each end of 7th and every following 6th row until
there are 102 sts. Work a second identical piece for the front. Sleeves (make 2):You have the option of log or short sleeves - work one or other set of intructions. Long sleeve: With No 11 needles
cast on 48 sts and work 3 inches in k1, p1 rib. Change to No 10 needles
and stocking-stitch, increasing 1 stitch at each end of 7th and every
following 6th row until there are 76 sts. Short sleeve: With No 11 needles
cast on 66 sts and work 1 inch in k1, p1 rib. Change to No 10 needles
and stocking stitch, increasing 1 stitch at each end of 3rd and every
following 4th row until there are 76 sts. Work straight until sleeve measures
4½ inches, then shape top as for long sleeve. Yoke:You should now have 2 identical pieces for the back and front, and two identical pieces for the sleeves, all on spare needles or stitch holders. With right side facing and the set of No 10 needles..... [Editor's note: If you are using a circular needle, thread the stitches on in the order: sleeve, front, sleeve, back. Put a stitch marker to mark the beginning/end of the round, as front and back look the same. Also remember that the yoke decreases in size until it becomes the neck opening so you may wish to change between lengths of circular needle and finally move to 4 needles as the round becomes smaller.] Work in rounds as follows: 1st round: K5, *
k7, p2, k17; repeat from * ending
last repeat k12 instead of k17. 12th round: K2tog, k2, *
p6, cable, p6, k3, k2tog, k3; repeat from *
to last 22sts, p6, cable, p6, k4. [250 sts] 18th round: K3, *
p6, cable, p6, k2, k2tog, k3; repeat from *
to last 22sts, p6, cable, p6, k2, k2tog. [240 sts] 24th round: K2tog, k1, *
p6, cable, p6, k2, k2tog, k2; repeat from *
to last 21sts, p6, cable, p6, k3. [230 sts] 30th round: K2, *
p5, cable, p5, k2, k2tog, k1; repeat from *
to last 19sts, p5, cable, p5, k1, k2tog. [200 sts] 36th round: K2tog, *
p4, cable, p4, k1, k2tog, k1; repeat from *
to last 16sts; p4, cable, p4, k2. [170sts] 42nd round: K1, *
p3, cable, p3, k2tog, k1; repeat from *
to last 14 sts; p3, cable, p3, k2tog. [140 sts] 48th round: P2tog, *
p1, cable, p2, k2tog, p1; repeat from *
to last 10sts, pl, cable, p2, k.l. [110 sts] Divide stitches onto No 11 needles, 45 across front and 45 across back.
Work 7 rows k1, p1 rib across front of neck; cast off in rib. Work back
of neck in the same way. To Make UpPress parts on wrong side under a damp cloth. |
MaterialsOriginal materials called for: 14 ozs. for long sleeves, 11 ozs. for short sleeves of Patons Moorland Double Knitting**. Example knitted in Twilleys Freedom Spirit DK - 8 x 50g balls - about 900m. 1 pair each of No 11 (3mm), and No 10 (3¼ mm) needles, and a set of 4 No 10 (3¼ mm) needles, or circular needle.[Editor's note: Please see the important notes about the wool used for the modern version, the consequent needle sizes used, and the sizing.] A cable needle. Two press-fasteners. TensionOriginal yarn knits 24sts x 32 rows to four inches on No 10 needles. Substitute yarn knits 22sts x 28 rows to four inches on No 8 (4mm) needles. Size mattersOriginal sized for bust 33-35 inches; length from top of shoulders 20½ inches; sleeve seam: 17 or 4½ inches. See "adapting the size". **A word on the wool.If you have some vintage Patons Moorland DK - you may like to note that I surmise they used this brand name for more than one version of this wool; I have some Moorland from the 1980s and I believe it is a relatively thick DK, which would be hard to contemplate knitting on No10 needles. Sara used Twilleys
Freedom Spirit DK, (120m per 50g ball), which knits as 22sts x 28
rows to 4ins on 4mm needles. See "adapting the size". Disclaimer
|
Adapting the size:The original pattern is for one size: 34-35 inch bust. The sweater is designed to be tightly fitting, and the nominal sweater size is just under 34 ins, so it intends there to be slight negative ease. The original wool and needle sizes indicate a "fine double knitting" wool with a tension of 24sts to 4 inches on 3¼mm (relatively fine) needles. The sizing is a bit small for an average size these days, so moving to a conventional DK wool (22 sts to 4 ins on 4mm needles) makes a nominal size of about 36½ins, making the sweater suitable for up to a 37-38 ins bust. Also - whatever wool and needle size you opt for - note particularly the suggestion to move to a larger needle size when working the yoke. If you increase the size by further gauge changes with thicker wool, you will find that the sweater may be less suited to the close fitting styling, and you lose the 50s "look". |
|
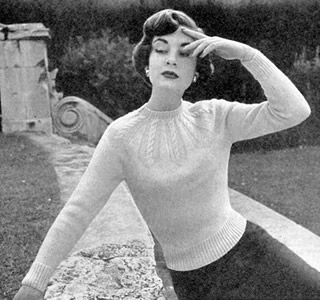
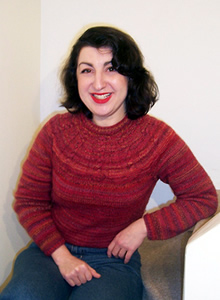
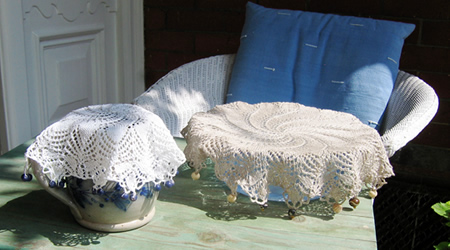
Knitted doilies from the early 1960s
These were frequently used when I was a child, as everyone had a milk jug to protect - and often as not, no refrigerator. I need to point our here, (just to be clear), that I did not come into the world during the era when milk was delivered daily straight from a churn into your own jug - ours did come in bottles.
Actually, I exaggerate our level of refinement "chez nous" - we did not have our milk in a jug as the norm. Mrs Blake did though, and I remember her lovely hand-made beaded doilies, to which I even now aspire - even though my milk is safe in a carton in the fridge.
I also remember camping with the Girl Guides, and protecting our dishes of jam with net cloths - only to find them later covered in wasps, munching away, having casually sliced their way through the netting with their sharp little mandibles! [Not members of the saw-fly family for nothing].
Larger doilyStart with 10ch, join with slip stitch to form a ring. Pass loops on to knitting needle thus: 1st Round: Knit. 3rd Round: Yfwd, k1. Rep 16th and 17th rounds until 41 st round is completed, having one knit stitch more before k2tog at end of each repeat. [220 sts] 42nd Round (and all even rounds unless otherwise stated): knit From now on one repeat of pattern stitches is given and is repeated 19 times more (20 times in all). 43rd Round: K10, yfwd, k1, yfwd. 61st Round: K1, (k2tog,yfwd) 3 times,
k1, k twice into next st, k1, (yfwd, slip 1, k1, psso) 3 times. 63rd Round: K8, k5 sts into next st, k7. 65th Round: Slip the last stitch
of each right needle on to left needle, slip 1, k2tog, psso, k2tog, yfwd,
k4, yfwd, k2tog, yfwd, k1, yfwd, slip1, k1, psso, yfwd, k4, yfwd, slip1,
k1, psso. 67th Round: Slip last stitch of each
right needle on left needle, slip 1, k2tog, psso, k5, yfwd, k2tog, yfwd,
k3, yfwd, slip 1, k1, psso, yfwd, k5. 71st Round: K2, yfwd, slip1, k2tog,
psso, yfwd, k2tog, yfwd, slip 1, k1, psso, k3, k2tog, yfwd, slip 1, k1,
psso, yfwd, slip 1, k2tog, psso, yfwd, k1. 74th Round: Knit. Crochet Edging75th Round: Slip last stitch of each
right needle on to left needle. Insert hook into place near stitch just
transferred and pull working thread through, *
(insert hook into next 3 sts as if to knit, thread over and pull through,
thread over and pull through 2 loops - dc made - slip the 3 worked sts
from needle, 3ch) twice; [Editor's note: This final crochet row does take a long time - it is fiddly and took me well over an hour and a half of fiddling. However, you can be encouraged by the fact that this is your very last step to finishing - once completed, it's all over.] Smaller doilyStart with 8ch, join with slip stitch to form a ring. Pass loop on to knitting needle and continue as for larger doily, noting that repeat is worked 7 times more (8 times in all) instead of 9. Divide the 8 sts, 3 on 2 needles and 2 on 1. Work as for larger doily until 29th round is completed. 30th Round: K14, k2tog. Continue as for larger doily starting from 57th round to end. Making upSew in all ends. Sew beads around edges - or make a set for your side table....
|
MaterialsCoats Mercer Crochet Cotton No 40 (20 gram), 2 balls in selected colour. 1.00 mm (or No 4) steel crochet hook. Set of four double pointed No 13 (2¼mm). Size matters13 inch diameter for larger and 9½ inch for smaller. Abbreviationsch: chain A Word
|
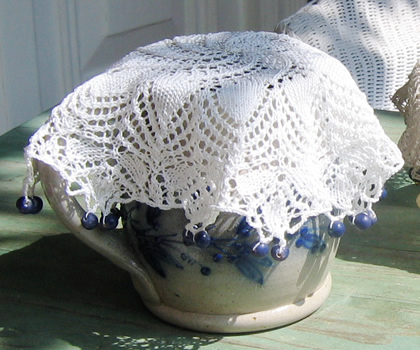
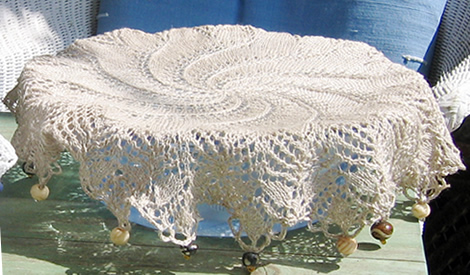
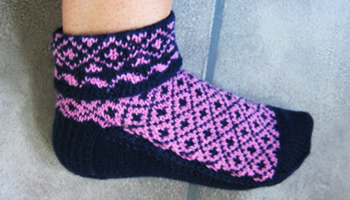
Early 1950s tennis socks originally knitted in crisp navy and white wool. I love cuffed socks but detect that some others (my sister) clearly do not. These have the design made specifically to fold down though - so there's no way out.
Instructions.The pattern works the instep and the sole separately on two needles to enable you to work the fair isle pattern across the instep only. It is not possible to achieve this in the round. However, you join the two together as you knit. Using No 12 needles with main shade (M), cast on 59 sts loosely and join in a round. Work 4 rounds in moss (also known as seed) stitch [every row k1 p1]. Next Round (increasing): K3; (m1, k8) 7 times. [66 sts] Cuff border:Change to No 11 needles and join in contrast (C) and work wave pattern border by repeating the 6 stitch pattern 10 times:
1st Round: *
k3 contrast (C), k3 navy (N); repeat from *
to end. Now continue with cuff diamond pattern, repeating the 8 stitch pattern 8 times across one round:
6th Round: *
k1(C), k2(N), k1(C), k2(N), k2(C); repeat from *
to end. Now break off C and continue with N only; change to No 12 needles and work 7 rounds knitting. Then turn the work so you are working the rounds in the other direction. This reverses the work to allow the cuff to fold over with the right side visible. Work 8 more rounds knitting; at the end of the first round knit into
the stitch below the first stitch of the round and knit it together with
the last stitch of the round to avoid a small hole in the work. Join in C, working main diamond pattern, repeating the 8 stitch pattern 8 times:
1st Round: *
k1(N), k2(C), k1(N), k2(C), k2(N), ; repeat from *
to end. These 8 rows form the pattern. Continue with N only and divide for the heel, however do not break off C. Divide for heelNext Row: Using navy wool only, knit the next 31 stitches on to one needle to work for the heel. Divide the remaining 33 sts across 2 needles, and leave to work the instep later. If you have worked the pattern correctly there will be a symmetrical set of complete patterns across the 33 instep sts. Make sure that it looks like this (you will have just completed row 5, the middle row in the picture):
[ Editor's note: If it doesn't look like this... you can compensate by knitting more or fewer sts for the heel flap until you get to the pattern boundary. Then when you purl back on the row below, follow the instructions as set to get your 30 sts. You should have your instep sts set correctly as above. If you still haven't then there is likely a mistake in your fair isle pattern.] Return to your heel sts, and turn the work so that you can work back and forth across the heel sts using 2 needles. Next Row: Purl back across 15 sts,
p2 together, purl remaining 14 sts. [30 sts]. Heel flapNext Row: *
Slip 1, knit 1; repeat from * across
all 30 sts. Repeat last 2 rows 13 times more. Turn heelTurn the heel by working short rows: Next Row: Slip the first stitch,
p16, p2tog, p1; turn. Continue in this way until all the sts have been incorporated in the row, ending with a knit row. [18 sts] Turn. Purl one row. Pick up and purl 16 sts down side of heel flap to bring the navy wool back to work the patterned instep. Leave these 16 sts along with the 18 heel sts, on a spare needle or stitch holder. Upper foot panelTake 33 sts left on needles 1 and 2, and slip them on to one needle. Continue to use the navy yarn and pick up the contrast C, which should
be waiting for you at the beginning of a purl side instep row (row 6 of
the pattern). Begin working back and forth across these 33 sts, keeping
the continuity of the pattern starting with a purl row and working from
row 6 of the chart where you left off; work alternate rows in knit and
purl. Continue for 5½ inches or 4 inches less than overall desired foot
length, ending with a knit row. Break contrast yarn, and continue in navy only. Turn the work and purl across 15 sts; p2tog; p16. Continue with wrong side facing, using another No 12 needle, pick up
and purl about 27sts from the slipped sts down the right side of the upper
foot panel, and from the edges of the first 5 rows you knitted. Using the same No 12 working needle, pick up and purl 17 sts from side of heel flap, then purl 9 sts from the heel. Using another No 12 working needle, purl the 9 remaining heel sts, and then purl the 16 sts you already picked up from the other side of the heel flap. Mark the stitch with a piece of waste wool, as before. Continuing with this needle, purl along the left side of the upper foot panel, picking up 27 sts from the edges of the first 6 rows you knitted and from the slipped edge sts.
The work is arranged on 3 needles. The picture shows the working needle
in the process of knitting across the sole,
and the waste wool markers in white. Purl across the 32 sts at the top of the panel. Then using one of the
spare needles, purl down the right side of the panel again, as far as
the stitch marker.] Do not turn the work. SoleUsing the No 12 working needles, you are going to knit back and forth across the sole (between the markers) in stocking stitch, knitting the last stitch from each row together with one stitch from the upper foot panel. 1st Row: (Wrong side facing) Slip1,
p24 from first needle, (16 sts up side of heel and 9 sts from heel flap),
then purl 24 sts from second needle, up to 1 stitch before the stitch
marker. Purl the last stitch of the sole section together with the first
of the instep sts. [50sts between the markers] 2nd Row: (Right side facing) Pass
the waste wool marker between the sts. Slip 1, ssk2tog; knit to the last
3 sts before the marker; k2tog, ssk the last stitch of the row together
with the next instep stitch as before. [48sts between the markers] Turn. Repeat 2nd and 3rd rows, shaping the sole by decreasing 2 sts on the knit rows, until 28 sole sts remain between the markers. Then continue without shaping as follows (continuing to weave in the markers as before): Next Row: Slip 1, purl to the last
stitch before the marker; purl together the last of the sole sts with
the first instep stitch as before. Repeat the last 2 rows until all the sts from the sides of the upper
foot have been joined to the sole. Do not join any of the sole sts to
the 32 sts left on the 4th needle at the end of the panel. ToeNow you continue to work the sole and upper foot sts together in a round, as follows: With right side facing, using your working needle (needle 1), knit across
32 sts from the upper foot. Knit the next 14 sts from the sole on to the
next needle (needle 2), and knit the final 14 sts from the sole on to
the next needle (needle 3). You have 60 sts arranged with 30 sts on needle 1, and 15 sts on each off needles 2 and 3. Continue to work in rounds as follows: [ Editor's note: This is where you can adjust the length of the foot if your feet have not grown to a multiple of half inches. Work a couple of extra plain rounds here before starting the decreasing.] 1st Round: Needle 1: k1, ssk2tog;
knit to the last 3 sts; k2tog, k1. Repeat rounds 1 and 2 until 24 sts remain. Slip the sts from needles 1 and 2 on to one needle and graft together with the sts on needle 3. Making upSew in all ends. Fold down cuff. |
Materials4 ply: 2 ozs navy, 1 oz contrast colour. One set each of 4 double pointed needles (dpns) size 11 (3mm) and 12
(2¾mm). Tension30 stitches and 32 rows to 4 inches over pattern. Size mattersLength from top to bottom of heel, top turned down, 5 inches; length of foot 9 inches (adjustable). AbbreviationsN is main shade (navy). m1: make one by picking up the loop between sts and knitting into the back of it ssk/ssk2tog: (slip, slip, knit) - or (slip1, knit 1, pass the slipped stitch over). Effectively you are "knitting 2 together through back loops".
A Word
|
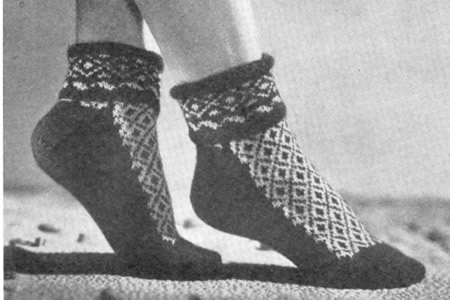
Original photo from Stitchcraft April 1950, constructed using a different pattern on 2 needles with seam under sole. Generally, seams in socks are avoided so they are more comfortable to wear; a seam right under the ball of the foot cannot be ideal as sportswear. I imagine these socks were for visual impact rather than practicality.
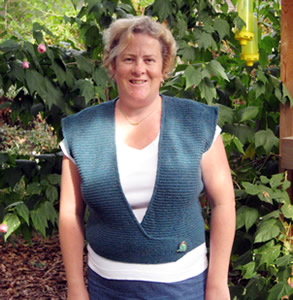
Snug winter accessory from 1953.
"Something new in waistcoats. A modern version of the old-fashioned knitted comforter".
Proves to be very flattering for most shapes, and not just for those twig-like 1950s post-war figures.
Instructions.The overall pattern is four basic rows: 1st Row: Right side facing, purl.
These 4 rows form the ridged pattern. Back:With larger needles cast on 117 sts. and work 52 rows in pattern as given above. With right side facing, shape sides by increasing one stitch at each end of next and every following 6th row until there are 153 sts. Work straight until back measures 11 inches at centre. Work straight until back measures l8¾ inches, then with right
side facing, shape shoulders by casting off 10 sts at beginning of next
8 rows. Right Front:With larger needles cast on 82 sts and work in pattern as for back, Work 12 rows straight in pattern. With wrong side facing, decrease one stitch at end of next and following
9 alternate rows [82 sts]. With right side facing, continue in pattern, sloping front edge and shaping
side edge as follows: Continue in pattern, sloping front edge by decreasing one stitch at beginning
of every following l0th row. With wrong side facing, continue sloping front edge on every l0th row as before, and at the same time, shape armhole by casting off 6 sts at beginning of next row, then k2 tog at this edge on next 7 rows. Now keep armhole edge straight and continue sloping front edge on every
l0th row as before until 40 sts remain. With wrong side facing, shape shoulder by casting off 10 sts at beginning
of next and following 3 alternate tows, armhole edge. Left Front:With larger needles cast on 60 sts. and work 52 rows in pattern. Armhole borders:Join shoulder seams. Front Borders:With right side facing and smaller circular needle, pick up and knit
172 sts from top of flap to centre back of neck. Work 5 border rows as for armhole borders. To Make UpPress parts lightly on wrong side under a damp cloth. Join side seams. Press seams. Fasten with pin or brooch as shown in photograph. |
|
Materials10 x 25g balls 1 pair each of No 11 (3mm) needles, and one long No 12 (2¾mm) circular needle. Original knitted in a 3ply wool on numbers 14, and 13 (2mm and 2¼mm) needles. Kilt pin to fasten. TensionYarn knits 28sts x 40 rows to four inches on No 11 needles. The original tension on thinner wool is 9 sts to the inch. Note: Do not stretch pattern when Size mattersOriginal sized for bust 33-34 inches; length from top of shoulders 19
inches. See "adapting the size". **A word on the wool.I used a Rowan Tweed 4ply, which is thicker than the original wool and made the item larger overall. The actual yarn I used is no longer available but you could choose Scottish Tweed 4ply instead. Original: Paton's Beehive Fingering 3 ply in Lipstick Red. Disclaimer
|
|
Adapting the size:Knitting in 4-ply produces a bigger size than the original but I carefully checked my tension, experimented with needle sizes, and did the arithmetic. Changing from 9st per inch to 7st per inch makes a big change from a 34 inch bust to 42. However the wrap over style offers some flexibility, and it is easy to add or subtract a few sts throughout the pattern if you need to, or even alter the waist size that you start with, and do fewer increases up to the armhole, if you feel up to it. This style is meant to be wrapped as tightly as you like to wear it, and seems to look flattering on a range of figure types. I wanted to make the wrap for myself, I liked the style and tried on this one before sending it off to Alison. However, the 4ply tweed made up too big for me (even with my own ample bosom!). I purchased some 2 ply on-line - fine pure wool in a cone, intended for machine knitting - so one day when I feel like working with lots of tiny stitches, I might get round to it.... (It's a lovely red - "lipstick red" ...) |
|
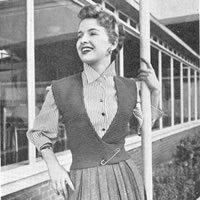
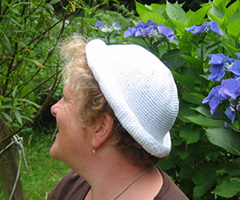
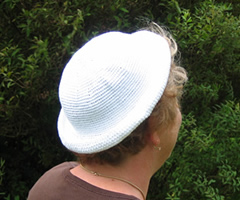
"Capped to catch the eye" in 1952.
This cap can be "worn with a purpose on windy days for cliff-top walks or out at sea,
or just for extra prettiness at any time".
"Leave it plain or dot with beads" - and - "for teenagers only - roll up the brim in jaunty sailor style".
Luvvly.
Instructions.Instructions are for 2 versions - one plain and one with striped brim. Crown 1st Round: *
2 dc in 1 dc; repeat from * to end. 5th Round: *
(1 dc in 1 dc) three times, 2 dc in 1 dc; repeat from *
to end. [40 dc] 7th Round: *
(1 dc in 1 dc) four times, 2 dc in 1 dc; repeat from *
to end. [60 dc] 12th Round: *
(1 dc in 1 dc) fourteen times, 2 dc in 1 dc; repeat from *
to last 10 dc; (1 dc in 1 dc) ten times. [106 dc] 19th-34th Round: As 18th round. This completes the crown. Striped BrimWith number 11 hook, and white yarn, make 23 chain, turn. Miss 1 ch 1 dc in each of 22 ch. †† Join in contrast. Continue repeating from †† to †† until strip fits all round the lower edge of the crown. Do not stretch this strip but allow it to fit comfortably. End with 2 rows of contrast colour. Fasten off. Finishing: Plain BrimThis is worked with the yarn doubled. Sew in ends and optionally embroider 5 rows of beads around the crown, as shown in
the photograph. |
MaterialsPlain: 2 x 50g ball Phildar
Phil Crochet, in white, (100% cotton, 201yards). Striped: 1 x 50g ball 3 balls (2 in white) made both hat versions. Nos. 11 (3mm) and 10 (3¼mm) crochet hooks. Crochet abbreviations:ch = chain Remember these are English crochet instructions where dc is equivalent
to US single crochet, and so on - see "Terminology" in the side
bar. Tension7 dc to an inch. Check the tension and your head measurement carefully; the original was made in angora which is more stretchy than pure cotton. Size mattersTo fit "an average head". However, the hat size can vary quite a lot according to your tension. A word on the wool.Original specified 2 x ½oz balls of Patons Fuzzy Wuzzy Angora. Disclaimer
|
Striped-brim version, and modelled original:
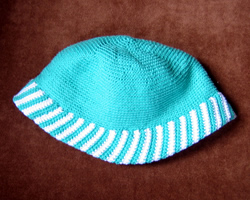
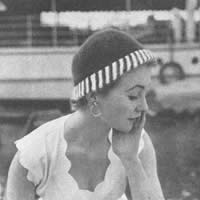
I was so taken with the another seaside idea on the same page as the hat that I felt compelled to share it with you here as well.
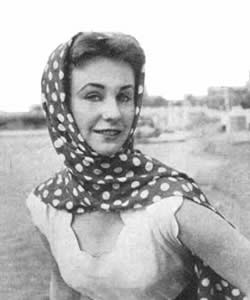
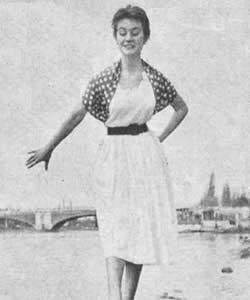
.....TIED AT THE BACK it makes a snug bolero....
As a change from the everlasting headsquare, buy a yard of rayon or silk -
ours was a yard of spotted rayon at 5/6d,
[Editor's note: For you
whipper snappers out there, that's 27½p or about 60 cents.]
but silk is best if you can afford it, as it's less slippery - cut it in half
lengthways, join the short ends neatly, slip hem the long raw edges, and you
have a manoueverable long stole, which can be worn in all sorts of ways and
is so much prettier and smarter than a triangle tied under your chin.
[Editor's note: I'm with
them on that one.]
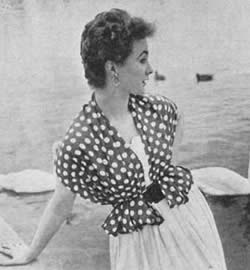
AS A CARDIGAN - round your shoulders, ends tucked up and over your belt in two comfortable pockets.
Carry it around on holiday and it will be a godsend for those chilly moments,
and less bother to carry than a cardigan. Tie it round tyour waist as a sash
when you don't want to carry it.
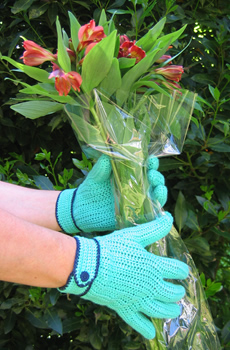
Chic summer gloves from 1955, worked in cotton crochet, though not lacy.
Elegant but not frilly - "these trim gloves are crisp and fresh". Definitely to be worn with pill-box hat and veil rather than Edwardian sunshade, (or in practice - neither - but you get the idea).
Original worked in white with black trim. Very Audrey Hepburn.
Instructions (both hands alike).Beginning at the side edge with main colour, make 41 chain, turn. Start with little finger Begin third finger ** Begin middle finger Begin first finger Begin thumb [Editor's note: You end here at the top of the thumb. One half of the glove is complete - this half covers the back of the hand.] Now keeping same side of glove piece facing you, rejoin to beginning of row, and work 1 long row dc. up side of thumb and all round fingers, ending at top of little finger. Now work down side of little finger to wrist thus: Little finger Third finger Middle finger First finger Thumb Continue with row, working a row of dc. down inner side of thumb and round all fingers, ending at top of little finger, where you finished your row of dc when working the other side; fasten off. Make another glove in the same way. To Make UpPress parts very carefully on wrong side under a damp cloth. Remember to turn second glove inside out for other hand. CuffsWith main colour yarn, make 45 ch., turn. 1st Row: Miss 1 ch., *
1 dc in each ch.; repeat from * to
last ch., 2 dc in last ch.; turn with 1 ch. With contrast yarn, work 1 row of dc all round cuff. Sew cuff neatly round glove with contrast edging overlapping edge of
main work and with opening in centre of back; rounded edge comes below
3rd finger and slightly overlaps straight short edge of cuff.
Work a small circle of dc in contrast and sew in position on top of cuff
as shown in photograph. |
Materials1 x 50g ball Phildar
Phil Crochet, shade 07 Veronese, (100% cotton, 201yards), with a small
amount of navy blue for contrast. Crochet abbreviations:ch = chain Remember these are English crochet instructions where dc is equivalent
to US single crochet, and so on - see "Terminology" in the side
bar. Tension6 half trebles to an inch. Size mattersTo fit "an average hand". A word on the wool.Original specified 2 x 1oz balls of Strutt's Milford Knitting Cotton No. 8 in white, with scraps of black 4-ply wool for edging. The single 50g ball of Phil Crochet was only just enough at 201yds. For winter gloves, they could be easily worked in wool instead of cotton for those who don't like to knit. Disclaimer
|
Your finished gloves.
Editor's note: "So what's all this messing about with a bunch of flowers?" - I was trying to emulate the original photo shoot, and found it surprisingly hard. I had to get George to take the photo and he did not seem focussed enough on (a) yes I did want the flowers in the photo not just a load of stems, (b) but it is supposed to be a centred around the gloves and not a bunch of flowers, and (c) o I wish I had slim elegant fingers, and maybe 4 arms so I could take the photo myself...

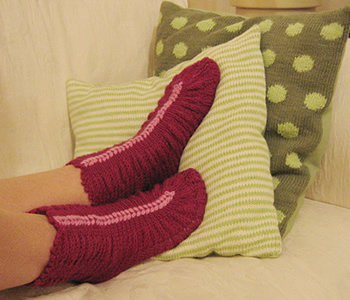
Second pattern this month from an "Oddments" leaflet for "using up old Scraps of Wool", dating anywhere between the 1930s and the 1950s. Described originally as Lady's Bedsocks*, I hope they will prove to be the perfect partner for Boudoir Bedjacket.
*One of the other patterns was called "Bedroom Boots" and I couldn't resist the alliteration; however, this pattern described here makes footwear that is much more elegant than either "bedsocks" or "boots" implies. They look at their best when on the feet, (as opposed to just after you have knitted them, when they look like a pair of unattractive caterpillars). It is hard for me to date the design, as many patterns were reproduced out of their true era; possibly an expert on publishing could be more accurate.
InstructionsEach sock is worked in one piece. Make two alike. Commence at the front edge. Using No. 12 needles, cast on 64 stitches,
and work 6 rows in k1, p1 rib. ** Change to No. 12 needles. Work 6 rows in k1, p1 rib. Making up - Press each piece lightly on the wrong side under
a damp cloth with a hot iron. Crochet edging - Using the main colour, work a picot edge all around the top of each of the socks, as follows: One slip st to secure the yarn to the top front edge. Embroidery |
MaterialsOriginal pattern calls for 2oz of 4ply, and a small quantity of contrast
for embroidery. One pair each of number 12, an No 6 needles. Tension20st to 4 inches (10cm) on No 6 (5mm) needles. Size mattersOne size fits all. A word on the wool.Baby Cashmerino is heavier than a 4ply, knitting to a tension of 25st and 34 rows to 4 inches. Thus I used more yarn than the original pattern. Each 50g is 125m, and I used 90g. |
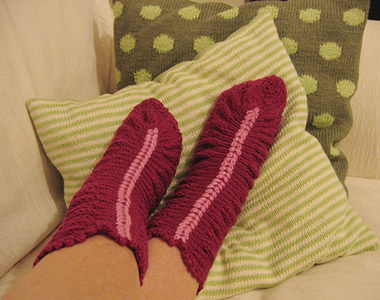
As a variation (or to "use up old scraps of wool") you might choose to make the picot edging in the contrast colour to match the embroidery - I believe this would work better if the contrast were darker than the main colour.
Alternatively, if you are not confident in your embroidery skills (I found it harder than I had imagined) you could stick with a single colour and embroider in the main yarn; this provides a more sophisticated look - if indeed a bedsock can be said in any way to contribute to a sophisticated look!
Third and final pattern is totally untested, from a magazine dated November 1968 [ "Ideas for Gifts"]. They really are called "boudoir slippers" which, apart from any other consideration, makes me feel that the pattern dates from longer ago than 1968. As a teenager, I would have found these indescribably awful; however, luckily, I did not have relatives who were handy with the old needles.
Likely to remain untested as a girl can have only so many bedsocks.
[Should any readers admit to making this pattern, please submit a photo of the result for me to display here!]
InstructionsEach sock is worked in one piece. Make two alike. Cast on 76 stitches, and work as follows: Row 1: k3, * p2, k2; repeat from
* to last stitch, k1. Repeat these rows for 6½ inches. Change to No. 12 needles. Work 6 rows in k1, p1 rib. Making up - Fold cast-on edge to cast-off edge and join side seams. (Seams form heel and toe). Crochet edging - Starting at the heel, crochet eyelets all around the edge as follows: - 3ch, * 1dc in next stitch, 1ch, miss next st; repeat from * all round. Join with slip stitch to 3ch at the beginning. Then work a row of picots thus: - * 3ch, 1 slip st into the first of these chain, 1 slip st into the 1ch space of the previous round; repeat from * all round. Fasten off With wool double, crochet a chain cord for each sock and thread through holes; make and sew a small tassel to each end. |
MaterialsOriginal pattern calls for 1 (1oz) ball of Patons Beehive Baby Wool in 3ply. One pair of number 11 needles. Tension32st and 40 rows to 4 inches (10cm). Size mattersOne size fits all. A word on the wool.It is fairly easy to acquire 3ply Baby wool to knit up to this tension. |
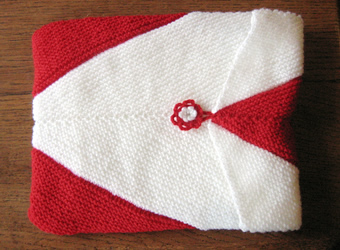
This is a pattern from 1956 "reversible bottle-cover" (sic) - though why the quotes, why the hyphen, and why the description reversible, I really am not sure. Originally a cover for a hot-water bottle, I have adapted it to fit a microwavable pad. The knitting turned out to be an interesting shape, and in consequence made for an interesting pattern, (probably not as intended). I used a bright red and white combination, which reminded me of a 1950s accessory set. The original recommended colours were "powder blue and white".
In the days when pattern illustrations were not in colour, the colour names were much more vivid and descriptive; modern names tend to try and evoke an emotion rather than a colour. I do love reading these old patterns with the colours - "lipstick red" "primrose yellow" "mimosa" "frosty lime" - you could just eat them - a feast for the mind's eye.
InstructionsFirst piece - with No. 11 needles and first colour, cast on 4 stitches. Row 1: Inc in every st (8 sts) With the right side facing for row 7 place a row marker on this side of the work, to mark it as the right side of the work.
Then continue working as before, increasing at both ends of the row, and in the middle, on odd (right side) rows; increase only in the middle on even (wrong side) rows. After a while, the stitches will become crowded and the shape hard to manage on just 2 needles. At this point, spread the sts evenly across two needles, discarding the centre st marker; continue to work back and forth across the needles using a third needle.
The work will take on a triangular, or arrow shape. Continue working until you have 105 sts on each side of the centre. Second piece - work a second triangle (or arrow) in the contrast colour. Lay the pieces out with the point of one arrow to the base corner of the other arrow, (see picture below).
Continue working with one of the available colours (I used the red). Cast off the two rows of knitting together, using a "three-needle cast off"(see picture below), fairly tightly.
[Editor's note: You put your working needle into the first st on the front needle and the first st on the second needle behind; you pull your loop through and knit both sts off the needles together. You have one st on your working (usually right hand) needle. You repeat so there are two sts on your working needle. You pass the first st you knitted over the second; continue casting off in this way.] This is how it looks half way through; ideally the work should lie flat at the cast off edge:
Next you put the other two edges together - again the point of one arrow is next to the base corner of the other arrow, (see picture below):
Cast off the two rows together. You are left with a sort of tube; turn it so that the cast off edges are inside. The next picture shows a hot water bottle placed in the tube. 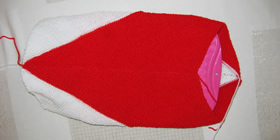 The arrow points are arranged centre front and back.
Crochet flower - begin by making a slip loop with your first colour as if you were starting a crochet chain, and crochet into this loop for your first round. Ensure that the loop "slips" (can be tightened) from the tail end of your work, not the working end. Round 1: using the first colour, crochet 8 dc into
your loop; adjust the slip loop until the stitches fit nicely. Make a second flower in the second colour. Round 1: using the second colour, crochet 8 dc into
your loop; adjust the slip loop until the sts fit nicely. Place second flower on top of first, and sew through both layers, onto the cover at the marked position for the button. |
MaterialsOriginal pattern calls for 2 oz each of two contrast colours in 3ply. One pair of number 11 needles, with a spare pair (or set or 4) to aid
in the construction. One hot water bottle "replacement
core", (available to order on the web). TensionGarter stitch is difficult to measure but the wool should knit to a basic tension over st st of 28st to 4 inches (10cm) on No 11 (3mm) needles. Size mattersOne size. A word on the wool.I used an acrylic 4ply; not ideal, but these covers can take some wear and tear. |
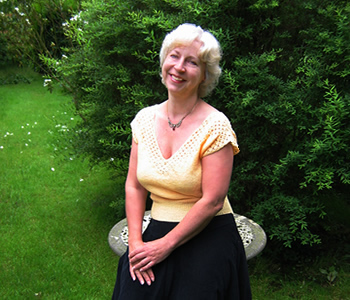
A pretty, low-cut, jewelled cocktail jumper for evenings, dating from 1957. Originally knitted in Patons Beehive Fingering 3-ply, this version uses a fine vintage Phildar yarn in sunshine yellow. The original colour suggestion was pale pink, with black embroidery, (which I omitted altogether for my version to avoid looking like a bee as much as possible). I think it would be very pretty in pink.
My pose above is in imitation of the orginal model, which is in itself quite a challenge despite the air-brushing techniques available for digital photographs....
Lace PatternRow 1: (right side) k1, wfwd, sl1,
k1, psso, k1, * k1, k2tog, wind wool twice
round needle, sl1, k1, psso, k1; repeat from *
to last 4 sts: k1, k2tog, wfwd, k1. InstructionsBack and front alike. With No. 13 needles, cast on 114 (126) stitches, and work 4 inches in
k1, p1 rib. [Editor's note: I worked both sides together in the round, (so every round knit) up to the start of the armhole pattern, when I split the work, and continued each side separately. Mark the sides with st markers to aid placement of the increases.] Introduce lace pattern at the centre: Next row: Inc in 1st st, k55 (61), pattern 26sts as
1st row of lace pattern, k55 (61), Inc in last st. Next row: pattern 14sts as 1st row of lace pattern;
k40 (46); pattern 38sts as 1st row of lace pattern; k40 (46); pattern 14sts as 1st row of lace pattern. Divide for neck as follows: Row 1: pattern 14sts as 1st row of lace pattern; k34
(40); k1, wfwd, sl1, k1, psso, k1, * k1,
k2tog, wind wool twice round needle, sl1, k1, psso, k1; repeat from *
twice more, k1, k2tog, turn, and leave remaining sts on a spare needle. Continue in pattern, decreasing 1st at neck edge on every alternate row, and at the same time, taking an extra 6 sts into lace pattern at neck edge on every following 1st pattern row until 49 (51) sts remain, ending with right side facing for next row. At this point 9 (10) complete patterns have been done from the start of the lace pattern. Now work over all stitches in pattern, still decreasing 1 st at neck
edge on next and following 3 alternate rows. [45 (47) sts] Shape shoulder as follows (right side facing): Next row: Cast off 12 (14) sts, pattern to last 2 sts, K2tog. With right side facing, rejoin the wool to the remaining sts and work the other side of the neck as follows: Row 1: k2tog, k1, * k1, k2tog, wind
wool twice round needle, sl1, k1, psso, k1; repeat from *
twice more; k1, k2tog, wfwd, k1; k34 (40); pattern 14sts as 1st
row of lace pattern. Finish to correspond with the other side of the neck. Making up - Press stocking stitch parts only on the wrong side under a damp cloth. Join shoulder and side seams. Press seams.
Embroidery - Using 2 strands of stranded cotton, embroider 4 petal
loop stitch flowers in centre of diamonds round neck edge and sleeves,
as shown in the photograph, then add a jewel or sequin to the centre of
each flower. |
MaterialsOriginal pattern calls for 5oz of 3-ply. One pair each of numbers 13 and 11 needles. Number 12 crochet hook. Jewels
(5mm) or sequins and stranded cotton for embroidery. Tension32st and 40 rows to 4 inches (10cm) on No 11 (3mm) needles. Size mattersInstructions for two slim fitting sizes: 33-35 (36-38) inch bust; length from top of shoulders 18½ (19¼) inches. A word on the wool.I used an old Phildar yarn (Loisirs) which knits 30st to 4inches; Phildar
Luxe is a quality fine yarn in a fair range of colours - but both
these yarns are mixed fibres with only 15% wool. Disclaimer(well...almost a disclaimer...)
|
Substituting the wool
The recommended yarn is a 3-ply. Knitting these old patterns makes you
think "gosh - I'd forgotten how fine 3-ply was" and "gosh
- how small and dainty people were in the 1950s".
In addition to the issues with size and tension, 3-ply is a very fine
(fingering) yarn which is now really restricted to baby wools, assuming
you can find it at all. The baby ranges usually offer it in white only,
and tend to be "easy care" - or as we know it: synthetic. I
have not done exhaustive research, but there does not seem to be any of
the standard bread-and-butter brands in this wool weight. I imagine that
some of the heavier crochet cottons may knit up to these kinds of tensions,
but the texture of the knitting may be a little stiff.
You can aquire some vintage 3-plys on eBay (for example, Jaeger 3ply Botany,
or even Patons Nylox, which is 80% wool and not entirely restricted to
mens sock colours). I notice also there are very fine yarns available in
cones intended for use with knitting machines, but often content and weights are not clearly defined.
The good news is there has been quite an opening up of the 4-ply wool weights* which I think is due to the popularity of sock knitting now. There are some lovely colour ranges, and Rowan, for example, offer several 4-ply ranges including suitable cottons. This top has turned out to be very pretty, and I would have much preferred it in a cotton or soft woollen yarn.
Knitting in 4-ply will help you with producing a bigger size but check
your tension carefully, experiment with smaller needles, and do your arithmetic.
Changing from 8st per inch to 7st per inch makes a small 35 inch bust
leap to 40. This style is meant to be tight, and don't necessarily be
put off if you have an ample figure - as long as it goes in and out in
the right proportion!
If you want to change the number of stitches to alter the size then you
need to add or subtract 12 at a time. You can alter the length up to the
arm easily enough, and also lengthen the armhole by simply knitting more
of the lace pattern before you start shaping the shoulder, (as I did).
*The "quickerknit", or fine double knitting yarns, seem to be offered in many more ranges now as well ; at one time this too was relegated to the baby wool shelves only, and it is one of my favourite weights to knit with.
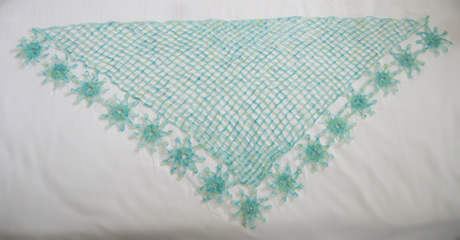
Pattern from 1955 described as a "lacy head scarf for evening wear". This is a charming fichu, for evening, or indeed day wear, depending on your choice of yarn type.
I don't know about you, but I try not to wear head scarves in the evening; in fact I try not to wear them ever. I took against them in the 1970s - something to do with the image of the Royal Family - o, and they make me look like an extra from an Edinburgh Fringe production of Mother Courage.
Hopefully, however, this one will make us all look like Grace Kelly.
InstructionsBegin at the widest part. With No. 11 (the larger) hook make 260 chain, very loosely. Row 1: Miss 1ch, * 1dc in next ch,
7ch, miss 5ch; repeat from * to last chain;
1dc in last ch; turn. Continue, repeating 2nd row, thus decreasing one trellis pattern
on every row, until only one trellis pattern remains to be worked in the centre.
First round: 3ch. (this counts as one dbl tr), work 26 dbl trs
through centre of ring, and join to top of he 3ch with a slip st. Make 14 more in the same way. Making up - Press lighty on the wrong side under a damp cloth. Make a long strip of flowers by joining (sewing) the tip of one petal of one flower to the adjoining tip of petal of another flower. Join this strip to sloping sides of main part - seven petals along each side, and one at the top of the triangle; catch the tips of two petals of each flower to the main work to secure the border. Give a final press, pinning out the flower points. [Editor's note: I experimented, adding a pearlised bead suspended in the centre of each of the flowers; it looks very pretty and follows the current fashion for applied beading - however the "nude" versions retain a certain delicacy without further adornment.] |
MaterialsOriginal pattern calls for a ½oz ball of "Fine Ply". Example in hand-painted cobweb lace wool (100m skeins about 9g) purchased from Alchemy Fibre Arts eBay shop. Numbers 11 (3mm) and 12 (2.5mm) crochet hooks. TensionOne trellis pattern measures ¾in on no. 11 hook. SizeApproximately 36 inches at the widest part. A word on the wool.There were quite a few patterns for very fine scarves and shawls in cobweb
wools, and as their name suggests they are very fine gauge. |
Now you have the taste for chic yet casual evening wear in adaptable crochet, I expect you'll want to embark on a larger project (such as the one below) to extend your skills. Let me know if you need the pattern.
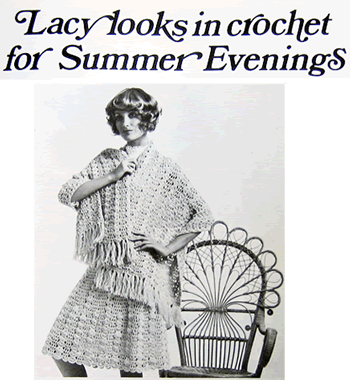

A true gem of a pattern described as an "angora tippet" from the early 1950s. Originally knitted in Patons Beryl Angora 4ply wool, this version uses a mixed fibre mohair yarn which knits to a 4ply tension.
InstructionsWith No. 8 needles, cast on 338 stitches loosely, and work 4 rows stocking stitch starting with a knit row. **Next (eyelet) row: K2 *wool forward,
K2tog.; repeat from * to last 2 sts, K2. Make hem - on next row by knitting 1st from the needle together
with 1st from the cast-on edge. Work 7 rows in stocking stitch, starting
with a purl row. Repeat sections from **
to ** once more. Next row: wrong side facing, K4, *
P30, K30; repeat from * to last 34 sts; P30,
K4. Start shaping Next row: K4, (K2tog, K12) 22 times, K4. Next row: K4, (K2tog, K11) 22 times, K4. Continue in this way, decreasing 22 sts on next and every following 6th
row, (remembering you will be working 1st fewer after the K2tog on each
decrease row) until 96 sts remain. Neckband Join neckband and main body Place the needle with the neck sts and the spare needle with the body
sts together, with right sides (facing each other) together, and cast
off the two sets of stitches together. Making up
The detail shows the mixture of stocking stitch and garter stitch gored panels, which gives the shoulder cape such a perfect drape. The hem is formed by a double folded picot edging, which is reproduced at the neck.
|
MaterialsOriginal pattern calls for 2 oz angora wool. One pair each of number 8 and number 11 needles. Two decorative gold buttons, and hook and eye for fastening at the neck. Tension28st to 4 inches (10cm) on No 8 (4mm) needles. Size mattersOne size fits all! However - I did lengthen the cape by about one inch overall, as I found that although the tension was as stated in sts per inch, the length seemed shorter than depicted. A word on the woolI used a vintage wool from Pingouin called Volutes (80% acrylic 20% mohair), which I chose from my stash mainly for its rich colour. It knits to a tension of 23sts x 34rows on No. 11-12 (3-2½mm) needles, thus I knitted the cape on smaller needles than the pattern stated to achieve the right tension. I think the cape really needs to be knitted in a true luxury yarn, such as angora, or cashmere. Rowan's Kidsilk Haze could be suitable but the smallest tension on No. 10 needles is quoted as 25sts to 4in. |
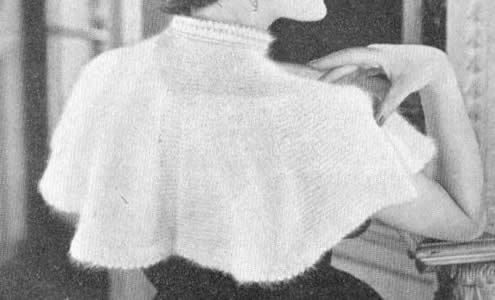
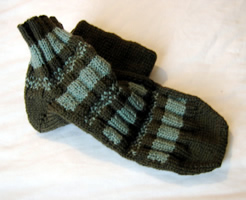 Men's slippersocks in 2 colours. I have also knitted a 3 colour version to use up wool oddments. I did try to knit these completely in the round to avoid seams but found it almost impossibly complex to do the fair-isle over only half the round - so I would stick to the instructions as given |
InstructionsWith No. 12 needles and main shade (M) cast on 60 stitches loosely, and
arrange over 3 needles. Commence pattern as follows: Rnd 1: Change to contrast colour (C) and knit all sts. These 20 Rows form the pattern. Work top of foot as follows: Break off M and slip the first 16 sts of the round on to a spare dpn,
and slip the last 13 sts on to a second spare dpn. [Editor's
note: these can be your No. 12 needles if required]. Row 1: Using C knit all sts. Now work one more pattern set of 20 rows, and then the first 8 rows again,
decreasing 1st at the end of the last row, (30 sts). Shape toe: Using M only, continue in stocking stitch, (one row knit, one row purl), decreasing 1 st (k2 tog) at each end of the next, and every alternate row, until 14 sts remain. Leave these sts on a safety pin. Make the heel: Return to the remaining 29sts; place both sets together on one needle,
and continue to work on them in st st, using colour M. Continue in st st until the foot is the same length as the top. Making up. Graft
the two sets of 14 sts together. Make a second sock to match. |
Materials2 x 50g skeins of main shade and 1 x 50g contrast in double knitting wool. Two sets of 4 double pointed needles, Nos. 10 and 12. Tension24 sts to 4 inches measured over stocking stitch on No 10 (3¼mm) needles. Size mattersThe pattern as written should fit a foot of 11 inches in length. |