Ducks on Parade
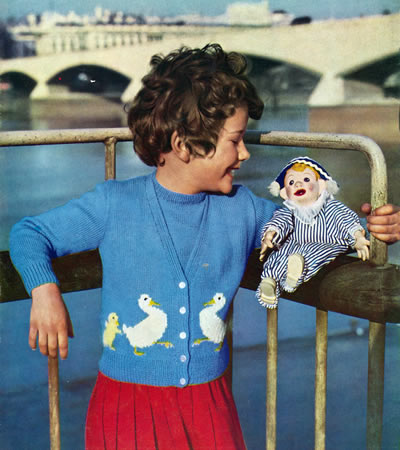
A twin set with a duck motif for Easter. However, the biggest charmer here is in the photo. Not only is the girl cute and looking like she having a lovely day out, but we have a real star in the shape of an original Andy Pandy himself. Even if the cardigan set does not appeal, these are cute little duckling motifs and the charts could be used for cushions or as cross stitch patterns.
Instructions:The individual ducklings are worked intarsia style, but main shade is
stranded loosely across back of work when not in use. ChartsThe charts are included with the pattern instructions below, but for a larger version of the charts you can right click on the icon below and choose "save link as" or "save target as" (browser dependent options) to download and save a pdf file.
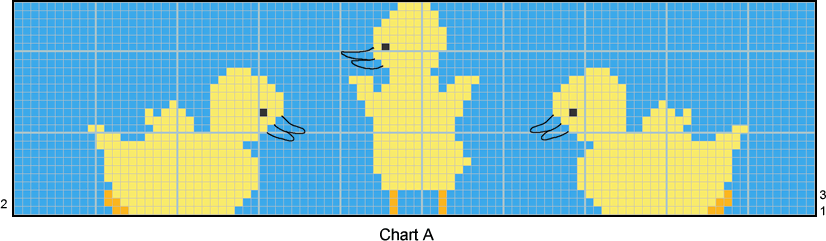
If you want to view chart images full size in the browser then right click on the image and choose "view image". Cardigan BackBegin by winding 4 balls each of Lemon (L) and Gold (G) wool. Change to No 11 needles and stocking stitch and work 30 pattern rows
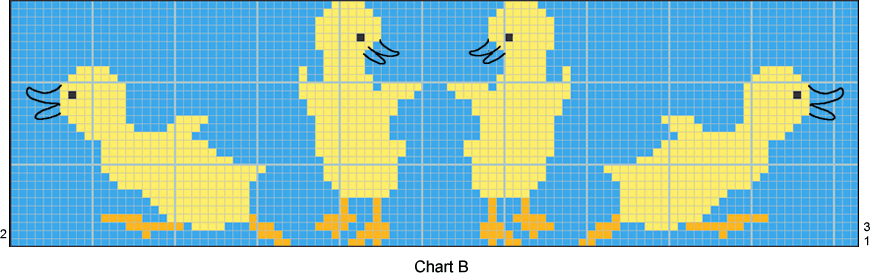
from chart B, reading odd rows knit from right to left and even rows purl
from left to right.
When the 30 rows are completed, continue straight in stocking stitch in main shade (M) only until back measures 9 inches. Then with right side facing, begin to shape armholes by casting off 5 sts at the beginning of the next 2 rows, then k2tog at each end of every knit row until 83 sts remain. Work straight until back measures 14½ inches. With right side facing, shape shoulders by casting off 8 sts at the beginning of the next 6 rows; cast off remaining stitches. Left FrontWith No 12 needles and main shade (M), cast on 50 sts and work 2 inches k1/p1 rib, increasing 1 stitch at the end of the last row. [51 sts] Change to No 11 needles and stocking stitch and work 42 pattern rows
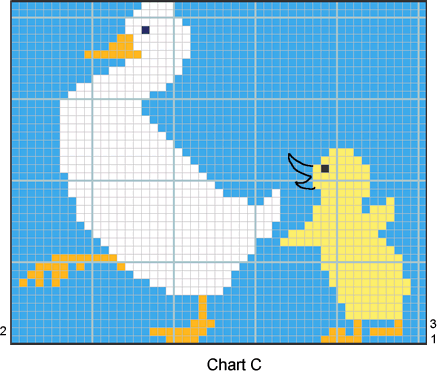
from chart C, reading odd and even rows as on back and joining in a separate
ball of G for each bird.
When the 42 rows are completed, continue straight in stocking stitch in M only until front measures 7 inches. Here shape front edge: Work 3 rows straight. Continue thus, decreasing 1 stitch at front edge on the next and every
following 4th row. Meanwhile, when front matches back at side edge, with
right side facing, shape armhole by casting off 5 sts at the beginning
of the next row, then k2tog at this edge on the following 5 knit rows,
after which you keep the armhole edge straight. Work straight until front matches back. With right side facing, shape shoulder by casting off 8 stitches at the beginning of the next and following 2 alternate rows, armhole edge. Right Front:Work as for left front, reversing all shapings. Sleeves (both alike):With No 12 needles and B. wool, cast on 52 sts and work 2 inches in k1,
p1 rib. With right side facing, shape top by casting off 3 stitches at the beginning of the next 2 rows, then k2tog at the beginning of every row until 46 sts remain, and then at each end of every row until 20 sts remain. Cast off. Front Borders:Join shoulder seams. To make a buttonhole: right side facing, rib 4, cast off 2, rib to end. On the next row casting on 2 over those cast off. Jumper Front:** Change to No 11 needles and work 2 rows in stocking stitch, starting
with a knit row.
When the 26 rows are completed, continue straight in stocking stitch
in M until front measures 9 inches. Then, with right side facing, shape
armholes by casting off 4 sts at the beginning of the next 2 rows,
then k2tog at each end of the next and every following knit row until
80 sts Work straight until front measures 12½ inches. Then, with right side facing, shape neck as follows:- Next row (right side facing): K30, k2tog, turn, and leave remaining stitches on a spare needle. Continue on these 31 sts , decreasing 1 stitch at the neck edge on every
row until 27 sts remain. Then decrease on every alternate row Work a few rows straight until front measures 14 inches. With right side facing, shape shoulder by casting off 8 sts at
the beginning of the next and following 2 alternate rows, (armhole edge). Finish to correspond with first shoulder. Jumper Back Work as for front from ** to ** . [80 sts] Work straight over all stitches until back measures 11½ inches.
Next row (right side facing): K42,
turn, and leave remaining stitches on a spare needle. To make a buttonhole: with right side facing, knit to last 3 sts, wool forward, k2tog, k1. When back measures same as front, with right side facing, shape shoulder by casting off 8 sts at the beginning of the next and following 2 alternate rows, (armhole edge); leave remaining 18 sts on a spare needle. With right side facing, rejoin wool to last 38 sts, cast on 4 sts for underlap. Next row: Knit. Finish to correspond with right shoulder, omitting buttonholes. Jumper SleevesWith No 12 needles and M, cast on 63 sts, and work ¾ inch k1/p1 rib, rows on right side having a k1 at each end. Change to No 11 needles and stocking stitch, shaping sides by increasing 1 stitch at each end of the 3rd and every following 4th row until there are 71 sts. Work a few rows straight until sleeve measures 2¾ inches. With right side facing, shape top by casting off 3 sts at the
beginning of the next 2 rows, then k2tog at the beginning of every row
until 47 sts remain, and then decrease at each end of every row until
19 sts Cast off. Jumper NeckbandJoin shoulder seams. With right side facing, using No 12 needles and M, pick up and knit 87 sts all round neck, including those on spare needles at back and front. Work inch k1/p1 rib, making 4th buttonhole after inch has been done and remembering to keep 4 sts at each end in garter stitch as before. Cast off in rib. Making UpPress parts carefully on wrong side under a damp cloth. Cardigan: embroider eyes and beaks of ducklings as for jumper. |
Materials 3 ply yarn: A pair each No 11 (3mm) and No 12 (2¾mm) needles. Four small buttons for jersey and 5 larger ones for cardigan. Tension32 sts and 40 rows to 4 inches on No 11 (3mm) needles in stocking stitch. Size mattersChest all round at underarm: on jumper, 25 ins; on cardigan, 26 ins;
A word on the woolOriginal called for Patons Beehive Fingering 3-ply. You can find some
nice 3 plies available to meet the tension specified. Disclaimer
|