Mittens for the Forces
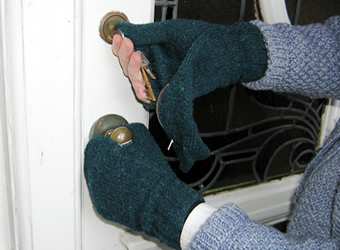
These are double layered mittens which have suddenly become popular again (probably more the height of fashion a year or so ago - as well as half a century ago). This pattern is from February 1940. Here the thumb is left free; in some designs of this era, the thumb and forefinger are left free - your "trigger finger " I assume.
"The glove mitts are a sensible idea, ensuring both warmth and freedom of movement. Instructions are given for both men's and women's sizes".
The different sizes are achieved by using different wool weights and needles.
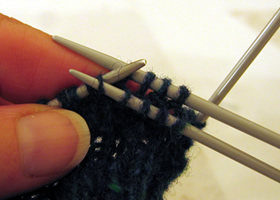
Instructions (both hands alike)Using No. 14 (2mm) needles cast on 48 stitches, and work in k2, p2 rib in rounds for 2½ inches. Next row: Knit twice into every stitch. Now slip every alternate stitch (ie every "made" stitch) on to No 12(11) needles and leave the original 48 sts on the No14 needles on the outside of the work.
[Editor's note: The
original instructions expect you to continue to knit on the larger needles,
leaving the outer sts on the No 14 needles. I found this very awkward;
I thought it would improve as I got further up the glove but it did not. Continue on the No 12(11) needles, on the "made" sts, in rounds of plain knitting, and work 2 rows straight. 3rd round: Knit twice into first
st, knit to the last st, knit twice into it. 6th round: Knit twice into first
st, knit to the last 2sts, knit twice into next st, k1. 9th round: Knit twice into first
st, knit to the last 3sts, knit twice into next st, k2. Continue in this way, increasing on every 3rd row at either side of the
thuumb, until there are 66 sts on the needles. Divide for thumb Continue on these 20 sts for 22 rounds. Rejoin wool to continue with the main part of the mitten: Work 18 rounds straight on these 54 sts. Divide for fingers Work 3 rounds straight on these 20 sts, then work 4 rounds k1, p1 rib. Cast off loosely in rib. Next round (middle finger): Remove the waste wool and pick up 4 sts at the base forefinger. Knit first 6 sts from holder; cast on 4 sts in waste wool and knit them onto the working needle; slip the last 6 sts on holder onto a needle and knit them. [20sts] Complete as for forefinger. Next round (third finger): Work and complete as for middle finger. Next round (little finger): Remove the waste wool and pick up 4 sts at the base third finger, and knit the remaining 14 sts from holder. [18sts] Work as before over these 18 sts. Over-mitten Next row (right side facing): K2tog;
k21; k2tog; k21; k2tog. Continue in stocking stitch, decreasing as for 7th row on every 6th row
until 37 sts remain. Making up 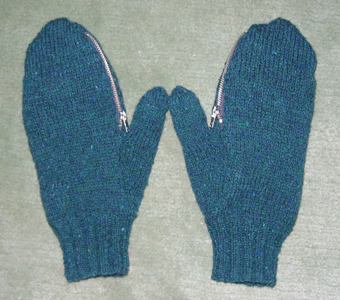
|
MaterialsExample shown is knitted in 3 x 25g balls Rowan 4ply Tweed. Set of 4 each of numbers 14, 12 and 11 (UK size) needles for the smaller
size, and 14, 11 and 10 for the larger size. Two 4-inch zip fasteners. TensionApprox. 8st to 1 inch Rowan 4ply tweed tension: 28st and 40rows to 4 inches (10cm) using No
11 (3mm) needles. Size mattersTo fit size 6¼-7, or 7½-8½ inch hand. A word on the wool.Original calls for 2oz 3 ply for girl's size [sic] and 3oz 4ply for man's
size. Disclaimer
|
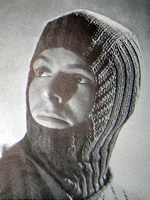
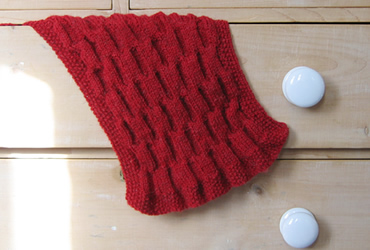
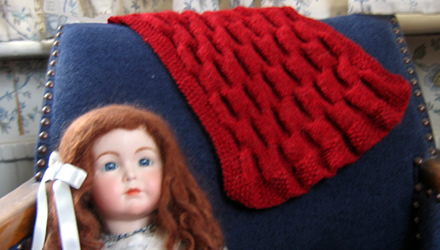
This 'good old Balaclava helmet' was included in the item "More Knitteds for the Forces".
I know - they are nice and warm - and they can be useful on the slopes - but I'm given to understand that beanies are more the thing currently, so I have spared you the details!
Let me know if, (your imagination no doubt fired by the hunk on the left), you want to knit it.
I'm afraid I also have to report that George says these are the silliest mittens he has ever had. Good thing he was not called upon to be in the Home Guard 50 or more years ago, eh?.