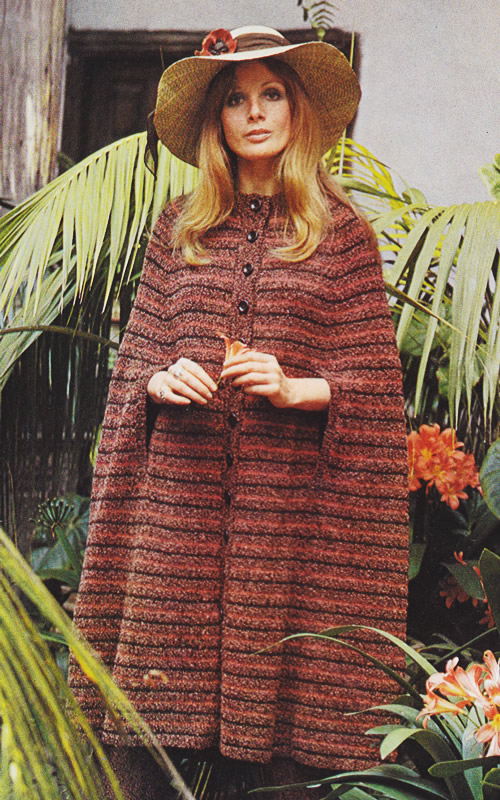
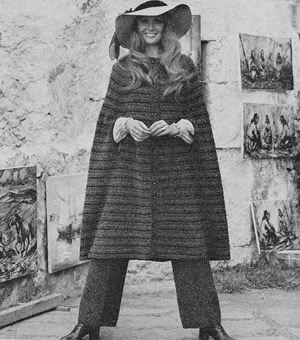
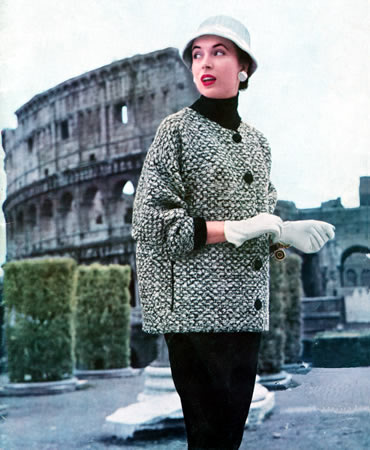
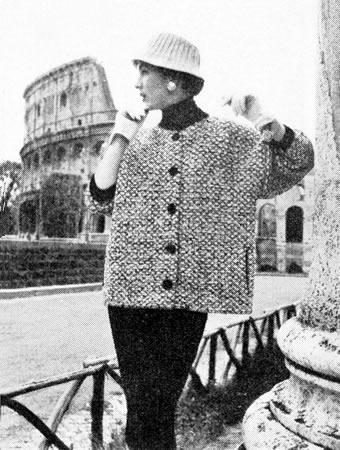
Cardigan Instructions.
Instructions for larger sizes given in brackets. Where one set of figures
is given this applies to all sizes.
The back and fronts are worked in one piece up to the armhole shaping.
If you want to separate the backs and fronts up to mid thigh, you can
do this and knit the first section of the pattern on each piece up to
the start of the side shaping. If you do this, you might keep 2 or 3 edge
stitches at the sides in garter or moss stitch until they are joined.
Join the pieces on the first "shape sides" row.
Note that you need to ensure the yarn you are using has a suitable drape for this style ie the knitted fabric is not too firm, and you will have to work out how to place the pattern stitches to keep continuity, when you join them.
Pocket linings
With No 8 needles, cast on 34 stitches and work 5½ inches in stocking
stitch, ending with a knit row.
Next row: p2, m1p, (p6, m1p) 5 times,
p2. [40 sts]
Leave stitches on a spare needle and make second pocket lining the same.
Back and Fronts
With No 10 needles, cast on 290 (308
: 326 : 344) stitches and work 7 rows
k1/p1 rib.
Change to No 8 needles.
Next row: k1, *
p1, k2, p1, k 10, p1, k2, p1; repeat from *
to last stitch, k1.
Work in pattern as follows:
1st row (right side facing): pl, *
(Tw2L, pl) twice, p6, (p1,Tw2R) twice; repeat from *
to last stitch, p1.
2nd row: k1, *
k1, p1, k2, p1, k8, pl, k2, p1, k1 ; repeat from *
to last stitch, k1.
3rd row: p1, *
p1, (Tw2L, pl) twice, p4, (p1, Tw2R) twice; p1; repeat from *
to last stitch, p1.
4th row: k1, *
(k2, p1) twice, k6, (p1, k2) twice; repeat from *
to last last stitch, kl.
5th row: p1, *
p2, (Tw2L, p1) twice, p2, (p1,Tw2R) twice, p2; repeat from *
to last stitch, p1.
6th row: k1,*
k1, (k2, p1) twice, k4, (p1, k2) twice, k1 : repeat from *
to last last stitch, k1.
7th row: pl, *
p3, (Tw2L, p1) twice, (p. l, Tw2R) twice, p3; repeat from *
to last stitch, p.l.
8th row: k1, *
k2, (k2, p1) twice, k2, (p1, k2) twice, k2; repeat from *
to last stitch, k1.
9th row: p1,*
p3, (p1, Tw2L) twice, (Tw2R., p1) twice, p3; repeat from *
to last stitch, p1.
10th row: k1,
* k3, (k2, p1) twice, (p1, k2) twice, k3; repeat from *
to last stitch, k1.
11th row:p1, *
p. 3, (p2, k1) twice, (k1, p2) twice, p3; repeat from *
to last last stitch, p1.
12th row: as 10th.
13th row: p1,
* p3, (p1, Tw2R) twice, (Tw2L, p1) twice, p3; repeat from *
to last stitch, p1.
14th row: as 8th.
15th row: p1, *
p2, (p1, Tw2R) twice, p2, (Tw2L, p1) twice, p2; repeat from *
to last stitch, p1.
16th row: as 6th.
17th row: p1,*
p1, (p1, Tw2R) twice, p4, (Tw2L, p1) twice, p1; repeat from *
to last stitch, p1.
18th row: as 4th.
19th row: p1,*
(p1, Tw2R) twice, p6, (Tw2L, p1) twice; repeat from last stitch, p1.
20th row: as 2nd.
21st row: p1, *
(Tw2R, p1) twice, p6, (p1, Tw2L) twice; repeat from *
to last stitch, p1.
22nd row: k1, *
p1, k2, p1, k10, p1, k2, p1; repeat from *
to last last stitch, k1.
23rd row: p1, *
k1, p2, k1, p10, k1, p2, k1,repeat from *
to last stitch, p1.
24th row: as 22nd.
Repeat the last 24 rows twice more, then rows 1 to 22 inclusive again.
[Editor's note:
If you have knitted fronts and back separate to this point, join them
here - on the last or the following row.]
Shape sides as follows:
Next row: p1, *
k1, p2, k1, p2 tog, p6, p2tog, k1,p. 2, k1 ; repeat from *
to last last stitch, p1. [258 (274
: 290 : 306) sts]
Next row: k1, *
p1, k2, p1, k8, p1, k2, p1 ; repeat from *
to last stitch, k1.
Continue in pattern as follows:
1st row: p1, *
(Tw2L, p1) twice, p4, (p1,Tw2R) twice; repeat from *
to last last stitch, p1.
2nd row: k1,
* k1, p1, k2, p1, k6, p1, k2, p1, k 1: repeat from *
to last stitch, k1.
3rd row: p1, *
p1, (Tw2L, p1) twice, p2, (p1,Tw2R) twice, p1; repeat from *
to last stitch, p1.
4th row: k1,*
(k2, p1) twice, k4, (p1, k2) twice; repeat from *
to last last stitch, k1.
5th row: p1,*
p2, (Tw2L, p1) twice, (p1,Tw2R) twice, p2; repeat from *
to last last stitch, p1.
6th row: k1,*
k1, (k2, p1) twice, k2, (p1, k2) twice, k1 ; repeat from *
to last last stitch, k1.
7th row: p1,
* p2, (p1, Tw2L) twice, (Tw2R, pl) twice, p2; repeat from *
to last stitch, p1.
8th row: k1, *
k2, (k2, p1) twice, (p1, k2) twice, k2; repeat from *
to last last stitch, k1.
9th row: p1,*
p2, (p2, k1) twice, (k1, p2) twice, p2; repeat from *
to last stitch, pl.
10th row: as 8th.
11th row: p1, *
p2, (p1, Tw2R) twice, (Tw2L, p1) twice, p2; repeat from *
to last stitch, p1.
12th row: as 6th.
13th row: p1, *
p1, (p1,Tw2R) twice, p2, (Tw2L, p1) twice, p1; repeat from *
to last stitch, p1.
14th row: as 4th.
15th row: p1, *
(p1, Tw2R) twice, p4, (Tw2L, p1) twice; repeat from *
to last last stitch, p1.
16th row: as 2nd.
17th row: p1,
* (Tw2R, p1 ) twice, p4, (p1 Tw2L) twice; repeat
from * to last stitch, p1.
18th row: k1, *
p1, k2, p1, k8, p1, k2, p1; repeat from *
to last stitch, k1.
19th row: p1, *
k1, p2, k1, p8, k1, p2, k1; repeat from *
to last stitch, p1.
20th row: as 18th.
Repeat the last 20 rows once more, then rows 1 to 12 inclusive again.
Place pocket linings as follows:
Next row: pattern 17, *
slip next 40 stitches on a stitch-holder, and in place of these, pattern
across 40 stitches of one pocket lining *,
pattern to last 57 stitches, repeat from *
to *, pattern last 17 stitches.
Work a further 7 rows straight in pattern, then work rows 1 to 18 inclusive
again.
Next row: p1, *
k1, p2, k1, p2tog, p4, p2tog, k1, p2, k1; repeat from *
to last stitch, p1. [226 (240 : 254
: 268) sts]
Next row: k1, *
p1, k2, p1, k6, p1, k2, p1, repeat from *
to last stitch, k1.
**
Continue in pattern as follows:
1st row: p1, *
(Tw2L, p1) twice, p2, (p1, Tw2R) twice; repeat from *
to last stitch, p1.
2nd row: k1, *
k1, p1, k2, p1, k4, p1, k2, p1, k1 ; repeat from *
to last stitch, k1.
3rd row: p1, *
p1, (Tw2L, p1) twice, (p1,Tw2R) twice, p1; repeat from *
to last last stitch, p1.
4th row: k1,*
(k2, p1) twice, k2, (p1, k2) twice; repeat from *
to last stitch, k1.
5th row: p1,
* p1, (p1,Tw2L) twice, (Tw2R, p1) twice, p1; repeat from *
to last last stitch, p1.
6th row: k1, *
k1, (k2, p1) twice, (p1, k2) twice, k1; repeat from *
to last stitch, k1.
7th row: p1, *
p1, (p2, k1) twice, (k1, p2) twice, p1; repeat from *
to last last stitch, pl.
8th row: as 6th.
9th row: pl, *
p1, (p1,Tw2R) twice, (Tw2L, p1) twice, p1 ; repeat from *
to last stitch, p1.
10th row: as 4th.
11th row: p1, *
(p1, Tw2R) twice, p2, (Tw2L, p1) twice; repeat from *
to last stitch, p1.
12th row: as 2nd.
13th row: p1, *
(Tw2R, p1) twice, p2, (p1, Tw2L) twice; repeat from *
to last stitch, p1.
14th row: k1, *
p1, k2, p1, k6, p1, k2, p1; repeat from *
to last stitch, k1.
15th row: p1,*
k1, p2, k1, p6, k1, p2, k1; repeat from *
to last stitch, p1.
16th row: as 14th.
**
Repeat the last 16 rows once more, then rows 1 to 14 inclusive again.
Next row: as 15th.
Next row: as 14th.
The last 2 rows form bodice pattern.
Repeat them until work measures 35 inches at centre, ending with right
side facing.
Shape neck and at the same time divide for fronts
as follows:
Next row: cast off 7, pattern 49
(52 : 56
: 59), turn and leave remaining stitches on a spare needle.
Continue on these stitches for RIGHT FRONT, shaping armhole
and neck as follows:
Next row: cast off 8, pattern to end.
Now decrease 1 stitch at each end of every row until 29 (32
: 32 : 35) stitches remain, then at
each end of next and every alternate row until, 19 (22
: 22 : 25) stitches remain.
Now keep neck edge straight and continue decreasing at armhole edge on
following 1 (3 : 2
: 4) alternate rows. [18 (19
: 20 : 21) sts]
Work straight until front measures 43 (43½
: 43½ : 44) inches at centre,
ending with wrong side facing.
Shape shoulder by casting off 6 (7
: 6 : 7) stitches at the beginning
of the next row, then 6 (6 : 7
: 7) stitches at the beginning of the following 2 alternate rows.
With right side facing, rejoin yarn to remaining stitches; cast off 8,
pattern 106 (114 : 120
: 128), turn, and leave remaining stitches on a
spare needle.
Continue on these stitches for BACK, shaping armholes by
casting off 8 stitches at the beginning of the next row, then decrease
1 stitch at each end of every row, until 86 (94
: 96 : 104) stitches remain.
Now decrease 1 stitch at each end of the next and every alternate row,
until 74 (78 : 82
: 86) stitches remain.
Work straight until back matches front at armhole edge, ending with right
side facing.
Shape shoulders by casting off 6 (7
: 6 : 7) stitches at the beginning
of the next 2 rows, then 6 (6 : 7
: 7) stitches at the beginning of the next 4 rows.
Leave remaining 38 (40 : 42
: 44) stitches on a spare needle.
With right side facing, rejoin yarn to remaining stitches for LEFT
FRONT, cast off 8, pattern to end.
Next row: cast off 7, pattern to
end.
Finish to correspond with right front, reversing shapings.
Front Borders:
Left: With No 10 needles, cast on 11 stitches.
1st row (right side facing): k2, (p1,
k 1) 4 times, k1.
2nd row: k1, (p1, k 1) 5 times.
Repeat the last 2 rows until strip fits up left front to start of neck
shaping when slightly stretched, ending with 2nd row.
Leave stitches on a safety-pin at top and sew border neatly in position.
Right: Work to correspond with left border with the addition of
12 buttonholes. 1st to come 7½ inches above lower edge, and 12th
to come 2¼ inches below start of neck shaping, with the remainder
spaced evenly between. First mark position of buttons on left front with
pins to ensure even spacing, then work holes to correspond.
To make a buttonhole: rib 4, cast off 3, rib to end; on the next
row, cast on 3 stitches over those cast off.
To Make Up
Using a warm iron and damp cloth, press parts very lightly on wrong side,
omitting ribbing and taking care not to over-press and spoil the pattern.
Armhole Borders: With right side facing and No 10 needles, pick
up and knit 116 (128 : 128
: 140) stitches round each armhole and work 7 rows k1/p1 rib.
Cast off evenly in rib.
Join shoulder seams.
Neck Border: With right side facing and No10 needles, work as
follows:
Rib 11 border stitches , pick up and knit 52 (56
: 56 : 60) stitches up right side
of neck, knit 38 (40 : 42
: 44) from back decreasing 1 stitch in centre, pick up and knit
52 (56 : 56
: 60) down left side, rib 11 from left border. [163 (173
: 175 : 185) sts]
Work 1 row k1/p1 rib as for border. Make 13th buttonhole in next 2 rows
as before, then work a further 4 rows in rib.
Cast off evenly in rib.
Pocket Tops:
With right side facing and No 10 needles, knit across each set of 40
pocket stitches, decreasing 1 stitch in centre. [39 sts]
Work 6 rows k1/p1 rib as for border.
Cast off in rib.
Catch down sides of pocket tops neatly to main work, then sew linings
lightly in position on wrong side.
Press seams. Sew on buttons.
|
Materials
16 (17 : 19
: 20) 1oz balls in Tweed Grey double knitting yarn.
A pair each of Nos
8 (4mm) and 10 (3¼mm) needles.
13 buttons.
Tension
The pattern is based on a tension of 22sts and 30 rows to 4 inches over
stocking stitch on No 8 (4mm) needles.
Size matters
The pattern is given in four sizes to fit chest: 32 (34
: 36 : 38) inches.
Length from top of shoulders 43 (43½
: 43½ : 44) inches.
Abbreviations
m1p: pick up horizontal loop lying before next stitch and purl
into back of it.
Tw2L: purl into back of 2nd stitch on left needle, then knit into
front of 1st stitch and slip both stitches off needle together.
Tw2R: knit into front of 2nd stitch on left needle, then purl
into front of 1st stitch and slip both stitches off needle together.
k2tog or p2tog: knit or purl 2 sts together (decrease one stitch).
stocking stitch: one row knit and one row purl, ("stockinette").
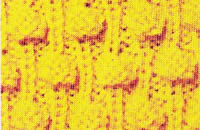
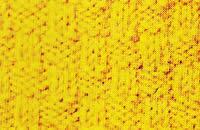
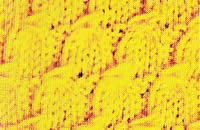
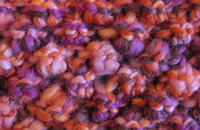
A word on the wool
The original yarn was Patons Fiona, which appeared in both 1oz and later
50g balls.It was a "Shetland" DK equivalent with a soft slight
fluffy texture. It is about 50-50 wool and acrylic making it softer than
pure Shetland, and also making for a good yardage - about 104 yards per
50g.
Note that this pattern calls for 1oz balls (1oz is about 28g).
Disclaimer
(well...almost)
In transposing any pattern it is always a risk that errors will be introduced,
in spite of dedicated proof reading.
If you have any problems with this pattern, please
and I will try and assist.
|