Simple Carry-All Tote

A minimalist 1960s design "carry-all" bag. The sides are meant to be rigid and incorporate cardboard (or plastic) supports. Yet another perfect project bag.
InstructionsCast on 54 stitches. Work in bands of garter stitch (every row knit)
and stocking stitch (knit one row, purl one row) as follows: 1st band:
3 inches in garter stitch (20 rows) Place markers at each end of the last row. [Editor's note: You
are about to knit the base of the bag.] Now work back of bag to match front, ie as 5th to 1st band in this order. Cast off loosely. Side panels(Make two the same) cast on 22sts, and work in bands of garter stitch and stocking stitch as for front. Cast off. Handles(Make two the same) cast on 8sts and work 13 inches in garter stitch. Making upPress pieces lightly on the wrong side. 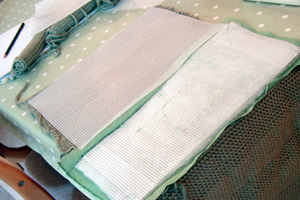 Join lining and place inside the bag with seams inside. Back the handles with petersham ribbon, then sew to top of bag 2½ inches from side seams. Turn in raw edges at top of lining and slip-stitch hem neatly in position. A Word on the Wool.I substituted 100g balls (each 75m/81yards) Debbie Bliss Cashmerino super chunky in Leaf green (colour 16022), knitted on number 5½mm needles, and this took double the stated requirement of the original yarn. I think you would require at least 5 balls of this wool to make the bag as written. I favoured a plain colour but the simplicity of the pattern would probably suit wilder colours. Debbie Bliss Cashmerino is a rather high quality smooth wool (it was on sale). As the size of a bag is not critical, substitute any superchunky with good results (checking your tension). It is suggested to support the sides with cardboard, but it may also be a good idea to use a smaller needle size than normally recommended for the yarn, so that the knitted fabric is firm - note that I did not do this. Adapting the Bag.As I used sale wool, I had only 4 x 100g balls, and in consequence I adapted the bag significantly to make it work. I made fabric handles and a fabric base (6 inches in length and matching the width of the bag). The handles are robust webbing covered in fabric. I sewed the handles
firmly to the plastic canvas side supports - so the handles and the plastic
canvas lining will take all the weight of the bag contents.  I made the base using plastic canvas (7 count) cut to size, and covered with some wadding plus the fabric, and then quilted through all layers, using the canvas as my guide. 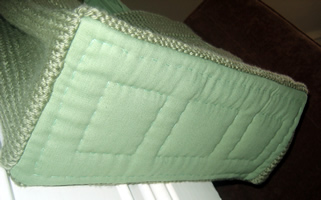 I machine sewed the sides of the bag to the base before hand sewing the knitted pieces up the sides using mattress stitch from the outside of the bag. Finally, in case you are tempted to try this as a felted bag - be warned:
felting garter stitch produces different results from stocking stitch
and your bag may end up a funny shape - or funnier than you intended.... |
MaterialsOriginal pattern calls for 6 x 50g balls of Patons Camelot which was
a bouclé yarn (in colour Corncob). See "a
word on the wool". One pair of number 7 (4½mm) needles. Fabric for lining. Cardboard or plastic canvas to support the sides. TensionOriginal tension 15sts x 21rows to 4 inches (10cm) on No 7 (4½mm) over stocking stitch. [My tension using Debbie Bliss yarn and number 5 (5½mm) needles is 14sts x 20rows to 4 inches over stocking stitch.] Size mattersOriginal bag is approximately 14in by 11in and 6in deep at the sides.
Disclaimer
|
